Wednesday, March 31, 2021

Shell of My Life

Today I'd like to share one of the new digital designs from Polka Dot Orchard.   I made this slimline card using Shell of  My Life, by artist Jeanie Hays.


For this one, I enlarged the image to fit my slimline card base, which is 8 1/2" x 3 1/2".  After printing them on Neenah 110# cardstock, I used Copic markers for coloring (referenced below)  and then fussy cut the pair out.

Next, I used a slimline sunrise die with yellow and blue cardstock and then secured it to the base. I matched up the turtles 'noses' to the center and secured them.  I added the sentiment strip to the left corner. Then to complete the card, I  added the tiny heart on the sentiment corner and the red heart in the center.

Thank you for stopping by today to view my blog.  I enjoy sharing my work with you and invite you to “Follow” my blog and to visit my site ~ “Not Just Scraps” on Facebook ~ where you can purchase my cards.


I’ll be entering this card in the following challenges: 

Sunday Stamps ~ Challenge #253 ~ Spring/Summer 

Die Cut Divas ~ March ~ Sunny Slimline 

The Dream Factory ~ Challenge #90 ~ Zoomania 


 Pam's Pearls

Copics Used:  Girl Turtle: YG00, YG01, YG05, YG11, YG13,  Boy Turtle: YG05, YG11, YG91, YG93, YG95,  Heart: R37

Products Used:


Tuesday, March 30, 2021

Feeling a Little Ruffled?

Today I'm sharing a card I recently made for one of the weekend challenges.  I used the 'Chicken Littleimage from QKR Stampede.  

I love the sentiment since it opens the card up for multiple uses. Would you believe I sent it as a sympathy card?  We all have those days where we feel 'rained on' and just can't catch a break.  This was perfect for the encouragement she needed.


After coloring with my Copic markers, I used the Gina Marie Drop Pendant die for the image.  I used a slimline cloud die for the next layer since the card base was 4 1/2" x 6". The actual card base is covered in a reddish brown cardstock, which matched the chicken's comb.  I tied the blue twine at the center fold, and then completed the card by adding the enameled dots.

Thank you for stopping by today to view my blog.  I enjoy sharing my work with you and invite you to “Follow” my blog and to visit my site ~ “Not Just Scraps” on Facebook ~ where you can purchase my cards.


I’ll be entering this card in the following challenges: 

CD Sunday ~ Challenge #57 

Lil Patch of Crafty Friends ~ Challenge #154 

Crafter's Challenge ~ Challenge #39 

Inkspirational Challenge #235 ~ Fur or Feathers 

Penny Black Saturday Challenge ~ March 

QKR Stampede ~ Challenge #416


Pam's Pearls 


Products Used:

QKR Stampede, Chicken Little


Monday, March 29, 2021

Why Fit In When You Were Born to STAND OUT!

Recently I needed to make a card for the 'Big Brother' after the arrival of a new baby.  I think making cards for kids that are not quite a teenager and yet over the 'baby' things can be just as tough as those masculine cards we all dread to make some days. 

However I truly feel that it is just as important to send cards to kids who have new siblings - especially when they were the only child before. We can not tell our children (and grandchildren) enough about how amazing they are and how proud we are of them.

When I ran across this Dr. Seuss quote, I finally knew the path I wanted this card to take.  Our nephew has already been through more in his lifetime than many do their entire life. He is one amazing young man and will be an outstanding big brother. 

Here's my finished card that went to him along with a few details on how it's made.  


 For this card I used Whimsy Stamps' Space Dragon and Moon Background stamps, both by artist Dustin Pike. 

After stamping on Neenah 110# card stock, I used my Copic markers for coloring.  I used Echo Park Summertime Seashells and yellow Quick Quotes Chalking Ink for the stencil stars.   

The sentiment from Dr. Seuss was self typed and cut with a fishtail die, then backed with a 1/8" mat of bright yellow-green. I used a 5 1/2" square white card base and covered the front with a deep purple.   The completed image was secured in the middle of the card and then the sentiments were added to complete the card. 

Thank you for stopping by today to view my blog.  I enjoy sharing my work with you and invite you to “Follow” my blog and to visit my site ~ “Not Just Scraps” on Facebook ~ where you can purchase my cards.


I’ll be entering this card in the following challenges: 

Gem of a Challenge ~ Week #7

 Castle Crafters ~ March ~ Challenge #39 

My Time to Craft ~ Challenge #453 ~ Stencil It 

A Bit More Time to Craft ~ Challenge #136 

The Dream Factory ~ Challenge #90 ~ Zootopia 

Happy Stampers ~ March ~ Stencils 

Academy of ScrapArt ~ March ~ Challenge #174 

Alphabet Challenge ~ Z -Zoology

Festive Friday~FF0080 (Bright colors, patterned paper, square card)


Pam's Pearls


Copics Used:  Planet: B63, B66, B69, V00, V04, V93, V95, Rocket:  C3, C4, C5, W4, BG72, BG74, Y15, YR15, R14, R35, V01, Dragon: YG07, B63, B66, W4, BV04, BG10


Products Used:


Whimsy Stamps, Moon Background


Friday, March 26, 2021

Sending Good Mojo Your Way!

Happy Friday from Polkadoodles Challenge Week 13

For this week's challenge we are focusing on New Beginnings using a Shaped card.  I have put together a Latte Cup with a top fold and am showcasing Polkadoodles New Job, from the Winnie Celebrations 2 Collection

Isn't she dressed for success!


Here's the deeper details if you want to make you're own Latte Cup New Job Card...

Start by covering the latte cup with the solid gray card stock on the bottom and  then secure the yellow corrugated sleeve in the center,  and the pearlized white on the cup lid.  The lid is covered with Diamond Ice Stickles to add a little sparkle to the card.  I used the papers from Polkadoodles Tatty Twinkle Free Easter Paper for the note paper and the sentiment matting and secured both to the yellow sleeve.  The sentiment is available in the Winnie Sunshine Delight Sentiment Bundle.  Securely glue these elements to the base, then add the paperclip for a little more character.  

The Polkadoodles New Job girl is such a cute digital and fun to color.  I sized her to fit just under the lip of the cup, printed her on Neenah 110# card stock and colored her with my Copic markers (referenced below).  I made a wider than normal (Copic B11) border around her to add good contrast.  When added to the card base,  glue her securely at the bottom of the card base, and add multiple foam squares around her arms and head to raise them up 1/4" to give the card a bit more dimension.

For the final touch, you can add 'Congratulations' or a different sentiment depending on your occasion,  across the left corner.

Thank you for stopping by today to view my blog.  I enjoy sharing my work with you and invite you to “Follow” my blog and to visit my site ~ “Not Just Scraps” on Facebook ~ where you can purchase my cards.  Be sure to check out all the Design Team project cards and enter your also!


I’ll be entering this card in the following challenges: 

Watercooler Challenge #312 

Paper Minutes ~ Challenge #684 ~ Food or Drinks 

Unicorn Challenge #63 ~ Make It Feminine 

Through The Craftroom Door ~ Anything Goes 3/23 

2021 Spring/Summer Coffee Lovers Blog Hop 

Cardz4Galz ~ Challenge 143 ~ Tea or Coffee


 Pam's Pearls


 Copics Used: Hair: E21, E23, E25, Bow & Jacket: Y15, Y19, Blouse: BG11, BG13, Jeans: N4 N6, N7, N8, Shoes, N2, N7, Lunchbox: BG72, BG75, Purse: E23, E33


Products Used:

Polkadoodles, New Job


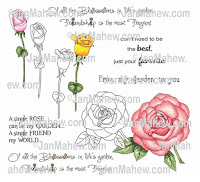
Of All the Blossoms In Life's Garden

Today I'm here with my Design Team ladies on the Colour Crazy Challenge Blog.  We're kicking off a new month with our New sponsor Jan's Digital Stamp Shop .  

For my project card I've selected her Roses image which is filled with 3 color and 3 black and white images, and 4 sentiments.  Here's my completed card, using the single open rose made into a birthday slimline card.


I printed the single rose about 3" square onto Neenah 110# card stock and colored it using my Copic markers.  

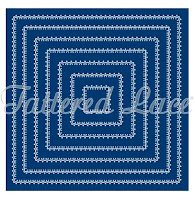
I selected a 3/4 dome x-stitched die for the completed image and set it aside.  I used a Sunshine outline slimline die  for the card base with a plaid paper that complimented the orange and peach colors used in the rose. Once the frame was cut in olive green and the plaid pieces glued into place, then I secured the rose on top.  The orange organza ribbon is knotted to the left side and a wooden Happy Birthday fishtail sentiment is secured in the knot and also held in place with a glue dot.

To complete the card, I used the sentiment out of the package on the inside of the card.


Thank you for stopping by today to view my blog.  I enjoy sharing my work with you and invite you to “Follow” my blog and to visit my site ~ “Not Just Scraps” on Facebook ~ where you can purchase my cards.


I’ll be entering this card in the following challenges:

 Seize the Birthday ~ Challenge 210 

Crafty Creations ~ Challenge 419 ~ Anything Goes 

Creative Moments ~ Challenge 211 ~ Anything Goes 

Fab N Funky ~ Challenge 516 ~ Flowers 

Sisterhood of Crafters ~ Easter/Spring 

Digi Choosday ~ Week 12  

AAA Birthday ~ Patterned Paper

Pam's Pearls

Copics Used:

Leaves & Stems: YG61, YG91, YG93, YG95, Rose: YR21, YR12, YR14, YR15, YR16, YR18

Products Used:


Thursday, March 25, 2021

All Bundled Up

Today I'm sharing another card for Building My Christmas Stash with the current challenge of Snowflakes.  Snowflakes are a rare sight here in South Carolina but we can dream of the delicate white beauties and we do enjoy the photos from our northern friends. 

For my challenge card, I selected All Bundled Up by Jennifer Stay at Coloring Bliss


 I printed the image to fit an A2 size card front and used Copic markers for coloring.  It's always interesting to see what artist use for snow colors.  I usually go to B60.  Honestly, it was bone dry!  Rather than getting up to refill, I switched to V20 this time and although a lot more gray in the swirls, it still turned out quite well.  

The pretty die cut edging is from Penny Black's Elegant Stitching.  The base is covered in a pink patterned paper, then the colored image is secured next.  I tied a 1/4" metallic edged light pink ribbon in a knot on the folded edge and added the snowflake charm as if the girl in the image is looking at that snowflake.  

Once everything was secured, then I added the Diamond Ice Stickles then the snowflake designs and the swirls and set it aside to dry.

Thank you for stopping by today to view my blog.  I enjoy sharing my work with you and invite you to “Follow” my blog and to visit my site ~ “Not Just Scraps” on Facebook ~ where you can purchase my cards.


I’ll be entering this card in the following challenges: 

Crafty Sentiments ~ Challenge 23 ~ Anything Goes 

The Holly and The Ivy ~ Challenge 90 ~ Anything Goes 

Make Mine Monday ~ Challenge 144 ~ Clean & Simple 

Simon Says ~ Monday Challenge ~ Whatever the Weather 

Merry Little Christmas Challenge ~ March 


Pam's Pearls 


Copics Used: Hat & Coat: B21, B24, B23, V05, V06, Boots: E35, E37, E39, Hair & Dog: E23, E25, Lamp C4, C6, Y11, Snowflakes, V20

Products Used:


Wednesday, March 24, 2021

To My Favorite Chick

 With this past weekend being National Poultry Day, 

what better time to make a CHICKEN card!  


I've selected Angie Blom's Ruffle My Feathers for this challenge.


I decided my card needed to have several layers and definitely some chicken wire.  I started by sizing the rooster to approximately 4" tall x 3" wide, printing the image on Neenah 110# card stock and then coloring with my Copic markers.  The edge of the image is die cut using Sizzix Stitched Framelits and set aside.  

The 5" card base is covered with a base layer of black dotted swiss cardstock.

 For the next layer, I used the Taylored Expression Chicken Wire embossing folder and a piece of silver cardstock to make the chicken wire strip (2" x 5") and glued it down the left side of the card. 

I cut the red dotted swiss mat (for the next layer up) approximately 1/4" larger than the colored image and secured the colored image to this mat, then to the right bottom corner of the card base.  

I added a 1/4" red ribbon near the fold of the card and knotted it about an inch from the top.  I added the open heart charm and securely knotted the ribbon to hold the charm in place. 

Lastly I added the digitally printed, fishtail cut sentiment at an angle above the chicken's head.

Thank you for stopping by today to view my blog.  I enjoy sharing my work with you and invite you to “Follow” my blog and to visit my site ~ “Not Just Scraps” on Facebook ~ where you can purchase my cards.


I’ll be entering this card in the following challenges: 

Crafty Animals ~ Challenge #48 

Crafting Happiness ~ Challenge #89 ~ Outdoors 

Make Mine Monday ~ Challenge 144 ~ CAS 

CD Sunday ~ Challenge #56 ~ Anything Goes 

The Paper Players ~ PP533 ~ CAS  


 Pam's Pearls

Copics Used: Head: R29, R35, R46, Feet: YR23, YR27, Beak: R35, Body: BV25, BV23, BV31, BV20, V20, V22, C4, C2, C1, N3

Products:


https://www.sizzix.com/662231/sizzix-framelits-die-set-6pk-stitched-squares
Sizzix Stitched Framelits


Tuesday, March 23, 2021

Faith is Being Sure of What We Hope For

As the 2021 Spring/Summer Coffee Lovers Blog Hop continues, I'd like to share my second card entry today.

I made this card using Polka Dot Orchard's coffee cup image from the Everlasting Happiness package and added the sentiment from The Way of Beauty package.


I sized the cup to about 3" square and added the sentiment to the right, sizing it about 1-1/2" wide and about 3" long.  After printing this on Neenah 110# cardstock, I used my Copic markers for coloring and the Gina Marie Designs Labels 3 for the edging.  I also took Copic BG75 and carefully marked the outer edge of the die to give it a little contrast against the matting. 

Next I cut two coordinating colors of dotted swiss paper at the diagonal corners and mounted each piece to a standard A2 card base.  I secured the colored image to the center of the card and added the yellow twine bow.  After deciding it needed just a little something more, I found one of my flourish dies and cut it out using a scrap piece of cream-colored cardstock.  I used Copic E31 to color it the same as the lightest shade of the coffee and clipped three of the swirls off, then carefully glued them on top of the coffee image. This finished the card off perfectly.

Thank you for stopping by today to view my blog.  I enjoy sharing my work with you and invite you to “Follow” my blog and to visit my site ~ “Not Just Scraps” on Facebook ~ where you can purchase my cards.


Monday, March 22, 2021

Let's Celebrate (Finally!)

Today's card has 'lived in a bag' for over a month waiting to be delivered to my crafting BFF.  Between all the life events, our time together has been delayed and rescheduled week after week. Finally, yesterday we got together for a day of crafting and not only just birthday celebration but also our Christmas celebration too.  Pitiful but true!

I think I was as excited to give her this card as I was the long awaited gift giving.  This is Stamping Bella's Edna Loves Ice Cream.


To make her card, I printed the image on Neenah 110#  cardstock and used my Copic markers for coloring.  I used the Tattered Lace Lacy Days die for the edge.  I matched the aqua in the dress with a deep aqua dotted Swiss cardstock for the card front background.  I used the My Favorite Thing, Stitched Scallop Edge Die die for the purple envelope type flap at the top.  After cutting that piece, I stamped 'Let's Celebrate!' and then added it as the topper to the card base. The lavender single twine is then wrapped around the top flap and tied with the camera charm in a knot to complete this design.  This front layered piece is then attached to the white A2 (top fold) card base to complete the card assembly. The final step was to add the Diamond accents to the edges of the ice cream and to her wings so that both glistened  to catch the eye of anyone passing by.

Thank you for stopping by today to view my blog.  I enjoy sharing my work with you and invite you to “Follow” my blog and to visit my site ~ “Not Just Scraps” on Facebook ~ where you can purchase my cards.


I’ll be entering this card in the following challenges: 

Stamping Sensations ~ March ~ Monochromatic  

A Perfect Time to Craft ~ March  

Perfectly CAS ~ Challenge #13 ~ Birthdays 

Sheepski Designs ~ Challenge #48 ~ Girls, Girls, Girls

 Crafty Calendar ~ Challenge #134 ~ Feminine 

Creative Fingers ~ Challenge #204 ~ Anything Goes


Pam's Pearls
Copics Used:
Hair: E21, E23, E25, E19, Wings: B60, B63, Glasses: BG45 (and glossy accents), Dress: BG45, BG49, BG15, BG09, Shoes: BG19, Ice Cream: E30, E33, E99, N0, Straw: BG09, Cherry: R27

Products Used:


 https://stamhttps://stampingbella.com/shop/index.php?route=product/product&product_id=495&search=edna+pingbella.com/shop/index.php?route=product/product&product_id=495&search=edna+


Saturday, March 20, 2021

You're My Love Mug!

It's finally here again! Today is the first day of the 2021 Spring/Summer Coffee Lover's Blog Hop with over 60 sponsors, tons of prizes and even a few free digital images.

The image I'm using today is My Love Mug from Polka Dot Orchard and it just happens to be the FREEBIE of the week on her site.  You can visit the website and get yours this week only, during the Coffee Lover's Blog Hop


 For this card, I sized the mug image to about 3" square and placed the sentiment to the side.  After printing on Neenah 110# cardstock, I began coloring with my Copic markers.  I used BG11, BG13, and BG15 for the mug, then started at the top with RV95 for the heart.  Within the next few seconds, the Copic BLOB Nightmare Happened!


What would you do?  Trash it?  Nope, not me. I kept going and simply cut the image out, and separated the sentiment into a fishtail banner. 

Additionally I used the Simon Says Twisted Stitch Scalloped border for the edging on the top flap  and the My Favorite Things Stitched Scalloped Basic Edger for the bottom edging flap under the mug. I also used a standard Brick embossing folder on white cardstock for the brick background in the middle of the card.   The coffee was colored using Copic E35.

After I mounted and secured the layers and the colored Love Mug, I used the micro gold metallic washi tape and a deep green button to make the sentiment banner appear to be hanging and to complete this card. 

Can't wait to see what your freebie Love Mug is going to look like. Don't forget to post your completed card on Friends of Polka Dot Orchard on Facebook ~ Here

Thank you for stopping by today to view my blog.  I enjoy sharing my work with you and invite you to “Follow” my blog and to visit my site ~ “Not Just Scraps” on Facebook ~ where you can purchase my cards.


I’ll be entering this card in the following challenges:

2021 Spring/Summer Coffee Lover's Blog Hop 

Crafty Gals ~ Challenge #217 ~ Green  

Watercooler ~ Challenge 311 ~ Feminine 


 Pam's Pearls

Products Used: