Monday, July 31, 2023

You're Always There

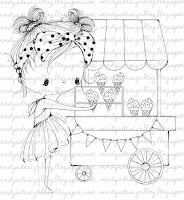
I'm posting this afternoon with the Classic Design Team as we open the August Challenge.  Our sponsor for the month is All Dressed Up and I hope you'll pop over to the Challenge blog to see all the Design Team cards and to enter yours too! 

But first let me share mine with you here.  I've used Summer Icecream from  All Dressed Up to make this BFF - You're Always There card.


To make this card, I sized the image to just under 4" and printed her on Neenah 110# cardstock.  I used my Copic markers for coloring.  

After selecting the coordinating green paper for matting, I used Tattered Lace, Hemstitch Square dies for both the image and the matting.   Next I secured both the the 5 1/2" square card base with the fold to the left side.  I added the two sentiments then finished the card with the magenta ribbon and bow at the fold. 

Thank you for stopping by today to view my blog. I enjoy sharing my work with you and invite you to 'Follow' my blog and to visit my site - "Not Just Scraps' on Facebook - where you can purchase my cards. 

I will be entering this card in the following challenges:  

CD Sunday Plus ~ Challenge 115 

Lil Patch of Crafty Friends ~ Challenge 210 

Alphabet Challenge ~ I is for Ice Cream 

Crazy Catz ~ Challenge 648 


Pam's Pearls


Copics

Hair: E21, E23, E25, E27, Bandana: R35, R37, Dress: BG18, Cart Top & Banner: Y19, B66, RV17, B05 BV04, Cart: E81, E84, Wheels: Gold Metallic 

Products


Merry & Bright Wishes

Where did July go?  Here it is the last day before a new month so I thought I'd share one more Christmas card.  I'll still be 'sprinkling' a few Christmas throughout the rest of the year too. 

This cutie is named Christmas Cardinals from Beccy's Place.


After sizing and printing him, I used Copic markers for coloring.  I had received a new circle die and was very anxious to try it out.  It's the Memory Box Scallop Pinpoint Circle and it's very delicate as you can see at the bottom in the reference part. 

However when I cut the image (using the largest die), the pretty decorative edge was on the OUTSIDE frame, not on the image part.  So I was left with the image just being cut in a circle.  Boy was I disappointed!  But it was my fault.  He laid on my desk for a day - I'd go to throw him away and just couldn't.  Finally my friends convinced me to cut the die in black and use the framed piece with the image so I could complete the card design.  

As you can see, that's what I did and I'm glad I didn't trash this cute little cardinal!  I added the red snowflake matting to the gray card base and then secured all the layers.  The bright red organza bow at the top fold completed the card which I think came out super cute. 

Thank you for stopping by today to view my blog. I enjoy sharing my work with you and invite you to 'Follow' my blog and to visit my site - "Not Just Scraps' on Facebook - where you can purchase my cards. 

I will be entering this card in the following challenges: 

Beccy's Place ~ July Challenge  

Dragonfly Dreams ~ Christmas in July  

My Time to Craft ~ #65 ~ Cute Christmas  (Top 3)

Creative Knockouts ~ Challenge 499 ~ Christmas in July


Pam's Pearls


Copics 

R24, R35, R46, YR00, W3  


Products  


Beccy's Place, Christmas Cardinals  


Saturday, July 29, 2023

Best Fishes in the Ocean

Our challenge for the Polkadoodles Design Team this week was an Ocean or Mermaid themed card.  I've selected the Zodiac Pieces Fish for my Ocean scene.


I love how they are elegantly drawn and have been anxious to work on them for a while.  Using my Copic markers, I made an underwater cave-like scene around the pair of fish.  

After trimming close to the edge, then I added the glittery matting and the fishy paper from Polkadoodles Mermazing Ocean Craft Paper Pack.  

The Best Fishes sentiment was pulled from the Little Dudes set.  Instead of a bow, I finished the card front with this unique brad that is a bottle with a heart - perfect for the fishy couple celebrating in the middle of the ocean! 

Be sure to visit the Polkadoodles Challenge Blog to see all the Design Team cards and enter your cards too! 


 Thank you for stopping by today to view my blog. I enjoy sharing my work with you and invite you to 'Follow' my blog and to visit my site - "Not Just Scraps' on Facebook - where you can purchase my cards. 

I will be entering this card in the following challenges: 

Crafty Catz ~ Challenge 648 

Creative Fingers ~ Challenge 259 

My Time to Craft ~ 513 Theme ~ Shades of Blue 


Pam's Pearls


Copics 

Border Reef: BG78, BG49, BG15, B79, B69, B66, Rays: BG000, BG01, B01, Y11,

 Sand: E31, E33, E30


Products

Zodiac Pieces 

Best Fishes from Pirate Little dude


 Mermazing Ocean Paper

Friday, July 28, 2023

Poinsettia Collage

Today's Christmas in July card comes from Divinity Designs, Poinsettia Collage.

This too is another card I made last week at Stamp Camp 2023.  With the guidance of our hostess, I also water colored this one! 


I stamped the flower on water color paper with black Versa Clair ink and added clear embossing powder immediately.  After heat embossing, I used Zig markers and an aqua brush to add the color to the image. 

After trimming the completed image close to the edge, I used Gina Marie Designs Wonky Stitched Rectangle die for the black mat.  The card base is a coordinating olive card stock paper that I cut to the A2 size.  I secured the two layers then added the fish tail sentiment that I had in my stash. This completed the design and added another card to my Christmas 2023 stash! 

Thank you for stopping by today to view my blog. I enjoy sharing my work with you and invite you to 'Follow' my blog and to visit my site - "Not Just Scraps' on Facebook - where you can purchase my cards. 

I will be entering this card in the following challenges:  

Christmas Craft Creations ~ July Challenge 

Word Art Wednesday ~ Week 605/606 

The Holly and The Ivy ~ Challenge 144 

Sparkles Forum ~ Challenge 166 ~ Christmas in July 

Build Your Stash Chirstmas Linky Party


Pam's Pearls


Products 


Thursday, July 27, 2023

Holly Jolly Christmas!

For day three of this set of Christmas in July cards, I'm sharing another one I made at Stamp Camp 2023 last week.

This image is from Stamping Bella, and is named Quinn & Her Boots. While she's as cute as can be, this card's focus last week was on the background technique.


Under the guidance of several super talented ladies, I learned about Nuvo Shimmer Powders.  On watercolor paper, I stamped the Simon Says 'Outline Snowflakes' background stamp with an embossing pad and heat embossed with white powder.  Then I used 2 shades of the Nuvo Shimmering powders, (Lilac Waterfall and Blue Blitz) and carefully put a small amount randomly around the stamped area.  Then I lightly spritzed the area with water to activate the powders.  You truly have to watch to see how cool it is!  I set it aside to allow drying time and started coloring the Stamping Bella girl.

I colored her with my Copic markers trying to color coordinate with the background.  For the decorative edge, I used Gina Marie's Pierced Nesting Oval dies.  I also added a random Christmas greeting that worked with the image. 

I coordinated the card base by matching her coat, then added the images slightly to the right of center to allow as much of the snowflake background to show that was possible. 

Lastly I added the clear dew drops to the center of three of the snowflakes to complete the card design.

Thank you for stopping by today to view my blog. I enjoy sharing my work with you and invite you to 'Follow' my blog and to visit my site - "Not Just Scraps' on Facebook - where you can purchase my cards. 

I will be entering this card in the following challenges: 

Build Your Stash Holiday Cardmakers ~ Christmas in July 

Christmas Craft Creations ~ July 

Sparkles Forum ~ Challenge 116 ~ Christmas in July  

World Wide Crafters and Colourist ~ Challenge 7


Pam's Pearls


Copics  

Snow: B60,B63, Hat, Scarf, & Boots: BV02, BV13, Coats, BG45, BG49, BG53, BG57, Skirt & Tights: N2, N4 N5, N7  


Products 

Stamping Bella, Quinn Girl


Wednesday, July 26, 2023

Snowflake Bauble

Like many of us, I saw several cards like today's being posted last year and couldn't find the stencil anywhere.  Of course you forget about it then BAM ~ you attend an event and there is someone with it willing to share!  What's even better is she was able to tell me where to order it!  

Sweet Poppy, Snowflake Bauble is one of the large thin metal stencils.  I love how my first attempt turned out and certainly hope to make a few more!   


I started with a larger piece (6" x 8') of mixed media paper and taped it to my glass mat.  I used Distressed Oxides and makeup brushes for the coloring and have referenced the colors at the bottom. 

I have a scrap of thick paper that I die cut a 'hill' on both sides to use as a mask.  It's metallic pink in the photo.  I slid it under the die to about the spot I thought I wanted to have the hill(s) in my design.  Then as you can see, I added a little light blue both at the top and bottom. 


Then I started at the top, not wanting to smear my work with my arm, and added the desired shades of oxides to the design.   When I was back on the bauble again, I shifted the 'hill' mask up to make the line of the horizon, using the yellows and applying upwardly.


When completed, I carefully removed the mask - only to see two errors.  Nice ORANGE spot right in the center, and no outside edge of the bauble where I had the mask.    Again using the side of the mask, I positioned it to the rounded edges of the bauble and added a little more blue so the edges were complete. 

The hardest part to me is next, deciding what will fit in this tiny space using the silhouette stamps that I have.  I took a good bit of time, laying different combinations our on the bauble to figure out which grouping I liked.  I used a stamping block and black Versa Claire ink to stamp the trees, fairy and pair of bunnies.  Can you see that I purposefully stamped the fairy OVER the orange spot?  Never an error, just an opportunity to embellish.

When complete, I trimmed close to the design and mounted on the coordinating cardstock.  I added the sentiment at the bottom right after mounting it also on a scrap of the cardstock.

Thank you for stopping by today to view my blog. I enjoy sharing my work with you and invite you to 'Follow' my blog and to visit my site - "Not Just Scraps' on Facebook - where you can purchase my cards. 

I will be entering this card in the following challenges: 

Build Your Stash Cardmakers - Christmas in July 

The Holly and The Ivy Christmas Challenge ~ Challenge #144 

Crafters Cafe ~ Challenge 299 ~ Christmas in July 

Merry Little Christmas Blog ~ Challenge 51 

Pearly Sparkles ~ Challenge 86 ~ Christmas in July 

ABC Christmas ~ N/O ~ O is for Ornament (top 3)

World Wide Crafters & Colourist ~ Challenge 7 


Pam's Pearls


Distressed Oxides used:

Festive Berries, Forest Moss,  Rustic Wilderness, Carved Pumpkin,

Unchartered Mariner


Products 


Tuesday, July 25, 2023

Warm & Cozy Christmas Wishes

Next up in my week of Christmas in July cards, is Penny Black's Cheerful Christmas.

For this image I guess I was feeling brave... and I stamped it using a very light tan ink.  I've only attempted a couple of 'no line' images but I know I have to keep trying in order to get better. 


Amazingly enough I felt like I did pretty good on the bird and the branch.   But I didn't quite get the best results on some of the leaves and berries.  It's still a beautiful image that I'll certainly use again and again. 

I used Tattered Lace's Lace Pearl Chain Dies for the decorative edge.  I covered the square card base with the light blue sky-like paper then secured the completed image to the center.  I added the knotted burgundy ribbon at the fold, and randomly placed three snowflakes around the image to complete the design. 

Thank you for stopping by today to view my blog. I enjoy sharing my work with you and invite you to 'Follow' my blog and to visit my site - "Not Just Scraps' on Facebook - where you can purchase my cards. 

I will be entering this card in the following challenges: 

Sweet Stampin' ~ Christmas in July 

Penny Black ~ July ~ The Great Outdoors 

Get Creative ~ 123, Christmas in July 

12 Months of Christmas ~ Challenge 102 

Build Your Stash Holiday Cardmakers ~ Christmas in July (BYSHChristmasinjulyelp)


Pam's Pearls


Copics 

Bird: B91, B93, B95, B97, R11, R30, YR24, Branch: E53, E55, Berries: R14, R35, R56, Leaves: G21, G24, G43, G46, G82


Products 

Tattered Lace, Lace Pearl Circles


Penny Black, Cheerful Christmas


Monday, July 24, 2023

Winter Wishes to You!

I've just returned from Stamp Camp 2023, near Jasper, GA with 11 amazingly talented crafters and have learned so much that I can't wait to share over the next few weeks.  

It was quite an adventure as on day three of five we were hit with very severe weather which took out our power completely.  Yes, true crafters continue with flash lights, lanterns, and even cold showers!  

I know we all feel truly blessed - one that where we were lodged did not suffer any damage from the falling trees and downed lines and - two that the time we shared through this brought this small group even closer in new found friendships.  Even in the storms, God is good!

I thought I'd start by sharing the card kit I made for the ladies.  I was inspired by Amador Bustamante with the Tiki Hut card he designed and we created at Copictopia  (Summer Fun) 2023.

 From that, I've used Hello BluebirdWinter Woods Overlay Die and created this light up winter scene 3D card. 


Using the tree frame overlay, I added the snowy hill and winter hills with the cottage to the background from other dies.  The fairy lights were wrapped around the trees and 'snow ball' ribbon was tucked in and around the lights.  The assembled snowman was popped up on the side and a couple of red die cut cardinals were secured in the trees.  Adding the sentiment was left to each person's choice. 

We had a lot of fun working through the steps to get the 3D card assembled and everyone especially loved the fairy lights.  Not a card we'd necessarily want to make every day - but still a super cute one! 

Thank you for stopping by today to view my blog. I enjoy sharing my work with you and invite you to 'Follow' my blog and to visit my site - "Not Just Scraps' on Facebook - where you can purchase my cards. 

Products

Hello Bluebird, Winter Woods Overlay

Fairy Lights


Saturday, July 22, 2023

Forever Friends

Today I'm sharing one of the new images for July from All Dressed Up with my Design Teammates.  I'm using  this cute little fellow with his pup called Summer Ice Cream,


This image could be used for so many occasions, like a lot of the All Dressed Up images. I used Copic markers for coloring and the Memory Box, Matinee Rectangle die set for the stitched edges.  

After securing the layers to the 5 1/2" card base, I added the double die cut sunshine, enamel dots, and the Forever Friends sentiment to complete the card design. 

Be sure to visit the All Dressed Up Challenge Blog to see all the Design Team cards of inspiration and enter your cards too!  

Thank you for stopping by today to view my blog. I enjoy sharing my work with you and invite you to 'Follow' my blog and to visit my site - "Not Just Scraps' on Facebook - where you can purchase my cards. 

I will be entering this card in the following challenges:  

CD Sunday Plus ~ Challenge 114 

Dream Valley ~ Challenge 297 ~ Use Dies or Punches 

Use Your Stuff ~ Challenge 488 ~ Summer Moodboard 


Pam's Pearls


Copics   

Hair: YR21, YR24, YR27, E39, Cone: RV00, RV02 R34, BG05, Shirt, YG05, RV02, Overalls: B01, B02, B04, B06, Bear: B31, B34, R20, Dog, B02, B04, B13, B15, B17


Products  


Memory Box, Matinee Rectangle


Monday, July 17, 2023

Santa's On a Holiday!

We're back today with our mid month inspirational posting for Jan's Digi Stamps and continuing Christmas in July! I'm sure if you live in the south or warm temperatures like I do, you'll welcome the Christmas cards this month as inspiration to cool off!

For my project card, I've selected Jan's new Santa's Holiday since you know I love the beach almost as much as my lake life.


 I've sized Santa for  5 1/2" card and printed him on Neenah 110# cardstock.  All the coloring was done with Copic markers and are referenced below.  For the decorative edges, I've used Cheery Lynn's French Flair Scallop die set. 

I selected a beige card base and secured the two layers in the center.  For a bit of additional sparkle, I added Diamond Stickles to the 'fur' area of the Santa's costume.


I may choose to add a bow before mailing the card but usually wait when I know I'm going to 'store' the cards for a bit.

Be sure to visit Jan's Challenge Blog to see all the Design Team cards and enter yours also!

Thank you for stopping by today to view my blog. I enjoy sharing my work with you and invite you to 'Follow' my blog and to visit my site - "Not Just Scraps' on Facebook - where you can purchase my cards. 

I will be entering this card in the following challenges:  

C.R.A.F.T. ~ Challenge 685 ~ Christmas 

Craft Rocket ~ Challenge 105 ~ Christmas in July 

Krafty Chicks ~ Week 672  ~ Week 2 

Crafty Gals Corner ~ Challenge 245 ~ Christmas in July (WINNER)


Pam's Pearls


Copics   

Chair: E95, E97, E99, Beard: C0, Flowers: B04, B01, YG63, Suit: R39, R29, R27, Drink: B00, Glass: BG10, Fruit: Y15, Y19, YR04, Umbrella: V01, V00


Products