Tuesday, August 31, 2021

Hug Me!

 Today I'm sharing a quick Napkin card that a group of ladies and I made at our beach retreat last week.  If you've never made napkin cards, you should give it a try some time.  

Here's the finished card then a few steps I took to make it.


There are several different ways to get to the same end card result - so I'll just share how I've found is the best for me.

- Separate your napkin ply's - you only use the top ply.  

- Using a school glue stick (must be a glue stick!) apply a thick coat completely covering the front of the card base. Be sure to get it well covered, especially close to the edges. 

- Carefully lay the card base, glue side down onto the BACK of the single (top layer) layer of the napkin. Be sure you are lining it up straight and the way you want it to be on the card front.

- Press down ~ then flip over.  

- Now, carefully work from the center with one finger - slowly smooth out any wrinkles, working them to the edge of the card base.

-Use large blade scissors and carefully trim the excess napkin away from the card base, trim as close to the base as possible.

There - you now have a napkin card!  Decorate to your hearts desire.  

In this case, I added two strips that match the colors in the napkin, then added the cluster of die cut cactus.  They are glued at the bottom and have pop dots at the top for added dimension. I finished the card with the sentiment 'Hug Me!'.

Ready to send  ~ Easy Peasy! 

Thank you for stopping by today to view my blog.  I enjoy sharing my work with you and invite you to “Follow” my blog and to visit my site ~ “Not Just Scraps” on Facebook ~ where you can purchase my cards.


I’ll be entering this card in the following challenges:

 Cute Card Thursday ~ Challenge #691 

Allsorts ~ Challenge #639 

Crafty Gals ~ Challenge 222 ~ Summer 


Pam's Pearls


Monday, August 30, 2021

Thrive Succulent ~ Take Two

Happy Monday!  As we start the last week of August,  we continue to be a troubled world.   As a card maker, I encourage you to focus some of your creations toward encouragement and peace. Don't keep them in a box on a shelf, mail them out!  If you are reading this as a consumer, I encourage you to purchase and send cards of encouragement. We all need to know we are loved and cared about during these unsettling days. 

Today's featured card is from Graciellie Designs ~ Thrive Succulent.  


I titled today's blog "Take Two" as I'd used this image in a reverse layout on July 26th. 

(https://pamspearls4u.blogspot.com/2021/07/how-sweet-sound.html


I love how the color combo completely changes the look of the card. What do you think?

Thank you for stopping by today to view my blog.  I enjoy sharing my work with you and invite you to “Follow” my blog and to visit my site ~ “Not Just Scraps” on Facebook ~ where you can purchase my cards.


I’ll be entering this card in the following challenges:

 Ave 613 ~ Challenge #8 ~ Palette #1 

CD Sunday ~ Challenge #68 

DL Art ~ Challenge 284 ~ Sympathy  

Krafty Chicks ~ Challenge 574 ~ Week 4 

Creative Moments ~ Challenge 221 

Word Art Wednesday ~ 505-506


 Pam's Pearls


Copics Used: Top Flower: YR23, Y18, Y17, Y35, YR27, Bottom:  Y38, Y19, Y15, Leaves: YG13, YG63, YG67, Background G27


Friday, August 27, 2021

A Basket of Crocus ~ Diamond Pop Up Card

Our Polkadoodles Design Team Challenge this week was to use Flowers and a different Shaped Card and it was certainly a fun challenge!  

I selected the pretty 'Crocus' from The Darling Buds Collection for my image and made her into a Diamond Pop Up card.  


After printing her and coloring with Copic markers I carefully hand cut her out and set her aside while I made the card base.  I used Polkadoodles Sweet Tweet 6 x 6 paper pack for the flower patterned paper on all of the sides except the top.  For the top diamond shape, I used Polkadoodles craft stencil Magical Grasses and several coordinating shades of distressed oxides.  

Once I had the pop up card assembled, then I secured the flower girl by gluing her at her feet and waist and adding two small foam squares behind her head to raise it for added dimension.  Lastly I die cut three miscellaneous small leaves and added those along with a silk flower on the bottom diamond base for the card to rest on when opened. 

Thank you for stopping by today to view my blog.  I enjoy sharing my work with you and invite you to “Follow” my blog and to visit my site ~ “Not Just Scraps” on Facebook ~ where you can purchase my cards.


Be sure to visit the Polkadoodles Challenge Blog to see the other Design Team cards and enter your card also!


I’ll be entering this card in the following challenges: 

Crafty Creations #424 August 

Crafty Gals Corner ~ Challenge 222 ~ Summer Fun 

The Paper Shelter ~ #480 Colour It 

Watercooler Wednesday Challenge WWC323 

The Cutie Pie Challenge ~ #162 ~ Girls, Girls, Girls 


 Pam's Pearls 


Copics Used: Hair: Y21, Y23, Y25, Basket: BG72, Greens: YG11, YG63, YG67, Yellows: Y08, Pinks, R81, R85, RV00, V05, V06, RV17, RV55, RV63, RV66

Products Used:  


Thursday, August 26, 2021

Tell Cancer It Can

Today I'd like to share a card with you that I made recently for a good friend and her husband who are going through cancer treatments.

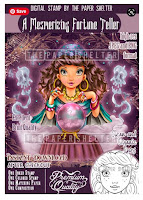
The image is  from The Paper Shelter, 'A Mesmerizing Fortune Teller' and the sentiment is from Cas-ual Friday, CF-51805.


 I sized this image to about 4" square and printed it on Neenah 110# cardstock.  The Copic markers that I used are referenced below.    

Once completed, I used the Whimsy Stamps Notched Stitched Dies for the edge of the image and the two mats. 

After stamping the sentiment on cardstock, I used the darker aqua cardstock and matted it also.  I cut a 6" square card base of coordinating lavender cardstock, then secured the layers as shown in the photo. 

Thank you for stopping by today to view my blog.  I enjoy sharing my work with you and invite you to “Follow” my blog and to visit my site ~ “Not Just Scraps” on Facebook ~ where you can purchase my cards.


I’ll be entering this card in the following challenges: 

Classic Design Challenge ~ August 

Crafter's Cafe ~ August ~ Fantasy 

Creations in Pink ~ #36 

Morgan's Art World ~ #8 

Pearly Sparkles ~ #65 

The Fairy and the Unicorn ~ August 

CD Sunday ~ #67

Allsorts ~ Week 637/8 

The Paper Shelter ~ #450 Colour It


Pam's Pearls

Copics Used:

Hair: C1, B41, C3, C4, C5, C9, BV0000, BV000, BV00, BV02, BV04, Hair Wrap, BG78,BG75. Table, BV01, BV02, BV13, Ghost: C3, B41, Cloud: V91, V93, V91, Cape: W3, W5, BG10, BG11, BG13, BG15, Y26, Y28, Ball: BG13, BG15, RV17, Y28, Jewelry: RV17, Y26, BG13, Y28, Background: V01, V05, RV66

Products Used: 


Tuesday, August 24, 2021

Sending LONG Get Well Wishes

 Today I'm sharing a get well card using Art Impression's Doggy Kisses.  This cute dachshund with is long wrapped tummy was perfect for the receiver of the card ~ Mr. Long! 


I stamped the image on Neenah 110# cardstock and used my Copic markers for coloring.    I covered the standard A2 card base with the animal accessories paper.  The burgundy mat and colored image were cut with the Gina Marie Nesting Label One.

Thank you for stopping by today to view my blog.  I enjoy sharing my work with you and invite you to “Follow” my blog and to visit my site ~ “Not Just Scraps” on Facebook ~ where you can purchase my cards.


I’ll be entering this card in the following challenges:

Art Impressions: Lions, Tigers, Bears 

Daisy Chain ~ Challenge #55 - Men & Boys 

Crafty Hazelnut Patterned Paper ~ August 


Pam's Pearls 


Copics Used: Dog: E30 E31, E33, E35, N1, W2, YG63, Y18

Products Used: 


Monday, August 23, 2021

Grateful ~ Embossing Challenge

 Who's ready for cooler weather ~ Raise Your Hand!

As the winds from the most recent Tropical Storm blew across the lake here in South Carolina the last few days, it didn't take long to start wishing for cooler fall days.  But we still have lots of summer left here before it's pumpkin season.

However, I joined in for an embossing folder challenge and made this Grateful card that I'd like to share with you today. 


I used the Cuttlebug Pumpkin Harvest Embossing folder with a 4 1/4" x 5 1/2" piece of white card stock for the initial die pressing of the pumpkins.  To color the pumpkins and vines I was able to use a finger dauber and Quick Quotes Chalking Inks.  The Pumpkins are done with Orange Slices,  the vine of leaves with Khaki and the background is Buttercup.  

I selected the olive cardstock to match the vine and cut the card base to have a top fold.  I used the Penny Black Elegant Stitching die set to add the decorative edging around the completed embossed piece.  Next I secured this layer to the card base and added the brown organza ribbon with a knot, then added a cross charm. 

For the sentiment I die cut the word Grateful from the My Favorite Things, Grateful for You stamp and Die set. 
NOW, I have ONE card ready for Thanksgiving and a lot more to go! 

Thank you for stopping by today to view my blog.  I enjoy sharing my work with you and invite you to “Follow” my blog and to visit my site ~ “Not Just Scraps” on Facebook ~ where you can purchase my cards.


Friday, August 20, 2021

Just Breathe...and Relax

Today I'm posting with Team C on Colour Crazy Challenge Blog as we kick off a week with All Dressed Up as our Sponsor.  

I've selected their Yoga image 'and Relax' also for my project card and here's what I came up with.


I sized the image to about 3" tall and printed her on Neenah 110# cardstock.  I used my Copic markers for coloring and then used the Memory Box Wrapped Scalloped Rectangle dies for the image and the polka-dotted matting.  

I took a scrap of coordinating olive green and die cut the smallest rectangle from the set and added the metal 'Just Breathe' embellishment using two mini brads.  


My card base is a hunter green standard A2 size.  As always I used my bookbinding adhesive for securing the layers onto the card base and then added the heavy tag.  It's amazing that this glue can hold the lightest vellum to the heavy metal and hold without showing through.  I'll reference it below for those of you who haven't gotten hooked on it yet! 

Be sure to pop over to the Colour Crazy Challenge blog to see all the Design Team cards and to enter yours too! 

Thank you for stopping by today to view my blog.  I enjoy sharing my work with you and invite you to “Follow” my blog and to visit my site ~ “Not Just Scraps” on Facebook ~ where you can purchase my cards.


Copics Used:  Hair: YR21, YR24, YR27, E39, Shirt: Y17, Y38, Flowers: Y38, YG03, Pants: YG17

Products Used: 


Wednesday, August 18, 2021

One Sip At A Time

Today I'm sharing a card I made using one of Graciellie Designs from the Coffee and Love Digital Stamps Set.  It made a great card of encouragement, get well or just for a note to say Hi!


I started by sizing the image to a little over 3" tall and adding the sentiment to the right, making it about 1 1/2" tall.  The total width of the two were just under 4".  I printed this on 110# Neenah cardstock, which I find to work well with Copic markers.  

I used Y13, Y15, Y19 for the yellow in the latte cup; N2, N0, N0 for the top and band; and W3 for the shadow underneath.  The leaves were done using YG63, YG93, and YG95.  The pink flower is Copic RV55, RV56, and the blue flower is B02 and B07.  

I used Sizzix Deco Rectangles (discontinued) for the decorative edges.  I wanted to use both the magenta and the blue in the backgrounds so I used a wide solid strip of magenta through the middle and added the smaller strips of blue at the top and bottom.  To complete the card design I added the three yellow enamel dots. 

Thank you for stopping by today to view my blog.  I enjoy sharing my work with you and invite you to “Follow” my blog and to visit my site ~ “Not Just Scraps” on Facebook ~ where you can purchase my cards.


Tuesday, August 17, 2021

Floral Spray

So many times when we need to create a sympathy card, we just don't know the right words to say.  You always can be assured that you are doing the right thing by sending scriptures about God's unending love for us. 

For today's card, I used a 'floral composition' digital image and the scripture from 1 John 4:19.


 For the floral image I used my Copic markers for coloring.  The yellow flowers are done with Y11 and Y17.  The Salmon flower and buds are done with R14, R17, and R43.  The greenery is done with YG63, YG93 and YG95.  

The decorative edging was achieved using Penny Black's Elegant Stitching.  I added a black liner mat to the A2 standard card base then secured the completed image.   Lastly I added the three random enameled dots. 

Thank you for stopping by today to view my blog.  I enjoy sharing my work with you and invite you to “Follow” my blog and to visit my site ~ “Not Just Scraps” on Facebook ~ where you can purchase my cards.


I’ll be entering this card in the following challenges: 

Crafting Happiness ~ Challenge 109 

Creative Crafters ~ Challenge 43 

Crafty Calendar ~ August


Pam's Pearls


Products Used:


Monday, August 16, 2021

Only He Can See

Today I'd like to share with you a special sympathy card that I was asked to make.  My client's best friend's father had passed on to heaven and she needed a special card for her.

Not knowing any other details as I thought about what might be appropriate, I was reminded how close I always feel to God when I am walking on the beach shores.  I know God is always with me, but I don't think I'm the only one that feels that extra closeness by the sea.  

With that thought in mind, I selected Unity Stamp Company's, Patience Girl for the main image of this card.  For the sentiment, I used the 'experience'  quote by Corrie Ten Boom which came from Sweet & Sassy, The Future Set.  I know that these two best friends were put together a long time ago to lean on each other through tough times, like the lost of a parent, by our Heavenly Father.  


 I made this card by stamping the Unity Stamp image on Neenah 110# cardstock and coloring with my Copic markers.  The decorative edging on the image and the matting papers was gotten by using Penny Black's Elegant Stitching Rectangle Dies.  After die cutting,  returned the colored piece to my Misti and stamped the sentiment using Versa Fine black ink.  The layers were then matted on a standard A2 sized card base.

Thank you for stopping by today to view my blog.  I enjoy sharing my work with you and invite you to “Follow” my blog and to visit my site ~ “Not Just Scraps” on Facebook ~ where you can purchase my cards.


I’ll be entering this card in the following challenges:

 Unity {Show & Tell} Summer Vibes ~ August 

Cute Card Thursday ~ Challenge 691 

Time Out ~ Challenge 194 ~ Running With Stitches 

The Creative Crafters ~ Challenge 43 

Lil Patch of Crafty Friends ~ Challenge 164

The Paper Players ~ Challenge 554 ~ Clean & Simple 


Pam's Pearls


Copics Used:  Shirt: R14, R37, Skirt: B95, B97, B99, Hat: W3, B95, Sand, W1, E50, E21, E43, Water, B00, BG11, B60, BG01


Products Used:


Friday, August 13, 2021

Bubbly Cheers!

 Happy Friday from the Colour Crazy Challenge Blog and our sponsor this week ~ Digi Doodle Studios. 

Today I've used 'BUBBLES' to make my sharing card as I'm looking forward to a relaxing weekend.  How about YOU? 


I sized this bubbly lady to about 5" x 3" and printed her on Neenah 110# cardstock. I used my Copic markers for coloring  and added a few deep purple punched 'dots' that were left from the previous card's die cutting.  I used a standard X-stitched rectangle die cut for the image and the purple liner.  Next I added the pink dotted swiss matting and a second purple liner and secured all the various layers on a folded white 8 1/2" x 11"of card stock.  Then I was able to trim leaving 1/8" around the edge, to make the completed card about 6 1/4" x 5 1/4".  It's large but this image needed a large card.  For the final touch I added the stitched fishtail 'Cheers!' which I also matted with purple.

Be sure to check out all the Design Team cards on the Colour Crazy Challenge Blog and add yours too!  

Thank you for stopping by today to view my blog.  I enjoy sharing my work with you and invite you to “Follow” my blog and to visit my site ~ “Not Just Scraps” on Facebook ~ where you can purchase my cards.


I’ll be entering this card in the following challenges: 

Crafty Creations ~ Challenge 424 

The Paper Shelter ~ Summer Break Challenge 

Watercooler Wednesday ~ Challenge 322 

Digi Choosday ~ Week 32


Pam's Pearls

Copics Used: Hair: YR21 YR24, YR27, E39, E59, Bubbles, BG15, BG13, BG11, BG10, RV02, RV00, RV000, BV04, BV02, BV00, BV000, Y11, Y000, Y0000, Glass: BG000, V05, RV17, Hair Tie: BG13, RV02, RV52

Products:


Back to the Books!

 It's time for another new challenge week at Polkadoodles Crafting and the Design Team is rolling out our Back to School card ideas for you.  Check out my teammates posts on the Challenge blog HERE.

For my project card I selected Student/School from the Little Dudes Collection and made a Slimline card.


I sized the image to about 5" tall for the 8" x 4" slimline design and printed him on Neenah 110# cardstock.  I used my Copic markers for coloring.  I added a light red stencil brick wall around the completed image and then grayed the area under the boy to ground him.

I selected the background papers from Polkadoodles Winnie Celebrations 2 and cut them 3" x 5".  After I die cut the colored image with one of the slimline dies, I decided I didn't want the sentiment at the bottom as planned, so I added the webbed twine both to add dimension and balance to the card.  After layering the papers and securing them I added the tagged sentiment that also came from Polkadoodles, from the Celebrations 3 Sentiment Collection.

Thank you for stopping by today to view my blog.  I enjoy sharing my work with you and invite you to “Follow” my blog and to visit my site ~ “Not Just Scraps” on Facebook ~ where you can purchase my cards.


I’ll be entering this card in the following challenges: 

Cute Card Thursday ~ Challenge 691 

Stinkin Inkers ~ Long & Skinny 

Crafting Happiness ~ Challenge 108 

Make Mine Monday ~ challenge 154 ~ Slimline


 Pam's Pearls

Copics Used:

Hat: YG01 YG03, YG17, Hair: E11, E13, E23, E55, E57, Backpack, YG93, YG95, Shirt: Y15, Y18, Books: YR23, YR27, Y21, Pants: B21, B24,Boots, N3, N5

Products Used: