Friday, December 28, 2018

Oh Fiddlesticks!

Another Birthday!!!

While we may not like to admit to our age, like my daughter in law that has be 27 for at least the last eight years... we almost always will become serious at some point and say how blessed we are and proud of every year of our lives. 

Today I'd like to share a special birthday card featuring Whimsy's Snowflake Wishes, by designer Marina Fedotova.   It also includes the Whimsy large Scalloped Doily Die, a miscellaneous Doily Die and the titles are from the Cheeky Sentiment Clear set by Deb Davis.


I made this card for our sweet Ms Pat who just turned 87 years young last week.  I admire her determination so much as each day her aches and pains make her tired and weary but nothing seems to get her down - she just keeps going and going.  Her caring heart overflows  with love and affection for so many - especially my Dad.  What a blessing she is to have in our family. 

Thanks for stopping by today - I hope you will continue to visit and share my posting with others to help grow my blog following.

Serving a Risen Savior,
Pam

This posting will appear on the following sites:


Tuesday, December 25, 2018

A Holiday Hug from Me to You

It's finally here ~ the BIG day all the kids have been waiting for and probably quite a few adults too.  By the time anyone reads my blog all of the presents will have been opened and wrapping papers torn and tossed to the floor.  New toys and games for the kids of all ages are seen everywhere and a few are set aside with the instructions for later when there isn't so much confusion. 

And then there are the other homes that are quiet - with only a single resident. The ones that have recently lost a loved one,  that are going through the holiday season alone for the first time - or even again and again.  Or those that have no family close by to share the joys of the season with. 

Whatever you situation is, I hope that at some point this past year, one of my cards has brought a smile to you, or a chuckle.  Or maybe a fond memory of days gone by ~  if so  - then I have been successful.  

My wish for you today, is for this holiday season bring joy to your life, a little laughter, a feeling that you are loved by someone you didn't even think knew you.  

I am sending you this Holiday Hug from Me to You today - This sweet Whimsy Snow Couple
to warm your day and make you smile. 

You are loved by many!  
Blessings through this holiday season and into 2019. 


Serving a Risen Savior, 
Pam

This posting will appear on the following sites:

Monday, December 24, 2018

A Jungle of a Challenge!

One of the best parts of my card making this past year has been the requests for designing personal cards for customers.  Although this is always a lot more time consuming, the gratification of understanding what they want and producing that image into a card makes every ounce of my time and energy worth what ever time it takes.  

Today's featured cards were quite the task of my creative side and I'm extremely proud of the way they turned out.  My customer and her two sisters have a tradition of their gift exchange theme being around palm trees.  So basically, that was what I was given for my instructions - create two cards  - with three palm trees, ... and she did like the Jungle Bells Three stamp set by Crissy Armstrong. 

Here's my single and double creations using Jungle Bells Three and a Palm Tree stamp times three! (unknown mfg). 


The Jungle Bells Three image is a red rubber image at the present time, so I started in the center and worked out.  I kept my center image tightly matted allowing me as much room as possible to fit the tree in behind and add the wavy red solid embellishment.  This was another card that could have used another set of arms to hold things in place while I was trying to get everything glued down.   The bright gold gemstones added to each of the trees was just the right touch to finish the cards. 

So if you are reading this and are not a crafter - but would like a handmade card, keep me in mind for future card orders.  Thanks so much for coming by today to see what I've been working on.

Serving a Risen Savior,
Pam 

This posting will appear on the following sites:


Saturday, December 22, 2018

Stirring Up a Few Kitchen Wishes

In my box of Christmas stamps, I came across this cute set of Inky Antic's Christmas greetings that I wanted to share with you today. These little kitchen mice greetings can be mixed and matched to make so many adorable cards perfect for any chef!


The name of this set is bigger than these cute little critters.
Cooking Mouses Clear Stamp Set, 11606LC.  It might be one you'd like to add to your collection some time. 

Thanks for stopping by today - Hope you are just about ready for Santa at your house. 

Serving a Risen Savior,
Pam 

This posting will appear on the following sites ~ 
Addicted to Card Making 2.0, Stamp Junkies, Stampers Swap Shop, Karle's Passion, Christian Card Maker, Pinterest and Not Just Scraps.

Friday, December 21, 2018

Oh What Fun!

Today's featured card is one of Whimsy's Digital's that was released in November. Iggy, was designed by CC Designs and is available in the Whimsy digital section of the store - just click on the name of the stamp for a direct link.

Here's the cute snowy winter card I made using this image.


I printed the digital image on 110# Neenah card stock and used Copic markers for coloring.  This is an easy image to color if you are looking for a quick card to make.  The background paper came from the Whimsy October Digital release of Christmas Fun Paper.  I used a cloud border die for both the clouds and the snow mounds, adding those after I had mounted the background paper and image to the standard A2 card base.  Then I used a scrap oval of the snowflake for the background of the sentiment 'oh what fun' , which came from the Whimsy Clear stamp set, CWSD244, Oh What Fun, by designer Deb Davis.  To finish the card, I added three plastic glittery snowflakes, using heavy duty glue dots and a strip of Merry & Bright washi tape across the top.

Thanks for stopping by today ~ I hope you are enjoying the Christmas card each day.

Serving a Risen Savior!


Tuesday, December 18, 2018

Don't Forget to Thank Your Happy Mail Carrier!

I know  ~ A lot of you reading this or seeing my social media posting will shake your head and think ... I don't even know if my mail carrier is male or female... Or I pick my mail up at the post office box...   However, there are still quite a few of us who have the pleasure of knowing our HAPPY MAIL carriers ~ and I happen to be one of those.  

Ms Jeannine, my carrier, is a very sweet lady who works really hard at ensuring she is on time and the mail is correctly delivered right the first time.  Each year I try to come up with a uniquely different card to honor her service field.  
This year I selected Lee Holland's Kitten Post to make her special card. 


The image is stamped on 110# Neenah and Colored with Copics and Prismacolor pencils.  Animal faces that are large like this are sometimes tricky to color - it's easy to get them too dark or splotchy.  And they always look weird when you are laying down your shades.  This time I started a his face with lighter pinks and worked to darker shades.  Here's my example working in progress. 


Hmmm.. looks like a face only a mother could love, right?  If yours does, then you are doing it correctly.  But as you blend all those tiny flicks together, lightly, they will come together to the final color you are looking for. 
The Stitched Scalloped Envelope Edge die is by Die-Namics/My Favorite Things. 

Thanks for stopping by today and I hope you will also remember to acknowledge your Mail Carrier ~ they certainly bring you some great packages don't they! 

Serving a Risen Savior!
Pam 

This posting will appear on the following sites:

Friday, December 14, 2018

Hip Hip Hooray! ... And a Freebie...

Happy 10th Birthday WHIMSY!

What a wonderful week it is to be celebrating the 10th birthday of this awesome stamp company.
 I am so very proud to be a tiny part of the Digital Design Team during this time of celebration!  Here's the Celebration card I made for today!


For my card I used Whimsy's digital image, Penguin Flies by designer Crissy Armstrong.   The Happy Birthday banner and Hooray dies are miscellaneous manufacturers I've had for a while and the oval is the Wonky Stitched Oval Die Set by Gina Marie Designs.

Remember on the 1st of December, Whimsy posted a free image as an early Christmas gift?   Well today, they are posting another FREE image to celebrate their 10th birthday!  Another Crissy Armstrong image - this time it's Mistletoe Polar Bears.

Here's the card I created using the free image. 


Isn't that a sweet image!  For the background I embossed with a light lavender using Whimsy's Snow Flurry Background rubber stamp, but then copied this embossed image to use as my background for my card.  I then placed the image to print on the embossed area of the paper giving the effect of the snowy background, yet masking out the white areas of the bodies of the polar bears. 

To get your free image today - be sure to visit the Whimsy Stamps and Inspiration page on Facebook. The Link posted by the Whimsy Owner, Denise Lynn will take you to the download Dropbox for your image.  Enjoy and be sure to post your completed card!  Can't wait to see how you use the image!  

Ways to SAVE today! 
Discounts on purchases are listed on the page ~ Linked here!

And one last bit of news you won't want to miss! 
This afternoon starting at 4 p.m. on Instagram, there will be a Whimsy Birthday Hop!  
Please join in on the fun there and visit all the great design team artist to see their beautiful birthday creations made to celebrate Whimsy 10th Birthday!

Thank you so much for stopping by and as always your comments are very welcomed!

Serving a Risen Savior, 
Pam

This posting will appear on the following sites:
Whimsy Stamps and Inspiration, Passionate Paper Creations, Stamp Junkies, Stampers Swap Shop, Christian Card Makers, Addicted to Card Making, Karle's Passion, Scrapbook OutletPinterest, and Not Just Scraps.


Thursday, December 13, 2018

Bringing You Warm Wishes

With the cold winter winds blowing, it's a perfect day to whisk away the chill and wish you a warm Merry Christmas!

Today card features Whimsy's Snowman and Friend by designer Lee Holland.  Although this is not a new release, this traditional stamp is still one of the winter favorites.


After Copic coloring and matting, I used a swirly embossing folder  mounted on a 5" Kraft card base for the snowman, then added the fish tale sentiment and the matching satin ribbon.  
All ready to go be sent with love to someone's home this Christmas season. 

Thank you for stopping by today and for following by postings.  Your comments are always welcome.

Serving a Risen Savior, 
Pam

This posting will also appear on the following sites:


Wednesday, December 12, 2018

Have A Holly Jolly ... Wobble/Wobble..

Today's Christmas card is another new December Release  from Whimsy Stamps ~ Noel, by CC Designs.  Holding her cute handful of balloons I decided to use the image for a Wobble card. 


The image is printed on 110# Neenah and Copic colored, then fussy cut.  Various sections from a piece of Christmas paper were cut and added to the card base to make the background.  I purchased the wobble piece, and applied to the back of the image and to the center of the card.  This is a quick and easy card and is especially a great card for young children! 

Thanks for stopping by today - I hope your Christmas Card creations are moving along this year.  Time seems to be running out quickly for me! 

Serving a Risen Savior, 
Pam

This posting will be on the following sites:

Monday, December 10, 2018

Dashing Through the SNOW...

While most of the eastern coast is being hit by the first big winter storm this weekend, here in South Carolina we are just splashing through the mud puddles like wet ducks!  But I decided this would be a good day to share Whimsy's Puppy Delivery image by Lee Holland used for the Christmas card I made.  It is available only red rubber currently, and can be purchased by clicking on the image name, which will take you over to the Whimsy site. 

My customer requested a card with this image for her young grandson who just got a new puppy.  I made it on a 5" square card base so that it would be especially easy for him to handle. 


The Whimsy image is stamped on 110# Neenah paper and Copic colored, then die cut with the Large Stitched Oval dies from Pink & Main.  The sentiment came from Whimsy's Clear stamp set # CWSD244, Oh What Fun by Deb Davis and was die cut with a miscellaneous fish tail tag die.  The larger fish tail tag was hand cut to fit the space needed.  The white card base is a standard 5" square and the red/white dotted paper is cut 4 1/2" square and added.  The green dotted paper is 1" x 4 1/2" and is put down next. The image, then the sentiment and top fish tail are added. The brown thread and miniature Christmas tree charm are added last to complete this card. 

I hope the little fellow likes his card and that you do also.  Your comments are always welcome and I thank you for stopping by today.

Serving a Risen Savior, 
Pam 

This posting will appear on the following sites:


Thursday, December 6, 2018

And the Robin Said ~ You Are So Cool

BRRR... Our coldest morning of the season today here at the lake, 29 degrees!  Quite a change since just four days ago it was 64, right?  Although we get a LOT of rain, we rarely get snow here.  You may grow tired of snow, we don't and therefore a lot of my Christmas and winter cards are snow scenes.  I get to enjoy 'my snow' on paper. 

Today's card is another new Whimsy Digital releases, Snowman with Robin and can be found in the Digital section on the Whimsy site or by clicking on the highlighted words.  


After printing the image on #110 Neenah Card Stock, I used Copic markers for coloring and the Gina Marie Designs X-Stitched Oval Die.  The sentiment 'You Are So Cool' is also from Whimsy - the Penguin Holiday Squares, and is matted with red to match the scarf and organza ribbon.  This is a standard A2 card base.  

I hope you are a member of the Whimsy Stamps and Inspiration Facebook page?  We're celebrating the company's 10th birthday!!!  There's a limited time free Christmas Mouse image you can pick up and watch for other specials coming! 

Thanks for stopping by today, your comments are welcome and I'd love for you to share my blog with a friend.

Serving a Risen Savior, 
Pam

This posting will appear on the following sites:


Tuesday, December 4, 2018

Christmas From the Coast of South Carolina

Today's featured card brings us a few of the sought after delights of the coast of South Carolina.   Inkadinkado's clear stamp set "Warmest Wishes", (60-31350) has nine cute coastal images that each could make wonderful seasonal cards. 

Today's card is showing the Shell Christmas Tree. 


After stamping the image on Neenah 110# Card stock I used Copic Markers for coloring. The matting pieces were die cut using the large stitched rectangle dies by My Favorite Things. The sentiment, "warmest wishes" is also from the same stamp set and the aqua mat behind the sentiment was hand cut.  Before mounting on the card base, I tied the thread and shell charm onto the matted shell tree image. 

For those that love the beach and long walks on the edge of the water, this will be the perfect card for them during this holiday season.   Thank you for stopping by today ~ your comments are always welcome.

Serving a risen Savior,
Pam

This posting will appear on the following sites:


Monday, December 3, 2018

It's Beginning To Look a Lot Like Christmas ~ With Rudolph

Today's featured card is one of Whimsy's classical favorites by many customers ~ 
Sylvia Zet's Rudolph.  
While I have been showing digital images, Rudolph is currently a Red Rubber stamp.  He was requested for a special little boy's card, and I wanted to share him with you also. 

Here's the finished card and a few notes on how I created the card. 


The image is Copic colored (reference colors listed below), then die cut using My Favorite Things Stitched Squares die.  A 1/4" hunter green mat was cut to go behind the image. Once I had the image on the mat,  I added glaze to the ornament and the berries and set them aside to dry. 


The card base is Kraft 5 x 7.  I cut the polka-dotted paper 4 3/4 x 6 3/4 and mounted on the card base.  The tree, words, and paper/tape pieces came from a scrapbook piece of paper - I carefully cut them out an added them to each side of the card.  Note: I left the green strip unglued so that the image could be tucked under the edge. 


Finding all the detailed elements for cards can be quite time consuming yet fun too.  I was so thrilled this season to find one of the facebook crafting sellers offering these mini Christmas tree buttons!  Perfect for cards.

After adding the image to the base, I then added the thread at the top and a wooden mini Christmas tree button at the top to complete the card front.  An additional white piece of card stock (4 x 6) is added inside the card, to be used for writing the note.

Thanks for stopping by today - I hope you liked today's card and that you will hop over to the Whimsy  store to see what products you can find to add to your collections.

Serving a Risen Savior,
Pam

This posting will also appear on the following sites:


Sunday, December 2, 2018

Warm Wishes from Whimsy's Cool Pony

It's Day Two of Whimsy's December New Releases, and I want to share the digital version of Crissy Armstrong's Cool Pony and also a piece of the digital version of  the Special Edition Penquin Coffee Break Digital Set.  I used the winter background which is included in the special edition set.  It is so neat to have a digital background stamp both to add to our images but also to give you the option to also add more to the image yourself. 

Even with the background image given, I drew in additional mountains for my card image to give more depth.  The possibilities are endless. 

Here's my final card from the front - but there's more.... 


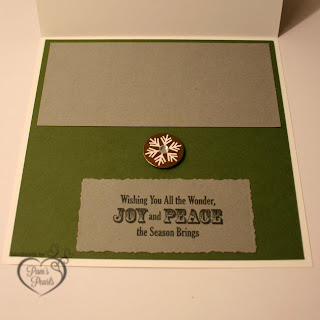
It's an easel card with an chipboard snowflake to hold the front of the card back.  The vellum sentiment says


and there is also a gray insert glued in for writing above the snowflake.

My image was Copic colored and the dies used were the stitched squares Die-Namics, from My Favorite Things.

Thanks so much for stopping by today to see the featured Christmas card.  Your comments are always welcomed.

Serving a Risen Savior, 
Pam

This posting will appear on the following sites:

Saturday, December 1, 2018

Whimsy's New Release ~ Blades & a Freebie

December 1st and we are all saying, 'No Way'!  
At least we crafting ladies can enjoy all the new releases and make our wish lists - or better yet... just go purchase so you are sure you get the right thing.  

As you know or could guess, the Design Team members are given the images about a month in advance to begin working on our cards for the new release products.  Today's card I finished around the 10th of November.... and if you are a Whimsy follower... you will remember that around the 15th Whimsy and Jennifer Dove released the new Kinetic Dies.  So, I started NOT to share this card as it was made 'the old fashion way' vs the new Kinetic way.  However since most of us don't have the new dies yet (Ah-Ha...Christmas List Items!!!) ... I decided to share my Slider card.  I do hope you will check out the new die line.  I just received mine this week and can't wait to try them out too. 

One of the new December release Digital images from Whimsy is BLADES by CC Designs.  Here is the slider card that I made using this image. 


The digital image was printed on 110# card stock, then Copic colored and fussy cut.  I used a Spellbinder die for the words  'Sweet Friend' and the Gina Marie Stitched Sky and Stitched Cloud Border Dies for the snow and cloud backgrounds.  I used Distress Oxides for the shading of all the background pieces.  I also colored in the 'slot' using the same Copic color as her dress so that it would have a white strip showing.  After assembly I took a 1/8" strip of light blue matching paper and glued around the area of tape between the two layers to cover the sticky tape that always shows.  This was a great tip that my friend Jennie shared with me.  The three snowflake embellishments are put on with glue dots that are made for heavy embellishments.  This also was a new 'find' for me, and they work really well. 

And for a very nice Christmas surprise!!!  Whimsy has a new digital freebie for members of the Facebook group Whimsy Stamps and Inspiration.  The link to get this image is on that page - if you aren't a member, request to join so you can get this limited image during the month of December.  
The image is called Christmas Mouse, designed by Crissy Armstrong.  Here's my card made with this cutie! 


Be sure to post your card also into the Challenge album before December 12th for your chance to win a $15 gift certificate.

Thank you for stopping by today!  I really appreciate your comments also. 

Serving a Risen Savior, 
Pam

This posting will appear on the following sites:

Thursday, November 29, 2018

The Greatest Gift

While yesterday's posting was full of fun and Be Merry, 
I will just a quickly turn us around to always stay focused on 
the Greatest Gift.


Unity's stamp, The Greatest Gift is Baby Jesus,  by designer Jeanie Dickinson simply gives us the visual image we need to bring JOY into our daily lives and into our family's each and every day. 

My wish for you this season ~ remember the greatest Gift!

Serving a Risen Savior, 
Pam 

This posting will appear on the following sites:

Wednesday, November 28, 2018

As the Holiday Begins... Be Merry

Although it's hard to believe - it seems the day after Thanksgiving is the day before Christmas doesn't it?  All the decorations continue to appear on the shelves earlier each year, pushing Halloween and Thanksgiving right out of the way.  

Today's Celebration Christmas card was made using the Unity's stamp, Bright Spirits.  


I remember last year when Designer Angie Blom and Unity released this stamp, it was super popular with it's cool floating ornament in the glass.  Of course by the time I ordered it, my cards were completed so I was totally thrilled to get it out early in my mass of card production this year.

The stamped image is Copic colored and the border die is from My Favorite Things, Stitched Scalloped Basic set. The sentiment 'Be Merry' was cut using a Spellbinder die using a lavender foiled paper.  The top pieces were mounted on a red metallic foil piece and then onto a deep purple card base.  Although tulle is wide, it was perfect for this card and added a little extra bling and sequin splatter that was needed.  

Merry Christmas to everyone as the season begins and please be careful driving. 
Serving a Risen Savior, 
Pam

This posting will appear on the following sites:

Tuesday, November 27, 2018

Time 2 Be Merry and Bright

I think anyone who 'is owned by a cat' might like today card.
Whimsy's, Scruffy Cat is back today and isn't so sure he's ready to be Merry and Bright!
 With his over-sized flowing Christmas hat, he's sure to bring a smile to the family that receives this card.


This digital image is a set that comes with two digital versions - one with the hat on the cat and one of the cat without the hat. My image is Copic colored with Diamond Stickles added to the fur of the Santa hat. I also used foam squares to raise the cat image above the wreath.  The Wreath die set is by Gina Marie Dies and the sentiment was taken from a piece of scrapbooking paper.  The completed image was mounted on a Hunter Green card base and then I added a tan rectangle mat inside for the writing space. 

Thanks for stopping by today to see another Christmas card.
Serving a Risen Savior,
Pam

This posting will also appear on the following sites:

Monday, November 26, 2018

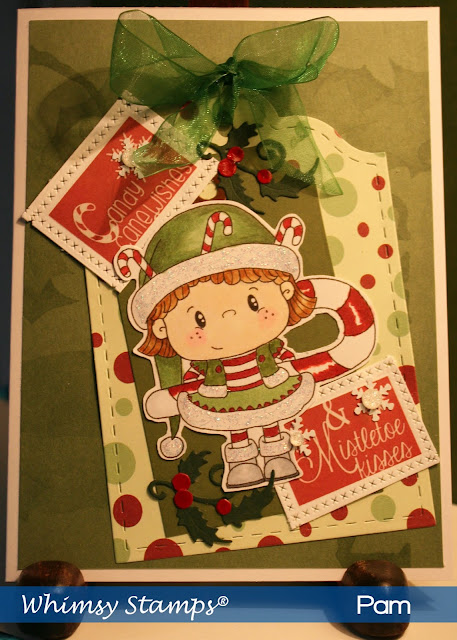
Candy Cane Wishes and Mistletoe Kisses

If you followed my blog posting last year, you may remember the postings of the Countdown to Christmas starting December 1 and a different Christmas card every week day down to December 23rd.  Things are looking a bit different this year ... looks like I'm going to have to start earlier to be able to share all these wonderful designs and cards with you!  A few have already slipped in and there are so many in progress on my desk!
Let's don't play the game of What's On Your Desk please!

Today I want to share another new CC Design digital image that is now a new release from Whimsy Stamp, named Candy.
This card started out as a tag, but as it grew I decided it would be more useful and stable as a card.  


To make your own card like this one: I used a 5 x 7 white card base, green Christmas paper for the bottom mat cut 4 3/4" x 6 3/4", x-large tag using Gina Marie Arched Stitched Tag Set with the green and red dotted paper, then a solid green medium tag (miscellaneous die).  I used the Whimsy Christmas Branches die set to make the holly and berries and coated the berries with liquid glaze.  The sentiments were printed from Goggle and then 'x' stitched around the edge using Die-Namics Basic Stitch Lines  and adding a snowflake and sequin.  The newly released digital image, Candy, can be found in the Whimsy store with all the digital releases items - waiting for you to check them out and slip them right into your cart. 
I colored my image with Copics and used the following colors:
Skin: E0000, R30,0,YR30, RV0000, E50
Hair: E26, E32, E34, E42, E55
Reds: R14, R27, R35, R39
Greens, G21, G85, G94, YG63
Gray, C0, C2, C4
After cutting her out and mounting the the image in place, I then added a little Diamond Stickles  on the fur of her outfit and boots as the final touch.

Thank you for stopping by to read my blog and to follow my work. 
Serving a Risen Savior, 
Pam

This posting will also appear on the following sites:

Friday, November 23, 2018

Choo Choo Train is Coming....

Counting those TEN tiny fingers and TEN tiny Toes...
Oh what a sweet precious boy!

Today I'm proud to feature another new die from Gina Marie Designs ~ Choo Choo Train Die Set.


This new set comes with three train pieces and three track pieces.


For my card, I used a baby blue gingham check paper for the train and black paper for the track.  I used all six die pieces and added three tiny bubbles for the steam coming out of the Train engine. I used a double mat and then a piece of random word 'boy' paper cut 1/4" smaller than the white card base.  Blue crochet thread is wrapped around and tied before mounting to the card base, then I added the white button and tied it securely.  These dies are generic enough to be used for Baby showers, birth announcements, birthday's and many other events and are sure to be a big hit!

Be sure to check out all the new Gina Marie Dies just released on her web site HERE. For her Black Friday Weekend Sales, click HERE to see the details. 

Thanks for stopping by today and for visiting Wholesale Crafting Supplies.

Also I'd like to invite you to hop over to Whimsy to catch their Black Friday specials too: 


Serving a Risen Savior,
Pam

This posting shall appear on the following sites: