Thursday, May 31, 2018

Happy Birthday to a Classic Guy


Almost two years ago, a friend of mine talked me into visiting the Friday night shag dances  ~ "Shaggin At The Shrine".  Although it had been many years since my beginner lessons, I was anxious to meet new friends in a safe environment.  
I can't begin to tell you what a great adventure that open door has become!  
And that's how I met Dave ~ who is celebrating 70 years young today!
Last Friday we celebrated his special day with a tremendous spread of food, lots of great tunes, and even a pair of crutches with black balloons!
Today's featured card is what I made for Dave using Unity Stamp Company's, Slowly Turning Classic by artist Tierra Jackson.


The stamped image was colored with Copic markers, matted with gray cardstock as well as the coordinating sentiment.  In the stash of masculine papers, I was thrilled that the chevron pattern looked just like tire treads!  Black flat back pearls are on the bottom and the twine is tied with a wooden star.  

Yes DAVE, you are our star on Friday nights.... always telling us the upcoming events and always pulling us together for the traditional group shot.  Thank you sir, for all you do for us!


Thank you for stopping by today to enjoy my work with me.
Serving a Risen Savior,
Pam

This posting will appear on the following sites:

Wednesday, May 30, 2018

Add A Little Western Touch

Today's featured card is the Whimsy Stamp Company, Country Style by DoveArt.  
This line of stamps are very detailed and really take a lot of concentration to follow to completion.  But when done ~ it is well worth the extra time to me.


After Copic coloring I used a simple stitched circle die on the colored image and then a straight edge circle die for the matting.  I matched the card background with the color of the blanket, then mounted a frayed edge piece of burlap and the image.  I used my thread to make a rope and secured just above the red coordinating button.  The 'tread' in the button is actually a thin piece of the background paper... one of my scrapbooking tricks!

Since this turned out to be 5 1/2 x 6", I also made a coordinating chocolate brown envelope.  This card is now at The Gallery, in Newberry for sale, and is also one that can be special ordered. 

Thank you for stopping by today and I always appreciate your comments.

Serving a Risen Savior,
Pam

This posting will appear on the following sites:

Monday, May 21, 2018

Monthly Envelope Challenge ~ Cheers

As I have written several times before, the card swapping group that I am in does a monthly 'envelope' challenge.  Everyone receives the same envelope of goodies from the monthly hostess and must use some of all the items and we are allowed to add two items.  

Our May Hostess, Cindy, sent out these supplies for this month's challenge.

Quite an assortment of supplies!  We are always grateful when things coordinate too.  Here is my finished product ~ 


I used the green flower to die cut the bottle top and glasses, the white flower for the wine in the glasses and the circle tag to die cut the smaller tag.  The piece of string is inked and used to tie on the tag. I scored the tag to make a wine bottle tag, and used part of the decorative paper for a collar which I finished off with the pink ribbon blow.  I also added Diamond Stickles inside the wine glasses for extra sparkle and finished with adding the sequins that were included.

It was a great project ~ I wonder what you would do with those same supplies?

Thank you for stopping by today - 
Serving a Risen Savior,
Pam 

Monday, May 14, 2018

Time for the Tassel

Another happy time in our lives - GRADUATION!
Might be your child, grandchild or just a friend of the family, 
but you still want that nice graduation card to drop in the mail or hand deliver.

This year I needed to make several for display and selling at THE GALLERY in Newberry, SC when I consign my cards. I had admired the Pop Up Cap card last year on Pinterest, and decided that would be the one I'd make several of for this year.
{Note: There are several patterns on Pinterest; so I won't repeat measurements here.}
This is the finished product and the next photos show just a few details.


I had found these small metal tassels, but the twisted yarn type tassel works also.


This is a very easy cut, score and fold card and you can see...


When folded it is the standard A2 size card, which really makes it a great card!


These can also be ordered by contacting me personally.

Thanks for stopping by today ~ may your day be blessed!
Serving a Risen Savior, 
Pam

This posting will appear on the following sites:

Tuesday, May 8, 2018

Live Life in Full Bloom

Today's featured card was used as a birthday card but is generic enough that it could have been sent for encouragement, graduation, or even a wedding.

The image is Prefer to Smile, a Unity Stamp by designer Angie Blom. 

After Copic coloring I added yellow metallic ink over the dots to add some sparkle and then used the Gina Marie Double Stitched In and Out Oval die set. I used a coordinating multi dotted paper for the background and mounted the completed project on an A2 card base. I purposefully didn't add any ribbon or additional items as I wanted the focus to be completely on the single yellow rose.

Thank you for stopping by today ~ I welcome your comments.

Serving a Risen Savior
Pam

This posting will also appear on the following sites:

Monday, May 7, 2018

A Peak At My Crafting Nest

I've now been in my new home about six months and am so very much enjoying having a little more space and a great screened in porch looking out from my little cove onto Lake Murray.

Many of you have shown your crafting areas, so I thought I would take today blog to show you mine.  I think we all arrange and re-arrange trying to maximize our space and organize our endless supplies. I'm not where I want my room to be, however change is good and I just keep working at it.

First my desk / crafting area, a large 3' x 5' solid wooden table.  At the top, I am reminded daily that Christ strengthens me.  I am working hard at I don't have to have everything where I can touch it.  My Copics (or Twins as they are called ) are always nearby.
To the left (not shown) is a small table with my computer, printer and my Cameo that sadly remains covered. 


To my right, my next favorite sign ~ Do What you LOVE what you do.  I am so blessed to be able to craft and do photography daily. 


I love the three tier roller cart that one of my girlfriends gave me.  It holds basic tools in the top, specialty pens and inks on the second shelf and stamped images and card fronts on the bottom shelf. 

The wooden storage rack was built by my Dad, and it is perfect for my general stamp storage.  I use the 12 x 12 x 1 plastic paper carriers by Akro-Mils, and sort my stamps by subject.  Individual stamps are packaged in small zip locks in each case.  

All my white card stock is stored in the small file cabinet with my postage supplies on top and then a large basket that holds most of my 6 x 6 papers and coordinating paper pads.

I still enjoy the clock that I made as a Unity project last fall.  I colored and added Sunset Promise to the clock face.  

On the next wall ~ 


On the door to my room, I have the ladder storage, which holds cards that have been completed and are ready for selling.  The brown frame is one of the Creative Memories display frames, which I use to display cards in progress or some inspirational piece.
My cutting board (which must be 105 years old!) is on top of my general file cabinet.  My second roller cart is next with all my scrap paper sorted by color on top.  New stamps or supplies that need to be repackaged or entered into Evernote go on the second and third shelves.  

One more wall~ 


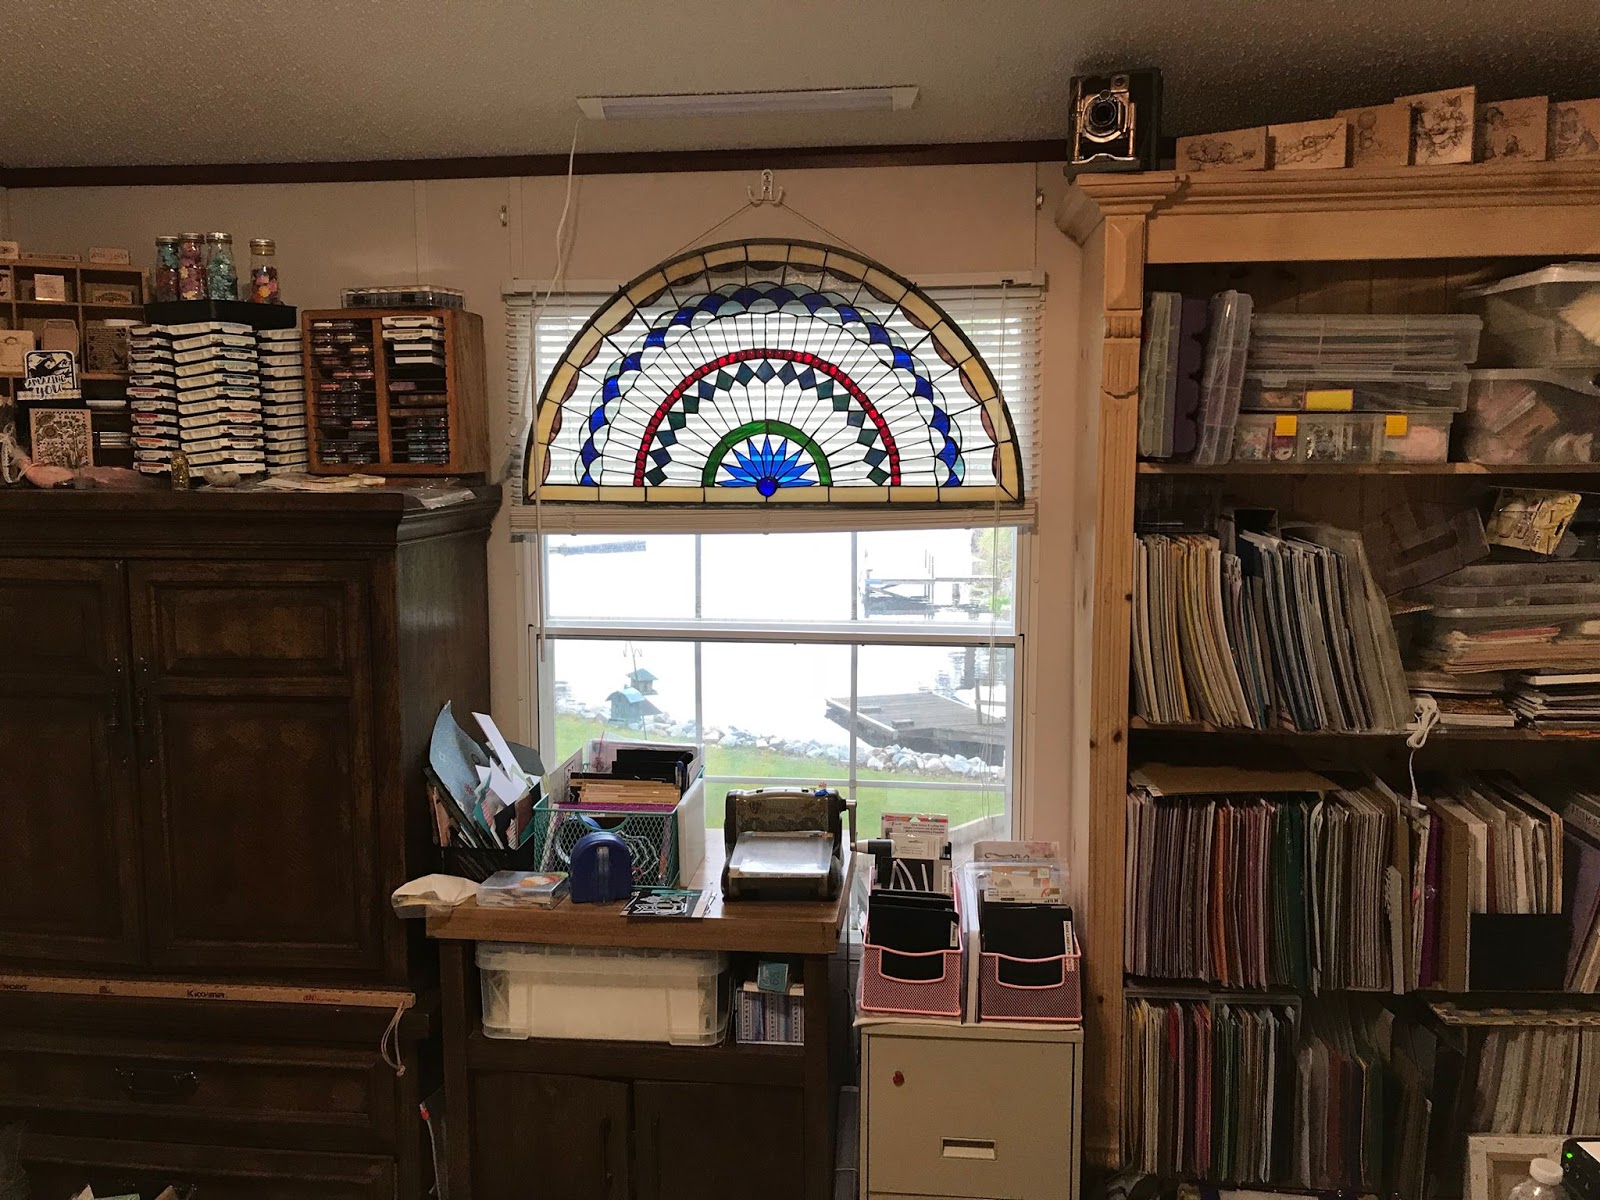
I have a huge cabinet to the left of the window.  Most of the items in it are not used on a daily basis.  On top is a small display of a few wooden stamps I've held on to, my Stampin Up ink pads and my Quick Quotes Chalking pads.

In the center of course is my wonderful lake view while I work.  
Directly under the window is my die cutting area and also my sentiments stamps are stored on sheets by category in the small file cabinet. 

To the right is my floor to ceiling bookcase with all my 12 x 12 papers, and various embellishments on the top shelf.  My House Mouse collection is displayed on the top of the bookshelf. 


To the left of my work desk is a full size closet! It too is a work in progress, daily it seems.  I installed a Pantry storage unit on the closet door for my threads.

The storage drawers that are at the back of the closet are the items to be sold on Not Just Scraps.


Inside to the left ...


are the wonderful peach wired baskets from Target that hold all of my Unity and Whimsy stamps.  The gray drawer unit came from Wal-Mart after I saw how well my friend Ginny Maxam's had held up through several house moves.  I store my embossing folders, assorted envelopes, and miscellaneous embellishments here.  The white roller drawer unit has smaller items like buttons, brads, small flowers as well as some of my punches. 


To the right ...


I have more storage units that hold other assorted supplies as well as some 3 x 12 x 12 boxes that hold additional stamps for Christmas and Summer. 

And the last area is the storage near the ceiling where I store my scrapbook albums yet to be used along with some card making supplies that are not used daily.  As you can tell this closet is just about another room! 


I hope you enjoyed the around the room peak.  When I started card making, I seriously thought it would be less supplies needed than when scrapbooking. Boy was I wrong!  It's all good though and I am enjoying every day of my crafting.  
I'd love to see your space too and welcome your comments.

Serving a Risen Savior,
Pam 

This posting will appear on the following sites:

Saturday, May 5, 2018

Happy Birthday Unity

All of the "Unities"
(i.e. Crafters addicted to Unity Stamps)
are celebrating the TENTH birthday of this company!

After releasing a beautiful selection of new stamps this month, a great Design Team Blog Hop, AND a super sale on regular items...
their new challenge is to create a birthday card for Unity. 

For my entry I selected SUMMER GIRL, by designer Angie Blom. 


After stamping and Copic coloring, I used the Gina Marie Stitched Label die and selected You ROCK My World, (3/2010 Kit of the Month ~ Rockin' It Unity Style) and a small miscellaneous Happy Birthday tag for the sentiments.  The centers of the flowers have bright orange crystal bling and each flower is painted over the color with a clear Wink of Stella pen to add a hint of sparkle.  The card base measures 5 1/2" x 6".

I really enjoy my vast collection of Unity Stamps and continue to be amazed each month as more great images are produced.   

Happy 10th Birthday Unity Stamp Company!
You really do ROCK!  

Thanks for stopping by ~ your comments are always welcome.  
Serving a Risen Savior, 
Pam 

This posting will also appear on the following sites:

Friday, May 4, 2018

Mother's Day Flower for You!

Today's featured card is one sweet little fellow bringing flowers to you for Mother's Day!


The image is a Whimsy stamp, Flower for You,  by designer Crissy Armstrong.  After stamping and Copic coloring, I used the Gina Marie Wonky Stitched Rectangle die and matted with black card stock.  The colorful strip is also matted with black and both are mounted on a yellow A2 size card base, along with the Mother's day sentiment.

Every time I use this stamp I think about my grandson Benjamin on his first visit to my lake home. 


Guess we all have a soft spot for sweet gifts from our babies. 

Thank you for stopping by today - your comments are appreciated.
Serving a Risen Savior,
Pam

This posting will appear on the following sites:

Thursday, May 3, 2018

Happy Mother's Day Collage

Today featured card is a digital image from Gracielle Designs.  The set is called Dear Friends and this image is the Floral Collage.


After Copic coloring, I used the Pink & Main Stitched Rectangle dies and mounted on a light green 6 x 6" card base.  Although it's not showing up well in the photo, the centers are coated with Diamond Stickles.

This card is for sale at The Gallery in Newberry, SC where I consign some of my cards.  If you are local to this area, I'd love for you to pop in to see my display and all the other local artist's work that is for sale.  The Gallery is located one block away from the historic Newberry Opera House.

Thank you for stopping by today ~ your comments are welcome.
Serving a Risen Savior,
Pam

This posting will also appear on the following sites: 

Wednesday, May 2, 2018

Mouse Card Swap


Well HELLO there!  I've been missing my blogging, but after the retreat, I decided to take a few days off at the beach.  
So back to reality in the craft room, and sharing my cards.

One of the monthly swap cards that I signed up for in April was a card with a Mouse.  Fulling intending to use a House Mouse.... that stamp didn't make it in the traveling bags for the retreat.  
I did however borrow a stamp from a company I'd never heard of.  Today I'm sharing two cards using the Saturated Canary Stamp named Rattoullie.  Hmm... kinda different huh?  Guess that is what this big eyed sweet image is stirring up with her mouse friend!


Do you ever color two stamped images at one time?  This time I reversed the layers of her dress while coloring both together. Normally however, I seem to get sidetracked and finish one and not the other.  I really enjoyed using different dies on each card, giving them a totally different look.

Thanks for stopping by today - Your comments are always welcome!
Serving A Risen Savior, 
Pam

This posting will also appear on the following sites: