Monday, November 30, 2020

Lovely Winter Wishes

Today I'd like to share another Christmas card using one of  Graciellie Designs packages.  This is made with her Festive Swag Mini Digital which includes the Winter swag image and three winter sentiments.


To make this card, I sized the swag to about 4" x 3" and sized the sentiment 'Winter Wishes' to fit snuggly just above the image.  Next I printed this on 110# Neenah cardstock.  After using Copic markers for coloring, it was easy to match a solid salmon paper for the first mat and then an olive printed pattern for the second mat.  For the image and the salmon paper, I used the Penny Black Elegant Stitching die set for the edges and for the olive patterned paper I used Quickutz Nesting Frame 7, Cookie Cutter Dies for the edge.  For the card base, I selected a lighter shade of olive green and used it with the left side fold orientation.   After securing the tilted layers, I added the brown twine and bow along with the three enamel dots to complete the card. 

Thank you for stopping by today.  I enjoy sharing my work with you and invite you to “Follow” my blog and to visit my site ~ “Not Just Scraps” on Facebook ~ where you can purchase my cards.


I’ll be entering this card in the following challenges: 

Merry Little Christmas Challenge #28 

Scribbles Design Challenge #94  Layer It Up 

Gem of a Challenge ~ Week 24 

Allsorts ~ Challenge #600 ~ Christmas Flowers & Wreaths 

Festive Friday ~ Challenge FF0073 

Creative Knockouts ~ Christmas Knockouts #328 


Serving a Risen Savior,

Pam

 Products Used:


Friday, November 27, 2020

A Star is Born

 Good morning and welcome to a new week (47) at the Colour Crazy Challenge Blog.  

Our sponsor for this week is All Dressed Up and I have selected 'A Star Is Born' for my Design Team project card.


To make this Christmas card, I sized the image to about 2" wide by 3 1/2" tall and printed it on Neeneh 110# cardstock.  I used my Copic markers for coloring.   I used the Penny Black Elegant Stitching die set for the edging on the colored image and on the coordinating solid blue mat.  I also cut a solid red liner mat that is about 1/8" larger than the colored image.  

For the sentiment, I stamped 'O hear the angel voices' from the Altenew, Lyrical Script set.  Then I used the Gina Marie Designs Fishtail Banner Die (discontinued) for the sentiment and added a red liner to that piece also.  I layered all of these on an A2 white card base and completed the card with a small die cut angel.

Thank you for stopping by today.  I enjoy sharing my work with you and invite you to “Follow” my blog and to visit my site ~ “Not Just Scraps” on Facebook ~ where you can purchase my cards.  Be sure to check out the Colour Crazy Challenge Blog and the Sponor's site also!


Wednesday, November 25, 2020

Okay! Light the Candles!

I thought we'd take a little break from the Christmas cards today and see a Birthday card from one of my card swaps. 

The two packages for this card came from Art Impressions,   Fire Out and GF Birthday Cake ~ which included the "Okay! Light The Candles!" sentiment. I've had this stamp over two years and still enjoy using it every time I pull it out. 


I stamped each of these images on 110# Neeneh cardstock leaving about 2" between each image.  I used my Copic markers for coloring. The Whimsy Stamps Pierced Trio Border Die was perfect  to get the seamed vertical wave piece with the sentiment and crazy cake to go along the left side of the card front.   I covered an A2 card base with orange vellum paper and added the lady (which had been fussy cut out) by securing her at her feet and adding several foam dots behind her arms and head to give her a little dimension.  This would have also been a cute design to make the lady into a wobble card!

Thank you for stopping by today.  I enjoy sharing my work with you and invite you to “Follow” my blog and to visit my site ~ “Not Just Scraps” on Facebook ~ where you can purchase my cards.


I’ll be entering this card in the following challenges: 

Crafty Sentiments ~ #24 Anything Goes 

Retro Rubber ~ #148 They Say It's Your Birthday 

Lil Patch of Crafty Friends ~ Challenge #146 

A Bit More Time to Craft ~ Challenge #128 

Crazy Hazelnut Patterned Paper ~ Challenge #11 

A Gem of a Challenge ~ Week 24 

Sweet Stamping ~ Challenge #11 Birthdays 

Art Impressions ~ Border Challenge 


Serving a Risen Savior,

Pam

Products used:


Tuesday, November 24, 2020

A Stocking Full of Happiness

Today I'd like to share another Christmas card I made this past weekend.  This one is using an image from Bugaboo Stamps called Candy Cane Stocking 


I sized the image to about 2" wide and 4" tall and printed on 110# Neenah cardstock.  I used Copic markers R29, R37, G07, Y15 and W2 for coloring.   I wanted a bold masculine look for this  card, so I selected a coordinating green plaid and used the Memory Box Matinee Rectangle Layers Die set for both the colored image and plaid background.  I mounted both of those pieces on a standard white A2 sized card base. Next I added a pre-printed Happy Holidays banner to the top of the card.  Lastly, I added a little Diamond Stickles around the 'fur' of the stocking and the sparkles around the image.

Thank you for stopping by today.  I enjoy sharing my work with you and invite you to “Follow” my blog and to visit my site ~ “Not Just Scraps” on Facebook ~ where you can purchase my cards.


I’ll be entering this card in the following challenges: 

Bugaboo November BINGO Challenge 

A Bit More Time to Craft ~ #128 

Cards Galore ~ November Challenge  

Sweet Stampers ~#50 Christmas 

Creative Craft Challenge # 34 

CCC Digi Creations ~#120 Christmas is on it's way


Serving a Risen Savior,

Pam

Products used:


Monday, November 23, 2020

Skate Our Way Through the Holidays

Happy Monday!  Today I wanted to share with you several cards and tags that I made this weekend as I played with the ice skates from Polka Dot Orchard's Merry ChristMouse package.  I love the vintage look of this image drawn by artist Jeanie Hayes and wanted to try it with several different backgrounds and other papers.  

I'll walk you through a few of the details of each of them.


 Starting at the top center - This one is a collaboration with Gracillie's Design - Cheery Christmas.  


I sized the wreath to about 4" and then added the skates to the center and the sentiment to the bottom right corner.  After printing I used my Copic markers for coloring and the Tattered Lace Lacy Days die for the edging.  I covered the card base with a red, black and silver plaid cardstock and secured the image slightly tilted to the left.  I added a small holly die cut branch on the top corner to complete this first card.

The second card is on a kraft 5" card base with a black liner then a vintage mat.  I added the green patterned paper that was die cut with the Gina Marie Designs Pointed Oval die (discontinued) then the skates that I fussy cut out after lightly coloring with Copics W2 & R01.  After securing the sentiment and all the other elements, I added a thin layer of glossy pen to the blades of the skates to complete card 2. 


The small tag in the center bottom was cut using Nellie Snellen Multi Curved Tag die is also Copic colored using W2 and R01 with C4 for the blades. It has a miniature holly and berries die cut added to the bow,  The tag is die cut out of black and cream plaid and a black organza ribbon was added to complete this tag.

For the larger tag to the left, after coloring, I lightly chalked a bit of stenciling behind the skates and then die cut the Gina Marie Designs X-stitched rectangle edging.  I added two die cut silver snowflakes to the top layer.  Next I die cut the top edge of a purple and also a red dotted tag, then layered them and tied with a lavender organza ribbon. 

Thank you for stopping by today. I hope these four examples will give you some new ideas of ways you use these cute skates. I enjoy sharing my work with you and invite you to “Follow” my blog and to visit my site ~ “Not Just Scraps” on Facebook ~ where you can purchase my cards.


I’ll be entering this card in the following challenges:

CD Sunday ~ Challenge #49 Anything Goes 

Crazy Hazelnut Patterned Paper ~ Challenge #11 

My Little Christmas Challenge #28 

Sweet Stampers ~ Challenge #50  Christmas 

Polkadoodles ~ Challenge #47 

52 Christmas Card Throwdown ~ November


Serving a Risen Savior,

Pam

Products Used:


Friday, November 20, 2020

The Amazing Things You Do

Today I'm here with the Colour Crazy Challenge Design Team and a new challenge.  Our sponsor this week is Knitty Kitty Digis, an Etsy based business from the UK.  They have some amazing Digis that I hope you will check out this week.

For my Design Team card I have selected one of the Build a Snow Scene Quintuples ( Florentina, Felicia, Fifi, Flavia and Francine).  Here's my completed card and then a few details about how I made it. 


 After printing the image on Neenah 110# card stock, I colored her with my Copic markers and then added an icy cold water stream with an iceberg scene and several low hanging wintery clouds. I am not an artist but had previously completed a similar background during a Whimsy Stamp Company retreat under the instructions of Canadian Artist Crissy Armstrong.  What a talented and patient teacher she is!  

After completing the coloring,  I used Pink & Main's Stitched Top Note die for the gray background and mounted both on a sky blue 5 1/2" square card base (with the fold on the left side).  I completed the card with a purple organza double bow and a tag  ~ You Are Amazing!  

Thank you for stopping by today.  I enjoy sharing my work with you and invite you to “Follow” my blog and to visit my site ~ “Not Just Scraps” on Facebook ~ where you can purchase my cards.


I’ll be entering this card in the following challenges:

AUD Sentiments ~ #264 Winter Animals 

Creative Knockouts ~ #377 Winter Wonderland 

The Paper Shelter ~ #450 Digital Image 

Digi Chooseday ~ Week #46 

The Artsy Stamper ~ #28 Critters 

A Perfect Time to Craft ~ November (11) 

Bastel - Traum ~ #95 Winter 

Crafty Animals ~ Challenge #44 

Creations in Pink ~ Challenge #28 

QKR Stampede ~ Challenge #408 

Classic Design Team Challenge #11, November


Serving a Risen Savior,

Pam

Products Used:


Thursday, November 19, 2020

Fall PEAR - Fection

For my second card today, I wanted to share another card made with another Jan's Digital Stamp image.  This time I've used Fall Pear-fection.  The package comes with four color drawings, four black and white drawings and six sentiments.

Here's my finished card and then a few steps on how I made this card.


I pulled in the black and white image into my card front template and centered the sentiment under the jug on the card front template.  I printed the card front on Neenah 110 # card stock and used my Copic markers for coloring.   I used the Memory Box Matinee Nesting Rectangles to die cut the edges of the colored image.  I covered the white A2 card base with a solid yellow mat, then added an olive green 1/4" smaller mat, followed by 1/4" smaller burgundy matting.  Lastly I added the colored image layer to complete the card. 

Thank you for stopping by today.  I enjoy sharing my work with you and invite you to “Follow” my blog and to visit my site ~ “Not Just Scraps” on Facebook ~ where you can purchase my cards.


I’ll be entering this card in the following challenges: 

Scribbles Designs Challenge #94 ~ Layer it Up 

Lasting Memories ~ 524, Photo Color Challenge #3 

Inkspirational Challenge #226 - Frame It 

Digi Chooseday ~ Week 46 

Make Mine Monday ~ #135 Elegant Fall/Autumn 

The Paper Girl Challenge # 212 ~ Thankful


Serving a Risen Savior, 

Pam


Products Used:


Sweet Christmas Wishes for You

Every time we get to the middle of the month posting for Jan's Digital Stamp Design Team, I have to just stop and wonder where has the month gone.  This month and the next will surely fly by for all of us!  While most of us can easily agree that we won't miss 2020 and all of the issues it has brought with it, we will sure be cautious as we head into another year of unknowns going into 2021. 

I hope you are like me as we prepare for the best time of each year - preparing for the Christmas Season and the honoring of the birth of our Savior's birth, the Christ Child.  I for one, love to decorate my home and prepare for additional family time and church festivities.  I love the extra time I spend making over 50 handmade Christmas cards and around 35-40 handmade Christmas ornaments.  What kind of traditions do you do during this time of year?

For my Design Team card today on Jan's Digitial Stamp Shop, I have selected her new release Candy Cane Basket.  This package contains  4 color drawings, 5 B/W drawings, and 11 sentiments.  

Here's my completed project card ~ 


To make this card, I enlarged the image of the basket to about 3" square and printed it on Neenah 110# card stock.  I printed the sentiment in a separate area, making it about 1" tall x about 1 1/2" long.  

I die cut the sentiment using a small tag die and set it to the side.  I also die cut the curved scalloped edge piece using a solid green strip and set to the side.

  • I colored the Candy Canes in the basket with my Copic markers using 3 shades of red ( R05, R27, R46) and 3 shades of green, YG67, YG65, YG63.  For the basket, I used Copic colors E21, E23, E25, E27, E18, E19, & E07. 

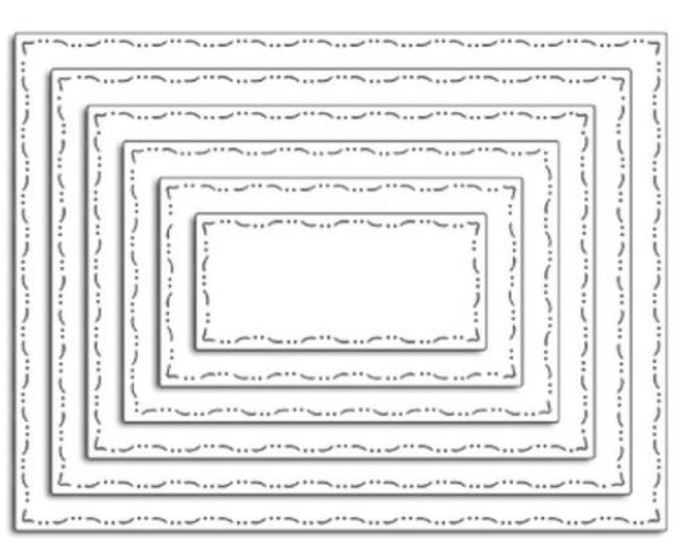
When complete, I die cut the edges using Nellie Snellen Multi Frame Booklet Square Die.  I selected a striped background matting that was the same shades of red and green that I'd selected for the card front, and covered the front of the white card base.  I secured to the A2 size card front,  Next I added the colored image slightly to the right side of the base.

Next I added the Copic colored image to the right edging end of the card base, and overlapped with the green die cut strip of solid edge binding paper.   I secured the sentiment tag over the decorative edge and glued it in place so that the tag punched end is toward the basket handle. Once secured, then I added the tiny green enameled dot over the tag 'hole' to complete the card design. 

Jan has TWO specials for November - first there is a TURKEY coupon ~ $1 off your Digi Purchase 


To use this coupon:

* Sales Starts NOW, Ends 12~31~20, Ends 12-31-2020, 

Good for one stamp/purchase per person

*USE Coupon Code: Turkey$1

But wait  ....  There's MORE!!!

Jan is also offering a FREEBIE to all her readers and blog players!

Visit the Shop (Click HERE) and get your FREE Christmas Ornaments Image!

Be sure to add your card to Jan's Challenge this month - Here's the link for her Blog Challenge:  HERE  

Thank you for stopping by today.  I enjoy sharing my work with you and invite you to “Follow” my blog and to visit my site ~ “Not Just Scraps” on Facebook ~ where you can purchase my cards.

I'll be entering this card on the following challenges: 

Tuesday Taggers ~ Traditional Christmas Colors 

Tuesday Throwdown ~ #469 & #470 

Creative Craft Cottage ~ Challenge #135 

CCC Digi Creations ~ Challenge #120 

12 Months of Christmas ~ Challenge #71  

World Wide Open Design Team Challenge ~ #11 

52 Christmas Card Throwdown ~ November Colour Challenge


Serving a Risen Savior,

Pam


Products Used:

Candy Cane Basket


Wednesday, November 18, 2020

I Will Praise the Name of God

Today I'm back with my second card as the Guest Designer for Word Art Wednesday.  This weeks sponsor is Sugar Pea Designs and the winner will be receiving a $25 gift certificate!  I hope you can take the time to check out their designs and also enter your handmade cards on this week's Word Art Wednesday challenge for your chance to win!

For my posting today, I've used Shepherds Singsong by Di's Digital Stamps.  Here's my completed card and a few details.


I sized the image to about 3" square and placed it in my card front template.  Then I sized the sentiment from Psalm 69:30 to about 1-1/2" x 4" and changed the font color to a deep purple.  


I placed the sentiment in a different area of the card template and then printed both sections of the card on Neenah 110# cardstock.  I colored the shepherd boys with my Copic markers and then die cut the image using Pink & Main's Stitched Top Note Die.  I covered a 5-1/2"  square card base with a deep solid aqua cardstock.  I trimmed another aqua piece (with white dots like snow) about 4" wide x 5-1/2" tall, using a scalloped edge die, and mounted that down the center of the card base.  Next I die cut the sentiment using a stitched fishtail die and added that to the card base on the right side near the edge of the card front.  Then I added the image to the top left of the card front. I completed the design with a double organza bow across the top.

Thank you for stopping by today.  I enjoy sharing my work with you and invite you to “Follow” my blog and to visit my site ~ “Not Just Scraps” on Facebook ~ where you can purchase my cards.


I’ll be entering this card in the following challenges: 

Di's Digi Challenge ~ Use a Digi Image 

Sweet Stampers ~ #50 ~ Christmas 

Sheepski Designs ~ #44 ~ Christmas 

Pearly Sparkles ~ #51 Christmas/Winter Critters 

Merry Little Christmas ~ #28 November Anything Christmas 

Daisy Chain Challenge ~ # 47 Christmas is Coming 

CCC Digi Creations ~ #120 Christmas is on it's way 


Serving a Risen Savior,

Pam


 Products Used:

Di's Digi, Shepards Singsong