Sunday, October 31, 2021

Have a WITCHY Halloween

Sending out lots of wishes for happy Trick or Treaters this weekend and especially tonight.

Sharing the card I made for my daughter using a C. C. Designs, Swiss Pixies Halloween image.


 The card is a 5" square base made out of orange cardstock with  the 'batty' paper matting cut 1/4" smaller.  I colored the witchy girl with my Copic markers and used the negative strip from a star die for the stenciling star work.  I added a black 1/8" mat behind the completed image then secured all layers to the card base to complete the card.

Thank you for stopping by today to view my blog.  I enjoy sharing my work with you and invite you to “Follow” my blog and to visit my site ~ “Not Just Scraps” on Facebook ~ where you can purchase my cards.


I’ll be entering this card in the following challenges:

 Sweet Stampin' ~ All Hallow's Eve 

Creative Cottage ~ Challenge 145 ~ Autumn/Halloween


Pam's Pearls 


Products:


Friday, October 29, 2021

Sending You Vampy Wishes!

Today I'd like to share the Halloween card I made for my grandson.  This design is from C. C. Designs, and it's named Vampy Wishes. I purchased it after Halloween last year, so I believe it may have been discontinued.


 It's such a great image, especially for boys of all ages!  

For this card I simply stamped the vampire and bat on Neenah 110# cardstock and then used Copic markers for coloring. I used Whimsy Stamps Stitched Zig-Zag die for the edge.  Then I added a black liner mat and the 'So Spooky' brad.  

The card base is an A2 standard size with a purple patterned paper mat.  I secured the image and mat at an angle to the card base, then finished the card with a black twine webbing on the fold side. 

Thank you for stopping by today to view my blog.  I enjoy sharing my work with you and invite you to “Follow” my blog and to visit my site ~ “Not Just Scraps” on Facebook ~ where you can purchase my cards.


Wednesday, October 27, 2021

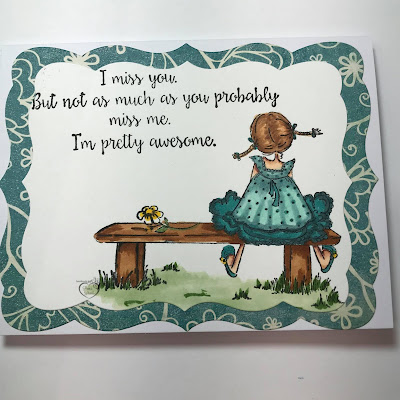
I Miss You

 Today's card is from Stamping Bella and I've done it in monochromatic shades of aqua greens. 

This cute little pig-tailed girl is from the Tiny Townie Set Amanda is Awesome, which includes the sentiment.


After stamping on Neenah 110# cardstock, I used Copic markers for coloring.  I selected Gina Marie Designs Label Three for the decorative edge of the image and the matting.  Both are mounted on a standard A2 sized card base.

This basic CAS card was quick and turned out super cute.  Thank you for stopping by today to view my blog.  I enjoy sharing my work with you and invite you to “Follow” my blog and to visit my site ~ “Not Just Scraps” on Facebook ~ where you can purchase my cards.


I’ll be entering this card in the following challenges:

Crafty Sentiments ~ New challenge 

Lemon Shortbread ~ Challenge 157 

Through the Craftroom Door ~ Week 26 

Crafters Castle ~ October ~ Challenge 46 


 Pam's Pearls


Copics:Bench: E33, E37, Flowers: Y18, YG93, Grass: YG63, YG61, YG95, YG67, Dress: BG70, BG72, BG57, BG75, BG11

Products:


Tuesday, October 26, 2021

Masculine Challenge ~ His Mercies Are New Every Morning

I think a lot of crafters would agree that masculine cards in general are a challenge.  My added challenge this weekend was that my craft room is totally packed up for home repairs.  But I was blessed with a few hours of crafting time with friends and pulled out several envelopes of single card kits that I'd received quite some time ago.

As I worked through the sorting of the papers, ribbons, and sentiments I was reminded how generous this friend as always been with sending out such nice Happy Mail.

I selected two pieces from the combined stash and added some of my own to make today's Masculine Card.


 The silhouette of the fisherman is printed on thick cardstock, I added the Copic coloring water shades and sunrise/sunset shades and die cut the stitched edge.  The Scripture from Lamentations 3:23 was also in the gifts.  I added the peach stars background paper and mounted all of the elements onto a standard A2 Bright Blue card base to complete my card entry. 

Thank you for stopping by today to view my blog.  I enjoy sharing my work with you and invite you to “Follow” my blog and to visit my site ~ “Not Just Scraps” on Facebook ~ where you can purchase my cards.


I’ll be entering this card in the following challenges: 

Lil Patch of Craft Friends ~ Challenge #168 

Crafters Castle ~ October ~ Challenge #46 

Inkspirational Challenge #250 ~ For the Boys 

Krafty Chicks ~ Challenge #582 ~ CAS 

2 Sisters on the Blog ~ Challenge 55 ~ for the Men 

Perfectly CAS ~ Challenge 20 ~ Sympathy 

Word Art Wednesday 513-514


Pam's Pearls


P. S.  My craft room as of this writing - 


Monday, October 25, 2021

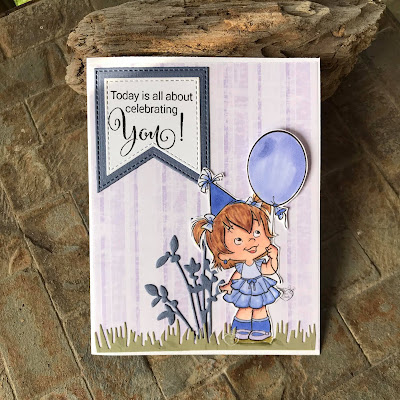
All About You!

Today I'd like to share a card I made using C. C. Designs digital design, Birthday Twilla.  This cute little girl holding the balloon is one of Roberto's Design images. 


I sized the image to about 3" tall, used my Copic markers for coloring and fussy cut around her when completed.  The card base is a standard A2 sized, with a light lavender vertical patterned mat.  From my 'bits and pieces' box I found the green grass die and the darker lavender flower stems to add to the card.  As I secured Twila onto the card, I glued her at her feet, body and head and added three small foam squares behind the balloon for dimension. 

At this point the card could be used for any occasion. Again using what I had on my desk, I added the 'All about You!' sentiment with the coordinating mat. 

Thank you for stopping by today to view my blog.  I enjoy sharing my work with you and invite you to “Follow” my blog and to visit my site ~ “Not Just Scraps” on Facebook ~ where you can purchase my cards.


I’ll be entering this card in the following challenges:

CD Sunday ~ Challenge #72 

Addicted to CAS ~ Challenge #209 ~ Purple 

Crafts Galore Encore ~ Challenge #92 ~ October 

Creative Crafters ~ Challenge #45 


 Pam's Pearls


 Products Used:


Friday, October 22, 2021

WITCH Way to the Candy?

I have to say that today's Polkadoodle Design Team Challenge was definitely unique.  I'd never would have thought of combining Monochrome with Halloween.  

But Wait until You See What We've Come Up With!   

For my project I've used Only the "N" series of Copic Markers, which are the grays to black shades.  I've selected Polkadoodles Winnie Wednesday Trick or Treat digi,   coordinating papers and sentiments which are listed specification below.  

The card has a 'Belly Band' with a Velcro dot behind the sentiment to hold it together ~ and allow access to open the card.


When you open, you find the little Trick or Treater all decked out with her kitty... and additional greeting. 


Another fun challenge and lots more of great cards over on the Polkadoodles Challenge Blog.  I do hope you will join us there. 

Thank you for stopping by today to view my blog.  I enjoy sharing my work with you and invite you to “Follow” my blog and to visit my site ~ “Not Just Scraps” on Facebook ~ where you can purchase my cards.


I’ll be entering this card in the following challenges:  

CD Sunday Challenge #71 

Classic Design Challenge #10 

Crafty Hazelnut Patterned Paper ~ October 

CCC Digi Creations ~ Challenge 120 Autumn/Fall 

Daisy Chain ~ Challenge 57 Autumn / Halloween 

Digi Doodle ~ Challenge 43 ~ Fall or Halloween 

Crafty Catz Weekly Challenge # 568


 Pam's Pearls


Copics: N0-N8

Products:


Wednesday, October 20, 2021

You Bet GIRAFFE I Love You


Popping in today to share a quick card that we made at the Fall Retreat back in September.   


As with all crafters, all items are 'available' when it comes to using in our cards, scrapbooks or other projects.  For this cutie, after covering the A2 cardbase with Giraffe skin paper, we used a colored acetate cupcake topper for the giraffe.  We simply trimmed the 1 1/4" acetate pick that was in the center, rounded it off, and covered it up with the sentiment. The sentiments were stamped from another giraffe set that we used in a different project.  Then we added the brown organza ribbon and tied it in a knot and  ~ we're done!

Thank you for stopping by today to view my blog.  I enjoy sharing my work with you and invite you to “Follow” my blog and to visit my site ~ “Not Just Scraps” on Facebook ~ where you can purchase my cards.


Tuesday, October 19, 2021

Wheels on the Bus Birthday Wishes

Today's card is a special one for a couple of reasons.  One it's for my daughter's birthday and two, it's the set I won last year from Art Impression for one of my card entries.  I've held on to it just waiting until the right time to be able to use it for my daughter. 

Here's the completed card using Art Impressions Bus Cubbies then a little more about why I selected this card. 


I'm sure many of you have fond (or not so fond) memories of your children's requests to sing the song 'Wheels on the Bus'... usually over and over and over.  Yes it was her favorite too.  But my memory is cherished because she was in a special needs class and one of the assignments was to draw 'wheels on a bus'.  Although this was a huge challenge - her drawing portrayed her classmates as normal kids - complete with wheelchairs and other adaptive equipment.  Each uniquely made as described in Psalms 139:13.  I've always held that drawing in my heart knowing these special needs children teach us more than we can ever teach them. 

This Art Impression Bus Cubbies is a fun stamp and die set to have and use.  Each stamp is easy to color and the dies line up great for cutting.  My photo doesn't capture it  - but inside the bus doors is another Koala waving! 

Thank you for stopping by today to view my blog.  I enjoy sharing my work with you and invite you to “Follow” my blog and to visit my site ~ “Not Just Scraps” on Facebook ~ where you can purchase my cards.


I’ll be entering this card in the following challenges: 

Art Impressions Blog Challenge : Planes, Trains, Auto #314 

Stamping Sensations ~ October ~ Animals Birds & Bugs 

A Perfect Time to Craft ~ October 

Classic Design Challenge ~ October 

QKR Stampede ~ Challenge 430 


 Pam's Pearls

 Copics Used:  Monkey: E30, E11, E17, Elephant: N1, N4, R20, W3, Koala: W1, W4, R20, Flamingo, R20, R11, Gator: YG02, YG03, Turtle: G40, YG06, YG17, Y32, YR24, Giraffe: YR21, YR24, YR27, Y25, Top Rack: E13, E35, E31, E37, BG45, RV02, Balloon: YG01/YG05, V20/V17, R43/R20, Bus: BG18, BG49, BG23, BG34, C4, N3, C2, W2

Products Used:


Monday, October 18, 2021

A Southern Bouquet for Your Birthday

Today I'd like to share with you one of the newer images from Jan's Digital Stamp Shop.  It's called Southern Bouquet and is a beautiful arrangement of fall flowers, berries and cotton bolls with greenery. The digital package also has two sentiment included and is currently on sale through October.

Here's the completed card I made using this digital package ~ 


I sized the image to about 4" tall and added the sentiment close to the vase.  I used Copic markers for coloring which are referenced at the bottom of this blog.  

After coloring I used a solid liner mat and then a patterned mat  and secured all three layers on a 5 1/2 " x 6" side fold card base.  The card is completed with a double loop organza bow.

I'd also like to dedicate this card to my Mom in Heaven as Friday (15th) was her 85th birthday! Not a day goes by that I don't think about her and miss her.  

Thank you for stopping by today to view my blog.  I enjoy sharing my work with you and invite you to “Follow” my blog and to visit my site ~ “Not Just Scraps” on Facebook ~ where you can purchase my cards.


I’ll be entering this card in the following challenges: 

Crafty Creations ~ Challenge 426 

Sisterhood of Crafters ~ Happy Birthday 

Watercooler Wednesday ~ Challenge 326 


Pam's Pearls


Copics: Flowers:Y15, Y19, YR20, E71, E19, Pods: E19, E17, E42, G46, Berries: R14, R37 Wine Multiliner, Fern Stems: E19, BG96, G46, Cotton: E15, N0, Leaves: YG06, G29, YG63, Vase: BG07,BG49, BG57, BG15, Shadow: BG72


Product:


Friday, October 15, 2021

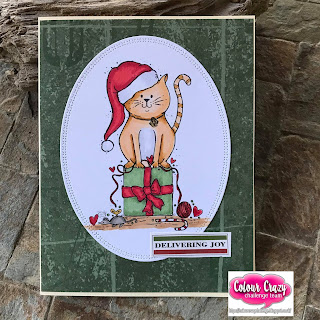
Delivering Joy

Today I'm sharing with the Design Team from the Colour Crazy Challenge Blog as we start a new week with our sponsor  ~ Angie Blom Digital Designs.  I have used her sweet kitty image from the  No Peeking Kitty package and adding to my Christmas Stash! 


 I colored with Copic markers and used an oval X-stitched die for the decorative edge when completed.  The base is a standard A2 size  with a variegated green mat added.  Next I secured the colored image to the card base.  I cut the  'Delivering Joy' sentiment tag from a scrap of paper and added it for the final touch.  I thought it was perfect - it's just what our cards do, right?   

Click HERE to hop over to the Colour Crazy challenge blog.  I hope you enjoy our DT cards and look forward to seeing yours!

Thank you for stopping by today to view my blog.  I enjoy sharing my work with you and invite you to “Follow” my blog and to visit my site ~ “Not Just Scraps” on Facebook ~ where you can purchase my cards.


I’ll be entering this card in the following challenges: 

Holly & Ivy Christmas ~ Challenge 103 

Through the Craftroom Door ~ Anything Goes 

Get Creative ~ Challenge 106 ~ Holiday 

Crafter's Castle ~ Challenge 46

Build Your Stash Holiday Cardmakers


 Pam's Pearls

Copics: Hat, Bow, Hearts: R14, R24, R27, Present: G29, Cat: YR20, YR23, YR21, C0, N0

Products: 


Wednesday, October 13, 2021

Room For You

Today I'm here to share with you this month's FREE image from 'Imagine That Digital Stamps'.  Wait! Did I just say FREE?  Yep ~ IF you are a blogger and you make a card with the monthly image and blog it - then the next month is FREE.  Just continue each month and wow!  You can sure rack up on these super cute images!!!

October's image is Lizzy's Umbrella and here's my card using part of the image and one of the sentiments. 


For my card, I wanted to focus on the cute girl and the sentiment about room for you under the umbrella.  With that in mind I decided to crop out the duck and just use her face with the umbrella background.  I placed the sentiment up close and centered under the image.  After printing on Neenah cardstock I used Copic markers for coloring.  I added a piece of black metallic micro washi tape just under the image for separation and to give a hint of sparkle when the card is turned in the light.

The card base is an A2 standard base.  I used Pink & Main's Cloudy Frame die and a light blue patterned paper to make a sky/cloud like frame and trimmed the colored image to fit inside the frame.  Once I'd secured the image to the back of the frame, then I secured them to the card front to complete the card. 

Thank you for stopping by today to view my blog.  I enjoy sharing my work with you and invite you to “Follow” my blog and to visit my site ~ “Not Just Scraps” on Facebook ~ where you can purchase my cards.


I’ll be entering this card in the following challenges:

Imagine That Digital Stamps ~ October Challenge 

Crafty Hazelnut Patterned Paper ~ October 

Crafts Galore Encore ~ Challenge #92 

Crafting Happiness ~ Challenge #116 ~ October Color 

Avenue 613 ~ Challenge #11 ~ October 

CD Sunday ~ Challenge 71

 Pam's Pearls


Copics: Umbrella: R35, BG02, Y18, V25, YR04, BG49, RV93, YG06, E19, Hair, E19, E23, E15, Bow & Shirt: R46, R22, Jacket: B21, B23, B24, Background: B000

Products:


The Magic of Christmas

As I flip through some of my Christmas digital images, there are so many that I haven't used yet...sometimes I just don't know where to start next.  It definitely is my favorite time of year for me as I shop for the Christmas images all year long!  

I've selected Jan'sDigital Stamps, Silent Night for today's card as I'm working back in some of her cards in preparation to begin posting for her Design Team again in November. 


Since I wanted the manger scene to be the center focus of this card, I sized the image to be about 3 3/4" tall and 5" wide.  Once printed on Neenah 110# cardstock, I used Copic markers for coloring. 

I used a 6" card base covered with a snowflake pattern.  I selected a burgundy 1/8" liner matting before adding the completed image to the card base.   I really like the way the snowflakes give the appearance of bright stars above the manger scene also. 

Thank you for stopping by today to view my blog.  I enjoy sharing my work with you and invite you to “Follow” my blog and to visit my site ~ “Not Just Scraps” on Facebook ~ where you can purchase my cards.


I’ll be entering this card in the following challenges: 

Get Creative ~ Challenge 106 ~ Holidays

Merry Little Christmas ~Challenge 39~ October

12 Months of Christmas Linkup ~ Challenge 52 

Build Your Christmas Stash


Pam's Pearls


Copics: Manger: E71, E74, Blanket: B12, Hair: E23, Glow: Y11, Straw: YR21, YR23, YR24, YR27

Products:


Jan's Digital Stamp Shop, Silent Night


Tuesday, October 12, 2021

God Prepares Us ~ The Male Version

Several weeks ago, I made a special beach card using one of Angie Blom's Unity Stamp Company Patience Girl with a wonderful sentiment from Sweet 'n Sassy, The Future.  Everyone loved that card combination and immediately I got a request for a 'guy' version.  I'm even hoping that maybe Angie will come out with a great guy walking on the beach stamp or digi one day!  But until then...  I dug around my stash of Unity Stamps and came up with this combination - which I hope you will love as much as I did. Plus I wanted to enter Angie's Facebook Background challenge this month! 

I've combined Unity Stamps Sunset Promise with Angie Blom's Digital P. S. I Love You, Guy.


 This one was a little tricky to combine - and there are lots of ways to do this - so as you read, don't feel this is the only way.... it's just the way I selected.

I started by masking out the girl sitting on the beach of Sunset Promise, then stamped the sunset.  Then I scanned this part as a jpg so that I could place the digital of the guy in front of the sunset and size him appropriately.  

I printed this on Neenah 110# cardstock and used Copic markers which are listed below.  When completed, I stamped the sentiment with Versafine ink.  

I used a 6" denim colored card base for this card.  I die cut the image and a black mat using the Pink & Main Stitched Rounded Square Die and secured each layer to the card base.  To finish the card, I added black twine around the top fold and a cross charm. 

Thank you for stopping by today to view my blog.  I enjoy sharing my work with you and invite you to “Follow” my blog and to visit my site ~ “Not Just Scraps” on Facebook ~ where you can purchase my cards.


I’ll be entering this card in the following challenges: 

CD Sunday ~ Challenge #71 

International Art & Soul ~ Challenge 119 ~ Use mostly Yellow & Orange 

2 Sisters on the Blog ~ Challenge 55 ~ Men's cards 

A Bit More Time to Craft ~ Challenge 145 

CCC Digi Creations ~ Challenge 130 ~ Autumn 

Daisy Chain ~ Challenge 57 ~ Autumn

Angie Blom Digital Background Challenge 


Pam's Pearls 


Copics: 

Water: BG01, BG10, BG000, BG0000, BG11, B0000, B000, B41, B60, Sand: E57, E42, E41, Jeans: B93, B95, Jacket: W2, W3, W4, W5, Shirt: G43, G24, Sun: Y13, Y15, RV00 Sky: Y95, Y32, Y21


Products: 


Monday, October 11, 2021

When You Put a Girl In A Wagon

This weekend there were two card challenges that caught my eye ~ 'pumpkins, pumpkins, pumpkins' and 'Fall/Thanksgiving'. For this challenge I was able to use Stamping Bella's 'Girl in a Wagon' stamp.  


 I used Copic markers for coloring and stamped the sentiment from a Penny Black sentiment set. 

The die cut is from Gina Marie Designs X-Stitched Oval Die and is mounted on a solid orange mat.  I added a deep aqua organza ribbon and a tiny wooden heart to complete this card. 

Thank you for stopping by today to view my blog.  I enjoy sharing my work with you and invite you to “Follow” my blog and to visit my site ~ “Not Just Scraps” on Facebook ~ where you can purchase my cards.


I’ll be entering this card in the following challenges: 

Creative Knockouts ~ #422 ~ Thankful 

Dare2bArtzy ~ Fall 3 

We Love Chocolate Baroque ~ October ~ Autumn 

Challenge Up Your Life ~ #140 ~ Pumpkins 

Daisy Chain ~ #57 ~ Autumn 

Digi Doodle Studio ~ #43  ~ Fall 


Pam's Pearls 


Copics: Card One:  Leaves & Vines: G24, G82, YG95, Girl in Wagon: E93, E95, Girl Standing BG75, BG72, BG57, BG53 Pumpkin: YR23, YR24, YR27, Wagon, E71, E74, N4, N8  

Card Two ~ Leaves & Vine:  G94, YG93, YG95, YG97, Girl in Wagon: V91, V93, V95, Girl Standing: R56, R85, Scarf: R81, R83, Pumpkin, YR12, YR18 Wagon, E33, E35, Shoes & Gloves: E37, Wheel N4, N8

Products:

Stamping Bella, Girl in Wagon

Gina Marie Designs, X Stitch Oval