Saturday, January 27, 2024

You Are Very Special

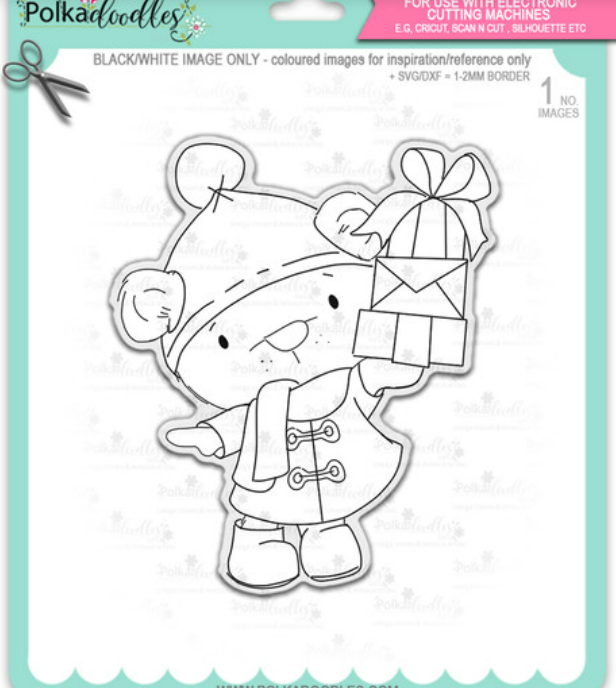
Our Polkadoodles Design Team challenge this week  was to use three different papers making which turned out to be a lot of fun!     I selected Bella Bear Lots of Parcels/Gifts and used papers from the Coffee, Tea & Cake Digital paper set 


 After Copic coloring Bella Bear, I fussy cut her out and set her aside while I made the card base.

I had printed various strips from the Coffee, Tea and Cake Digital papers, so I was able to cut these to fit the 5 x 7 card base.  I started with a solid burgundy background matting first, then added the three vertical sections.  I sized the cupcake print by measuring the bear's height to be sure the paper height would be behind her.  After securing that paper, I added a spring wobbler to the back of Bella Bear and secured her to the center of the card.   I die cut the printed sentiment and added the same solid burgundy mat behind it, then secured it at the bottom right of the card.  Lastly I added the white organza ribbon and bow at the top fold. 

This special card will be sent to my husband's aunt who is turning 90 in a couple of weeks.

Thank you for stopping by today to view my blog. I enjoy sharing my work with you and invite you to 'Follow' my blog and to visit my site - "Not Just Scraps' on Facebook - where you can purchase my cards. 

I will be entering this card in the following challenges:

Paper Funday ~ Challenge 61 ~ Let's Celebrate   

Passion for Markers~ Week 723 ~ Birthday   

Unicorn Challenge ~ Challenge 94 ~ Birthdays   ~Winner

Dream Valley ~ Challenge 308 ~ 2 or More Papers  

Make Mine Monday ~ Challenge 217 ~ Happy Birthday  


Pam's Pearls


Products  


Friday, January 26, 2024

Cupid Got it Right

I'm sharing another adorable elephant Valentine's Day card from the new release at Polkadoodles today.  This cute pair are called "Love Always" and I've made an overlapping Z-fold card with them and the new digital papers. 


 To make this card, I started by printing the elephant image and several 6" squares of the coordinating digital papers from the Polkadoodles Spring tons of Love Paper Patterns 3.  

I used Copic markers for coloring the image and Gina Marie Designs Stitched Scalloped Rectangle for the decorative edging. I also cut a second rectangle out of white cardstock using the same die, to be used inside the card.

After making the folds for the 'Z' shape, I covered each section with brown cardstock and then one of the patterned papers.  I secured the blank white rectangle to the inside back piece and then with the card folded, lined up the placement of the Elephant image over the blank piece inside.  I added the adhesive to the left half of the image and attached it to the folded card panel. Lastly I added the raised sentiment from the Spring Tons of Love Greetings/Sentiment pack and three randomly placed enamel hearts to complete my card design. 

Thank you for stopping by today to view my blog. I enjoy sharing my work with you and invite you to 'Follow' my blog and to visit my site - "Not Just Scraps' on Facebook - where you can purchase my cards. 

I will be entering this card in the following challenges: 

Lil Red Wagon ~ Challenge 740 ~ Never Been Used Stuff  

The Paper Shelter - Challenge 580 ~ Anything But a Square  

Dream Valley ~ Challenge 308 ~ 2 or More Papers  

2 Sisters on the Blog ~ Challenge 82 

Creations in Pink ~ Challenge 66  


Pam's Pearls


Copics 

Right Male: W1, W3, W5, E50, E0000, 

Left Female: W0, W2, W4, R000, N2, R56, R35


Products 


Wednesday, January 24, 2024

Be Gentle With Yourself

They say 'blog postings are going away' or they are a thing of the past.  But are they?  I've been blogging now for over eight years and things seem about the same as they were when I started.  The technology seems to be working against us sometimes as it is harder to get the blog postings to the followers.  But so many blogs have great information, wonderful ideas and fantastic freebies!

I've found that Beccy's Place is one blog posting I enjoy following.  Around the first of each month she has a monthly challenge and a free image as well.  She also has a wonderful library of tutorials for tons of fun folds and designer cards.  

Today's card is her January freebie.  Aren't these Crocus beautifully drawn!


I made this card for a dear friend who just found out she has breast cancer.  My prayers for her filled this card.

To make this card, I sized the flowers to just under 4" and printed on 110# Neenah card stock.  I used Copic markers for the coloring and then used the Tattered Lace Lacy Days Square die for the edging.  After covering the 5 x 7 card base with a lavender paper, I secured the completed flowers about 1/2" from the top of the background paper.  

Separately, I stamped the sentiment with Versa Clair black ink and used the Penny Black Elegant Stitching Rectangle die.  I added fun foam to the back before securing the sentiment in the bottom right corner of the card front, overlapping the flowers slightly.  

No bow for this one - I didn't want to take away from the flowers.

Thank you for stopping by today to view my blog. I enjoy sharing my work with you and invite you to 'Follow' my blog and to visit my site - "Not Just Scraps' on Facebook - where you can purchase my cards. 

I will be entering this card in the following challenges: 

Beautiful Blossoms Challenge  ~ Winner

Birthstone Challenge #7 - Garnet/Amethyst 

Daisy Chain ~ Challenge 81 ~ No Designer Paper  

Let's Craft & Create ~ Challenge 203 ~ Penny for your thoughts  

Pearly Sparkles ~ Challenge 91 ~ CAS  

Beccy's Place ~ January Challenge


Pam's Pearls


Copics 

V12, V15, V17, Y19, G43, G46

Products 


Tuesday, January 23, 2024

Chocolate Surprise

By the time Valentine's gets here in February, it probably won't be as cold here in the south as it has been this week! Since I'm starting to share my Valentine selection for 2024, I thought today would be perfect for this Whimsy Penguin Chocolate Surprise card.


If you're a follower of Whimsy Stamps, you know without looking at the product description, this one is drawn by Crissy Armstrong.  Her penguin collection is amazing and this one is just as cute as all the rest of them.  Be warned, they are a bit habit forming if you pick up a couple. 

This is Copic colored and then die cut with Penny Black Elegant Stitching Rectangle die for the pretty edging.  I mounted the heart patterned paper on a standard A2 card base and added a 1/2" strip of coordinating aqua cardstock across the center horizontally.  Then I secured the completed image in the center and added the random tiny bling dots to complete the card design. 

Thank you for stopping by today to view my blog. I enjoy sharing my work with you and invite you to 'Follow' my blog and to visit my site - "Not Just Scraps' on Facebook - where you can purchase my cards. 

I will be entering this card in the following challenges: 

Critter Crazy ~ Challenge 82  

Day of the Month Card Club ~ Challenge 59 ~ Penguin Awareness  

Creative Fingers ~ Challenge 269  

CD Sunday ~ Challenge 125


Pam's Pearls


Copics 

Hat & Scarf: BG45, BG49, BG53, BG57, Heart Box: R27, R29, Bow: R83, Penguin: Y0000, N2, N4, N6, Snow: B60  

Products 

Whimsy Stamps, Penguin Chocolate Surprise

Penny Black, Elegant Stitching


Monday, January 22, 2024

Snuggly Love

Today's image is from Polkadoodles newly released Tons of Love Valentine Elephant Bundle.  I've used 'Love You Elephant' to create this 'wobbler' card.


I colored the image with my Copic markers and then hand cut around the image and set it aside.  

Using the Memory Box Scallop Pinpoint Circle Frame, I die cut the delicate white frame first.   After printing the pink heart digital paper (also in the new release bundle, #29), I trimmed it to fit the A2 card base and glued it to the front.  I used a standard circle die cut that was slightly larger than the center cut of the Pinpoint Frame, and cut the front of the card base where I wanted the colored image to go.  Then I added a tiny glue line on the card front around the edge of the cut opening and secured the Pinpoint frame to the front of the card. 

Using the circle that was removed, I added the 'wobbler' piece to the center and to the back of the cut out image.  Once secured, I lined it up inside the card, testing by closing and opening the front of the card to be sure it was in the right location.  After lightly marking a few dots around the circle, I was able to add the glue to secure the circle wobbler to the inside of the card so that he peeks out through the open window of the front. 


Certainly not the best video... but turned out super cute! 

Thank you for stopping by today to view my blog. I enjoy sharing my work with you and invite you to 'Follow' my blog and to visit my site - "Not Just Scraps' on Facebook - where you can purchase my cards. 

I will be entering this card in the following challenges: 

A Perfect Time to Craft ~ January Challenge 

Crafty Animals ~ Challenge 79  

Creative Crafters ~ Challenge 72 

CD Sunday Plus ~ Challenge 125

Pam's Pearls


Copics 

E40, E41, E42, E43, N1, N3, R000, V000, RV93 

Products 


Friday, January 19, 2024

Sending Prayers

Today I'm sharing another floral image from Kit & Clowder's 2023 Advent daily images.  These lovely crocus were from Day 13.


 I started by sizing them up to just under 4" tall and layering the sentiment 'Sending Prayers' close to the open flower on the right.  

After printing on 110# Neenah cardstock, I used my Copic markers for coloring.  The beautiful die cut edge was done using the Tattered Lace Beaded Chain Square Nesting die.  I cut a purple mat slightly larger than the die cut edge and secured the two together.  

The card base is a 5 3/4" square, top fold and I covered the front with a deep olive card stock.  Then I secured the image in the center of the base.  I elected not to add a bow since I didn't want to distract from this image.  

Thank you for stopping by today to view my blog. I enjoy sharing my work with you and invite you to 'Follow' my blog and to visit my site - "Not Just Scraps' on Facebook - where you can purchase my cards. 

I will be entering this card in the following challenges:  

Word Art Wednesday ~ Week 631-632 

Crafting from the Heart ~ Challenge 8 

Beautiful Blossoms ~ January Challenge 

Daisy Chain ~ Challenge 81 ~ No Design Paper  


Pam's Pearls


Copics 

 Flowers: V12, V15, V17, Y18, YR27, Leaves: YG61, YG63, YG67


Products 


Wednesday, January 17, 2024

Raised Roses

Today I'm sharing a birthday card I made for a lifetime girlfriend.   After working with Missy for many years, we continued to keep in touch when I retired and left that area.  You can imagine how surprised and thrilled I was to find out years later that she and her husband had moved to this area upon their retirement!  Now we get to continue our friendship and take advantage by having a play day once a month devoted to crafting together. 

For her birthday card, I've used the flower from Day 10 of Kit and Clowder's 2023 Advent calendar.   I've also used Cheery Lynn's Lattice Die 2 for the background. 


I started by sizing the flower for an A2 card and coloring it with Copic markers.  As you can tell that's not what direction it went in from there.  Next, I decided to hand cut it out and went on the hunt for a vintage type paper for the background.  

After selecting the floral, I used the lighter mint green cardstock for cutting the Cheery Lynn Lattice 2 die.  With the 2" strip left from cutting the die (the piece was 6" square), I stamped the Happy Birthday sentiment and heat embossed it.  I used a tiny decorative die for that sentiment and added fun foam to the back of the completed tag. 

I'm not a card maker that is set on making every card an A2 size.  The floral background piece was also 6" square so I added the lattice about 1/2" from the edge of the floral piece.  Then I cut the right side the same 1/2".  I added foam behind the top third of the rose and added glue to the backside of the foam and to the flat part of the rose.  Then I secured the rose near the center of the lattice work making sure none of the foam was showing.   Lastly, I secured the sentiment in place, in the bottom right hand corner of the card front to complete her card. 

Thank you for stopping by today to view my blog. I enjoy sharing my work with you and invite you to 'Follow' my blog and to visit my site - "Not Just Scraps' on Facebook - where you can purchase my cards. 

I will be entering this card in the following challenges:  

Unicorn Challenge ~ Challenge 94 ~ Birthday  

Make Mine Monday ~ Challenge 217 ~ Happy Birthday 

Beautiful Blossoms ~ Birthday Celebration 

Beautiful Blossoms 1st Birthday Challenge 

Creations in Pink ~ Challenge 66  

World Wide Crafters and Colourist ~ Challenge 13


Pam's Pearls


Copics  

Rose: R81, R83, R85, R56, Leaves: G46, YG63, YR24


Products 


Tuesday, January 16, 2024

Our Deepest Sympathies

Our second sponsor for the Classic Design Challenge for January is Go Ha DigitalI've selected the lovely floral frame called 'Digital Stamp - 2EUR' for my design team project. 


 I sized the image to about 4" and layered the sentiment in the center of the design.  After printing, I colored the image with my Copic markers.  

I selected a 6" card base and covered the front with the light green patterned paper and then secured the completed image in the center.  With this being a sympathy card, I elected not to add a bow or additional embellishments. 

Thank you for stopping by today to view my blog. I enjoy sharing my work with you and invite you to 'Follow' my blog and to visit my site - "Not Just Scraps' on Facebook - where you can purchase my cards. 

I will be entering this card in the following challenges: 

Beautiful Blossoms ~ Challenge #13   

Crafts Galore Encore ~ January Challenge  

Creative Crafters ~ Challenge 72


Pam's Pearls


Copics 

Flowers: R35, R37, R39,  R49, Leaves:  YG41, YG63


Products 


Monday, January 15, 2024

I Toad-aly Love You!

Today I’m posting with the Design Team on the Classic Design Challenge Blog as we kick off the January Challenge with a new Team Lead, new Team Members and an entire new look!

We have two sponsors this month also!  I’ll be sharing my card from GoHa Digital later this week, but today I’m sharing my project card using ‘Little Eleanor and Baby Pickles Ballet Dancing’ by Colour of Love.


 My image is sized to about 4” tall and I typed the sentiment separately. 

 Our optional twist for January is ‘Blue and White’.  I tried to stay close to the color challenge but green just kept popping in!  Then I couldn't pass up the frog paper, but kept it to a minimum.   

After I completed the Copic coloring, I used Gina Marie Designs. Label 3 for the pretty decorative edges.  I cut the sentiment with a stitched banner slimline die and added the coordinating solid green which I hand cut.

The top fold card base is 6" and I secured the blue dotted Swiss paper to the card front, then added the layers as shown.  I added a layer of fun foam behind the sentiment before attaching to the top of the card to add a little depth.  I really like the way this one turned out.

I hope you'll flip over to the Classic Design Challenge to see all the Design Team's cards and enter yours too.  Be sure to come back to see my other sponsored card by GoHa Designs. 

Thank you for stopping by today to view my blog. I enjoy sharing my work with you and invite you to 'Follow' my blog and to visit my site - "Not Just Scraps' on Facebook - where you can purchase my cards. 

I will be entering this card in the following challenges: 

2 Critter Crazy ~ Challenge 82  

Sheepski Designs ~ Challenge 82  

CD Sunday Plus ~ Challenge 125  

Lil Patch of Crafting Friends ~ Challenge 221   

Pam's Pearls


Copics 

Frog: YG03, YG23, YG25, R02, Eyes: N2, Outfit: B05, B06, B12, BG05, C00, Eyes: B06, B12, Hair: YR20, YR24, YR27, E39

Products  

Colour of Love, Little Eleanor and Baby Pickles

Gina Marie Designs, Label 3 


Saturday, January 13, 2024

Wishing You the Moon...

For our Polkadoodles Design Challenge today we were to create a card with Blue, Grey and a splash of Lilac.  That just sounds pretty doesn't it! 

For mine I selected Polkadoodles, Fantasy Moon and papers from  Adalene French Vintage Craft papers Here's the finished card and then a few more details.


I colored the image with my Copic markers and used the Gina Marie Designs Label Two for the decorative edge.  I wanted to use the sentiment from the same Fantasy Moon package and even rearranging the format of it, it just wasn't fitting in the space between the image and the edge of the paper.  To resolve this, I printed the sentiment on another piece of the designer paper.  I used the Penny Black Elegant Stitching die to give the sentiment a pretty edging.  I also added a Happy Birthday matted sentiment at the bottom, matted in navy.  Lastly, I tied a lavender organza ribbon and bow at the top fold of the card to complete the card design. 

Be sure to visit the Polkadoodles Challenge to see all the Design team cards this week and enter yours! 

Thank you for stopping by today to view my blog. I enjoy sharing my work with you and invite you to 'Follow' my blog and to visit my site - "Not Just Scraps' on Facebook - where you can purchase my cards. 

I will be entering this card in the following challenges:  

Creative Knockouts ~ Challenge 512 ~ Celebrations  

Just Us Girls ~ Challenge 709 ~ Sparkle  

Double D Challenge ~ 8th Birthday/Anniversary  

Unicorn Challenge ~ Challenge 94 ~ Birthday  


Pam's Pearls


Copics  

Moon: BV20, BV23, BV25, Leaves: B45, Flowers: B37, B04, BG45, BG53, BV31, Background C2, C3  


Products 


Polkadoodles, Adalene Craft Papers


Gina Marie Designs, Label Two