Friday, August 30, 2019

Dallas Girl ~ Part Two

I'm back today to share with you my second card in the Unity Stamps August Challenge ~ Use one stamp kit three ways.

Again using Unity Stamps Dallas Girl by Artist Angie Blom, here is my entry for Card two.


I only used a black and a grey coloring pencil to color Dallas Girl for this card. I added the ledge for her to stand on overlooking the mountains and the birds flying by.

She is matted on black then put on a REVERSE open card (the FOLD is on the right) with black wood grain matting and a black card base.  This part of the card is 2 3/4 wide by 5" tall.  {Set aside to make the other side of the card base.}

I stamped the Unity sentiment and laced a heart charm around this  matted strip of black card stock.  

The large black base piece is 7 1/4" wide by 5 3/4" tall.  Fold in the left side at 2 1/4".  The white wood grain strip for the left panel is 2" x 5 1/2" and the piece for the right side is 5" wide by 5 1/2" tall. After those are cut, aligned and glued, I folded the left flap over, and positioned the right side of the card so that the left edge is about 1/4" under the left flap, then glued.  Once the right side of the card is secured, then I added the left sentiment strip, being sure it was centered with the right side image.  

This reverse center Fancy Fold is very unique and displays well also.  It's actually the first time I've done an image in just black & gray pencil - I love color so much - but I do love the way this turned out.  

Thanks for coming to see Card two... Card three tomorrow.

Serving a Risen Savior,
Pam


Thursday, August 29, 2019

Dallas Girl ~ Part One

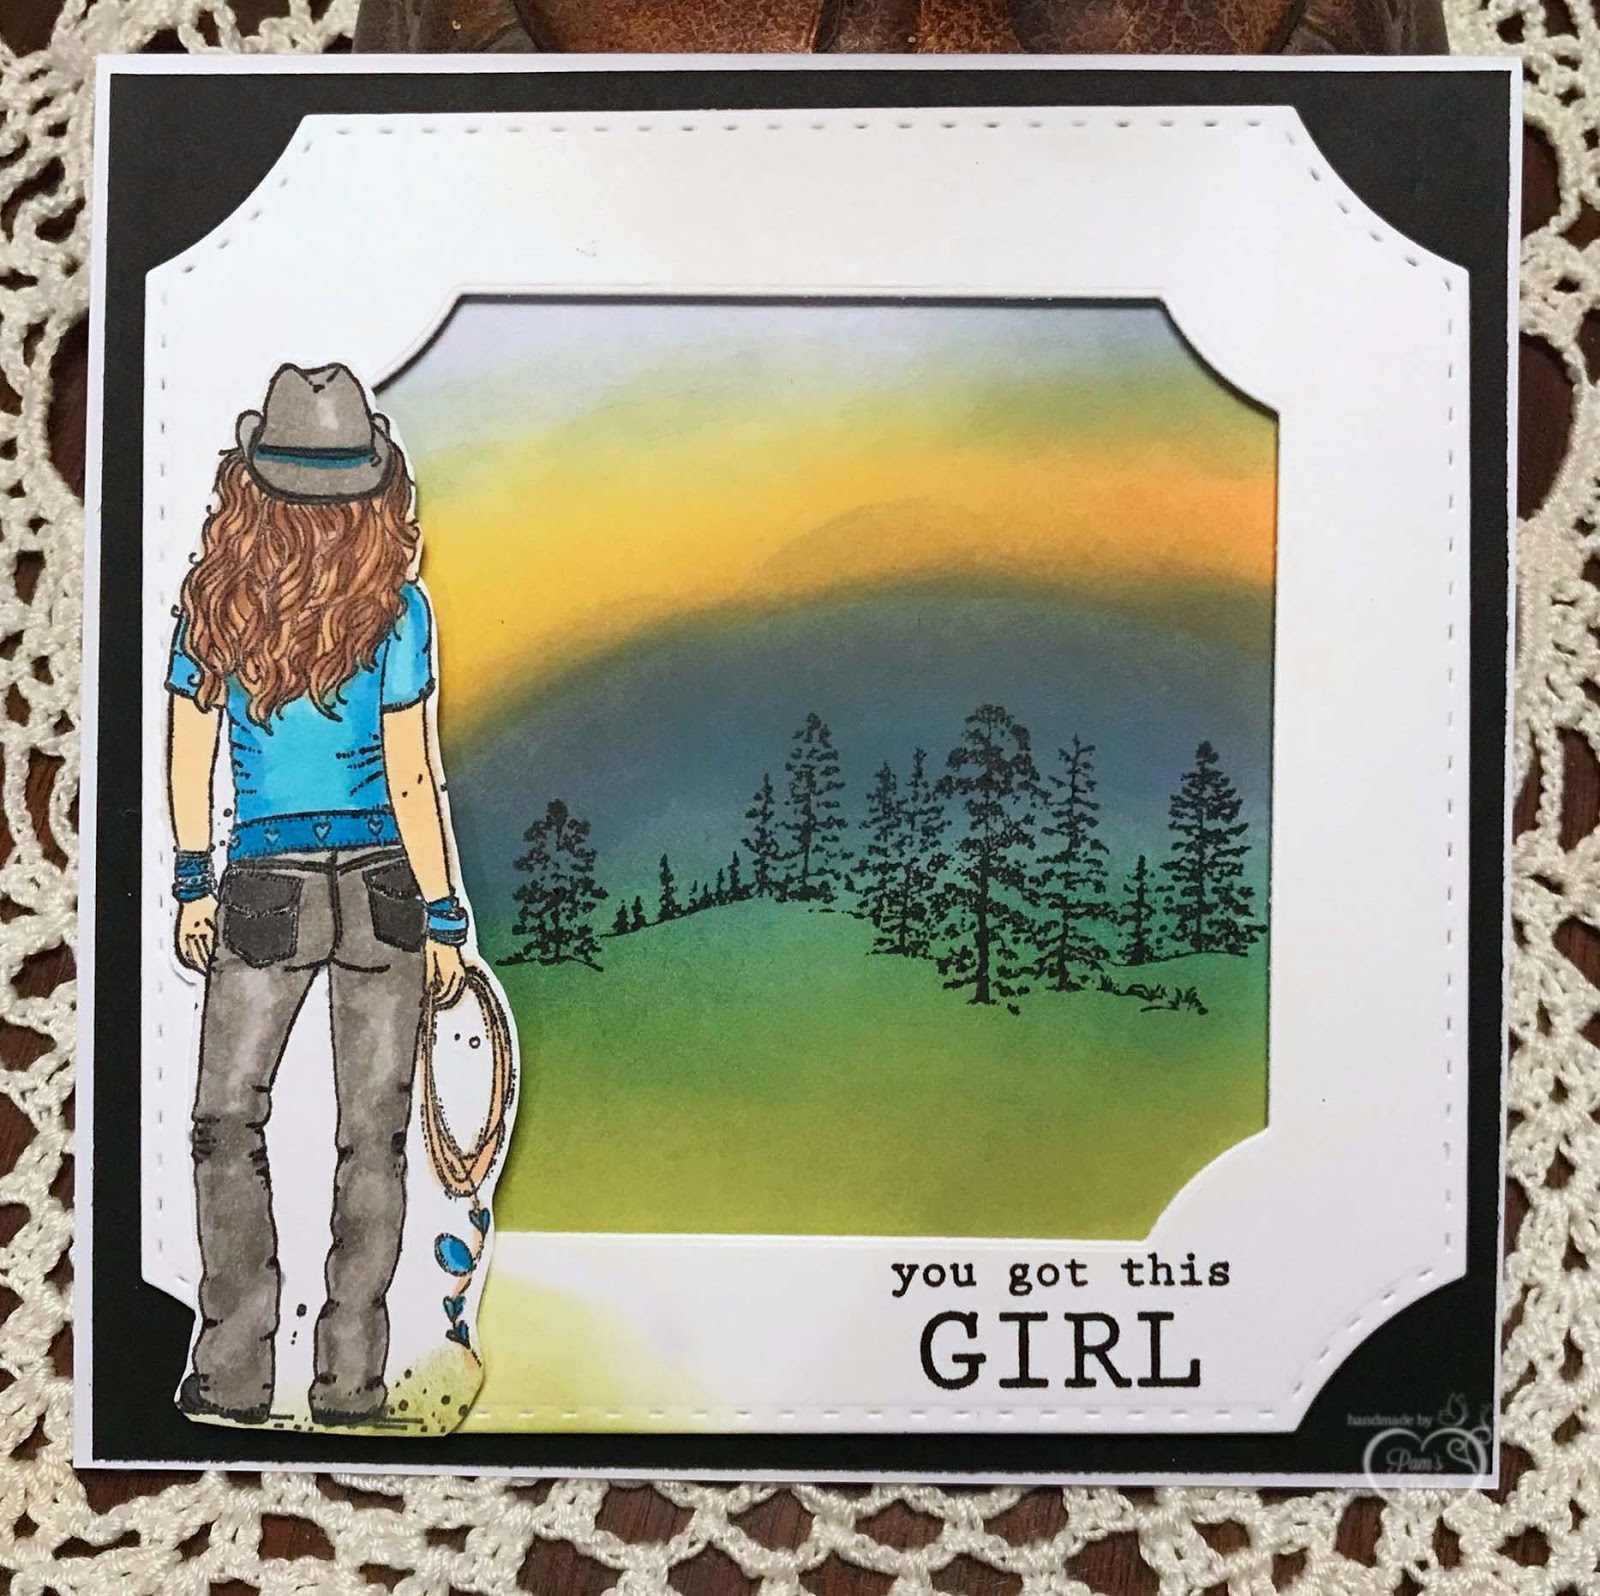
For the month of August, Unity Stamps has issued a challenge to use one stamp kit three different ways.  I selected Dallas Girl, by artist Angie Blom.  

Today I'd like to show you my entry for Card One.


Of course I'd start with Copic markers, my favorites!  The colors I used for Dallas Girl are referenced below also.  After coloring, I fussy cut around her and set her aside.

For the background I used the following oxides - (starting at the bottom)  Pealed Paint, Pine Needles, Salty Ocean, Faded Jeans, Spiced Marmalade, Fossilized Amber, Salty Ocean.  I found a random tree line stamp and stamped to the far right using Versa Fine black to get the crispest lines possible.

Now for the frame.  With Dallas Girl being 4" tall and needing the frame to be at least 3/4" wide... it took several layouts to find a combination of dies that would give a wide enough window to see the scene AND stay on a 6" square card base. With this one I was able to use the 'you got this GIRL' sentiment that comes with this Unity stamp set.  I put a black mat on the card base first. Next I stamped the sentiment on the frame front and then put wide foam tape on the back.  I placed the image on the card base, lined up the frame over the image, and lightly marked where it needed to be trimmed.  After trimming, I adhered the frame to the image first, then glued the framed image to the card base.

Once I had the Dallas Girl image glued in place, I used pealed paint oxide lightly at her feet to carry out the effect of the pasture. I love how this card turned out and would definitely make it again.
See you tomorrow with Card Two.

Serving a Risen Savior,
Pam
Copics Used: 
Skin E50,E51, Hair, E21, E23, E25, Shirt & Jewelry B01, B02 B05, Jeans & Hat W01-W06, B02 Boots, W06, Rope, E21, B01, B02

Products Used:


Dallas Girl ~ Part Three

I'm back again with the last card for the Unity August challenge of using one stamp kit three different ways.  I'm still using the Unity Stamps' Dallas Girl by designer Angie Blom.

This one was my 'out of my box' card.  But those of you who attend my retreats or my past workshops know I like to encourage others to do something you don't normally do.  I have to do that also, not just ask you do that.

Card Three is definitely my Stretch Card.


For this one, I started out on 140 # Water color paper.  I heat embossed the Dallas Girl and then painted her using my water color  markers (no water added).  Then I added water to the paper as I started at the bottom painting in the ground and the flag image.  After trimming and matting on black card stock, I used the Wild & Free sentiment from the Layers of Life, Soul Searching (2/19) package.  I tied heavy red twine across the left corner and secured on the back, then mounted this on a heavy card stock card and trimmed to fit my work.  The completed card is 5" square.

Thanks for following all three days  of this project. If you are a member of Unity {Show & Tell} I hope you have looked at the album and comment on mine and some of the work of the ladies. We all try so hard to come up with new ways to share their love for Unity stamps.

Serving a Risen Savior,
Pam


Wednesday, August 28, 2019

Holy Guacamole!

It can't be time for my 'Baby Girl' to have another birthday! 
But the wheels of time continue to turn and we know to count our blessings every day, especially the ones with our kids.

 My friend had recently received the June La-La Land Monthly Kit which had a Mexican theme.  Since my daughter has two chihuahua 's that are 'her babies',  I was thrilled when she suggested I use her kit for making my daughter's birthday card.

Here's the finished card and the info about how I made the card.


The kit is full of Mexican foods with dies, three Chihuahua's, Marcie and several sentiments.  I pulled out Marcie and two of the chihuahua's and Copic colored the dogs to match my daughter's two fur babies.  I used her favorite colors (Purple and lime green) for coloring Marcie.  

I made the background piece by die cutting a stitched scalloped rectangle, then used the Pink & Main Sunny Cover Die  to stencil the sunburst.  I also used  my (discontinued) La-La Land Happy Birthday corner die, cutting it twice (purple & lime) and splicing so it would show over the background papers.

As I put the card together, I added a couple of small foam dots behind the pup's heads to give a little dimension, added the '35' since I know this will end up in her scrapbook, and finished the card with a double organza bow.  

It was a fun card to make and she loved it (yesterday/27th) which made it even better....even if she does make me feel old!  

Thanks for stopping by today to see what's on my desk. 
Your comments are always welcome.

Serving a Risen Savior, 
Pam 
Products Used:


Tuesday, August 27, 2019

Dream Big Little Man

Today I would like to share with you a card I designed for a couple expecting their first baby.  

With their nursery theme for little Rory being 'Woodland Animals', I decided to invite all of them to welcome him into the world!


For this card I started with making the background with oxide inks - Pine Needles, Peeled Paint, Fossilized Amber, Spiced Marmalade.  Next I used three birch tree dies and two stitched cloud dies to add to the background.  With all the animals Copic colored and hand cut,  I glued each one at the bottom and put a foam square at the top.  I die cut the sentiment with a Book Page die cut and added it to the top with Arrow washi tape.

It's always fun to design a unique card and especially one for a sweet little baby. Thanks for stopping by to see what I've been working on. Your comments are always welcome.

Serving a Risen Savior,
Pam 

Monday, August 26, 2019

Sending Super Big Hugs ~ National Dog Day

Happy National Dog Day!
Have you hugged your fur baby today? 

For today's card I selected with Stamping Bella's Dawn Loves Her Doggie and the sentiment TLC Blessing by Stampendous.


The image is stamped on 110 Neenah card stock and Copic colored.  I used my Tattered Lace Pearl Chain Square die, then a solid blue matting.  The card base is a 6' white square.

Thanks for stopping by today. Your comments are always welcomed.

Serving a Risen Savior, 
Pam 
Copics Used: Dog C0-C4, Girl:  Hair, E21, E23, E25, E27.  Shirt  & Shoes: B23, Pants: BV13, BV11, Skin: E50, E51, E53, Cheeks R30/0

Products Used: 
 

Spread Your Wings - Sketch Challenge

For one of the card site's Weekend Sketch challenge, I decided on two images from the digital package from Polka Dot Orchard's Spread Your Wings.  

This is the sketch given to inspire the challenge.


From the digital package, I pulled the hummingbird and the two flowers into Photoshop Elements and moved them close together, sized them to fit an A2 card (but put 4 images on the 8 1/2 x 11 page layout) and then printed them on Neenah 110# card stock.  After  Copic coloring (referenced below),  I die cut out the image with the Gina Marie Ric Rack Circle die.


For the dies, I cut a 2 1/3" x 5" strip for the tag and die cut a rounded top, then punched a hole in the top for the ribbon.  I die cut two coordinating Gina Marie Fish Tail Banner  dies and one lacy fish tail die for the sentiment, With Sympathy.  I layered these similar to the inspiration drawing but modified slightly turning to a portrait layout to compliment my image size.  After getting everything glued down, I added the blue organza ribbon and a few enameled dots.

Thanks for stopping by today - and don't forget to check out all the great digital images at Polka Dot Orchard's Digital store. 

Serving a Risen Savior, 
Pam
Copics Used:  Flower centers: E17 top to E19 bottom, Petals: E97, YR02, E93, Stems: YG93
   Hummingbird: Red R35, Body: BG34, then BG45 over, Wings: BG15, BG05, BG02, BG57, BG45

Products Used: 

Thursday, August 22, 2019

A Peek Inside the Porthole

One of my swap challenge cards this month was for a 'Shaped' card.  I'm pretty standard in my A2 or square based cards, so this challenge was a stretch for me.  

But when you have this really cute new stamp, somehow you can just let your imagination run a bit and see what happens.  

When you look at the completed card below, it sure looks dull and a bit boring ~ after all ... it's a Porthole!


But you can see it's a shaker and peeking through... you can see ...


Surprise! Say Cheese!  

Isn't he just the cutest Great White Shark you've ever seen in a porthole?  He's from Spellbinders ~ Fun Stampers Journey  If you decide to make a porthole shaker card, be sure to notice on the  window of the porthole you use the acetate on both sides.

Another great Shaker card tip, especially if you are doing a circle shape,  when you are applying your foam tape, remove BOTH sides of the paper from the tape as you apply it to the card. You will be amazed how much easier you can make the curves without having to clip the tape.

Thanks for stopping by today to see what I've been working on.  Your comments are always welcomed.  

Serving a Risen Savior, 
Pam 


Tuesday, August 20, 2019

One Tall Cake Coming Up!

I love it when my Happy Mail is the perfect stamp for that night's crafting time.  Thus was the case last night when the time came to craft and I needed a couple of Girlfriend Birthday cards.

Penny Black's Tall Cake stamp had just arrived, so straight to the craft table and to the ink and paper she went.  I actually stamped her twice and freely colored each image with no particular outcome in mind.  I used my Copic Markers for coloring on both images.  On the dresses for both girls, I used the Copic "Bubble technique"
to make their polka dots on their dresses. 

The first card is for an upcoming girlfriend's  birthday.  It's completed in a pastel background, using the Gina Marie Designs Stitched Rectangle die (discontinued) and an aqua organza ribbon.  I used yellow Stickles on the candle flames.


The second version will be part of the project I'm involved in sending cards to the Soldiers Overseas for them to have to send back home to their families. These cards have to be flat without much embellishments. This image is on a Kraft card base and I used the Spellbinder Labels Eight die, a 'WISH' sentiment die and "Happy Birthday" Washi tape to  complete this card.


Both turned out cute, yet very different.  It's always fun to complete cards differently and see the results you get.  Penny Black stamps are very easy to use in may ways and adapt well to all kinds of backgrounds and card formats.

Thanks for stopping by today to see what I have been working on.  Your comments are always welcomed.

Serving a Risen Savior, 
Pam


Monday, August 19, 2019

Hope Your Day is Hunky Dory

Earlier this month I saw Meghan Kennihan's Apple Shaker Card on the Kat Scrappiness Blog as she announced the August Back to School Challenge.  What an adorable way to kick off their challenge.

It peaked my interest enough to play around with Stamping Bella's Tessie the Teacher stamp.  I wanted to alter the image a bit so I stamped and scanned it, then opened in Photoshop Elements.  This allowed me to enlarge her slightly taller and take away most of the desk area to the right.  


Then I printed her on Neenah 110 card stock and colored her with Copic markers.  I used the Craft Essential Pointed Ovals for die cutting the image and also the aqua blue pieces.  The sentiment is from the Whimsy Stamps Cheeky Sentiments.  For the finishing touches, I added a glittery world globe and a organza bow.

Thanks for stopping by today.  Your comments are always welcome.

Serving a Risen Savior,
Pam