Sunday, April 14, 2019

For a Book Worm or a Graduate

I started today's card for a challenge honoring National Library Week which started last Sunday, April 7th and ended Saturday, April 13th.   A little personal tidbit about myself that only TWO people (my Dad & Cindy) know and it would be a stretch to see if  either remember.  You see, the library is the very first place that I had a REAL JOB.  My first summer job was spent in the library putting the returned books back in the proper place on the shelves.  My part time job paid a whopping TWENTY-FIVE CENTS per hour!  So now you know a USELESS personal tidbit about  ME!

I have plenty of 'book' stamps, but decided to search for 'free coloring sheets bookworm'  ; finding over 7 pages of several cute images that would work for this challenge.  Here's what I selected in my completed project challenge card. 


The image is printed on Neenah 110# Card stock and colored with Copic Markers (referenced below*).  The dies that I used for the different layers are listed at the end. 

As my card progressed, I began searching for just the right sentiment to go with this bright eyed girl peeping over her glasses.  This sentiment,  "Live your Life to be a story worth telling." struck me as a great quote to use for a graduate.  

As layering together, I started from the top, doing the first three so I could add the natural twine and button before adding to the card base which already had the blue mat on the base. The last step was to add the sentiment, a few sequins, and of course take those photos before entering in the challenge. 

Thanks so much for stopping by today. Your comments are always welcome. 

Serving a Risen Savior ~
Pam 

This posting will appear on the following sites:


Copics Used:
Hair: E50, E33, E55, E57, Eyes, B00, B23, B28, Skin: E0000, 0/R30, v20, YR30, RV0000, E40, E41 under glasses. Brows, Sepia pen 0.3.  Book E70 E71. Bookworm, blue pen 0.3, ink SU Pacific Point. 

Dies used: from the bottom up, these are the dies I used: Dark blue: Pink&Main,  Scallop Squares ,  Patterned paper: Pink&Main, Stitched Rounded Squares, Medium blue and sentiment,  Darice Nesting Book Pages, 2014-10.

Friday, April 12, 2019

Roses for My Lady!

Did you know that I take special orders for custom designed cards?  You have to remember I'm not the artist, but within limitations, I can use the images, stamps and dies that I have available and make a card to meet the occasion you are wanting to celebrate.

This was the case several weeks ago as a friend at church quietly asked me to make 'a very special birthday card' for his lovely wife. That was the extent of the directions.  Honestly, I'd like a little more guidance; but I knew where another good source was to help... her sister!  Immediately - she loves horses!  Oh boy!  Another horse card!  Didn't I just mention I'm not an artist? 

I also knew the birthday girl loved deep pink to burgundy flowers; so finding an image of a horse with a bouquet of  flowers was just perfect.  Her birthday was yesterday, so now I can finally show you the finished card ~ 


The image was printed on Neenah 110# card stock and Copic colored (listed below). This was another one that took me a long time to color, but I'm really pleased with the way the horse turned out.  I trimmed a black mat to fit just inside a die cut burgundy mat that was die cut using Gina Marie Design's die, Pleated Lace Rectangle Die.  For the  6 x 6 card base, I used two coordinating patterned papers and  covered the seam with the burgundy ribbon.  The bow was added after I attached the colored image.  To make this card uniquely special just for her - I typed the name of their horse farm and included it in a very small banner die, printed in the arched text, and glued it just to the right of the sunshine background.  

Thanks for stopping in today to see the details of this special order Birthday card.  Your comments are always welcomed.

Serving a Risen Savior,
Pam

This posting will appear on the following sites:

Copics Used:
Horse; E15, E25, E33, E37, E51, E53, E23  Mane: cover with E0000 & E40, then E41, E21, E13, E42, YR00, YR20, E59.  Flower, R81, R83, R85, R89, Sun YR5, E95, R11, R81, YR21, YR15, YR32, R15


Thursday, April 11, 2019

Party Kitty is Ready to Celebrate!

Back to my turn for another new April Digital Release from Whimsy Stamps!  Today's card is from the Rustic Sugar Collection, "Party Kitty" which has a huge handful of brightly colored balloons and balancing a cupcake on his tail!  I believe he's ready to have a birthday party for sure. 


I printed the digital image on 110# Neenah card stock paper and used Copic markers for all of the coloring.  I have listed the colors at the end of the blog for your reference.  

I selected a 6" square card  base and covered the front with  a light blue Happy Birthday printed paper.  Then I took a 5" blue solid square and glued it to the birthday paper diagonally (clipping the overhanging peaks).  I took the NEXT TO THE LARGEST Creatopia, Frame 7 die set, centered it on the card and cut that shape out.  Note, with the three thickness, you need to run through several times. Then the front of the card was ready to decorate with several little presents, confetti and a "It's Your Day" framed sentiment. 

Inside, On the top I cut an additional piece of paper with the same die  and covered that area also.  I used the LARGEST of the Frame 7 set to cut out the Party Kitty so that he filled the image from the front. 


 I put a Happy Birthday banner piece across the top and then centered the kitty image so that he was aligned to show through the window.  


This cute little kitty is ready to hit the mail box and scoop up some fun at the party.

Thanks for stopping by today - I welcome your comments.

Serving a Risen Savior
Pam 

This posting will appear on the following sites:
WhimsyStamps & Inspiration, Christian Card Maker, Karle's Passion, Stamp Junkies, Stampers Shop Swap, Passionate Paper Creations, Pinterest and Not Just Scraps.

Copics Used:  Balloons: B01, BG11, BG23, BG34, B00, B04, Y17, Y32, Y21, Y31,  YG91, YG95,  R81, R83, R85, RV34, Kitty: E40, E41, E42, E43, E50, E51, E52, E53, E81  RV000, E000.

Products Used: 

Monday, April 8, 2019

Sweet Dreams

Today I'd like to share with you a project card that uses an older technique and my slightly different way of doing this to achieve the results that are appealing to me.  

Here is my finished project; however if you are a crafter I hope you will continue reading as my technique is different than most. 


When the current Unity challenge was posted, I dug through the box of crafting napkins, to see what might work with one of my Unity stamps.   Having done many napkin cards in the past, and having just demo'd this technique in March at my Spring Retreat, I was excited to put one together to enter the challenge. 

Everyone's way of doing things is a bit different, and isn't it wonderful to see the different end results.  The technique I was taught many years ago, teaches to apply the single layer of napkin to your card stock using a GLUE STICK.    


You cover the card stock area really thick and slightly larger than what you need for your card.  Take your SINGLE ply napkin and start at one side, holding the rest of the napkin up, use your finger to push the air out and you end up with smooth, napkin covered card stock.


Trim off the excess that goes beyond your paper with scissors, then it's off to your die machine. 


Laying that aside - I had selected Tierra Jackson's Patience and Love for this Easter themed card. For the bunnies, I used the 'Smooshing' technique with my  Copic Markers (referenced below) to get the fur look. I also stamped another book to raise on the card.  I searched to find another Unity stamp with the words small enough for the title on the front of the book.  I used Washi tape to isolate just the words "Happy Lives Here" from the KOM July 2001 Kit, but it was also too big.


But I had to resort to writing a title, which worked out okay too! I trimmed and scored, then glued near each hand to secure the raised book on the card.

With everything glued into place, then I applied two coats of Modge Podge, letting it dry about 20 minutes between coats.  I used a yellow crochet thread for the string loopy bow and punched two holes in the tag I stamped from Phyllis Harris' A Sky With No Limits, for the sentiment.  The tag has a foam square on the back to raise it above the bow, then the charm is added to the top.


It always feels good to use one of the stamps that has just been sitting in the rack waiting it's turn.  Another good challenge from Unity and another card available in my store. 


Thanks for stopping by and reading all the way through!  Your comments are welcomed.

Serving a Risen Savior,
Pam

This posting will appear on the following sites:

Copics Used: Bunnies left to right: 1st: W1,W2,W4,RV00, R30, 2nd: N3, C1, RV00, 3rd: E41, E42, E31, E33, RV00, R30:  4th: C1, C2, RV00, R30, PJ's on bunnies: Y06, BG11, R32, BV11. Bed headboard, E15, E17, Pillows and Covers: R81, R83, R85, R89, Hearts R37 and Copic multiliner Wine
Products: 


Friday, April 5, 2019

You're Gonna Need These!

Several months ago when I saw the posting that Little Miss Muffett stamps were going out of business, I honestly had never heard of that line of stamps.  But I clicked the 'Enabler Button' provided in the link and found three or four cute stamps of course.  With my son and son-in-law both very active volunteer firemen, I had to pick up today's card image, Sunbonnet Fireman Fire Hose.


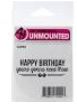
It's such a great image for lots of different occasions, but adding the Art Impressions (G4992) "HAPPY BIRTHDAY you're gonna need these" with the little sunglasses, add the aging factor to the fireman image to make it one humorous card also.

Thanks for stopping by today - Your comments are always welcome.

Serving a Risen Savior,
Pam

This posting will also appear on the following sites:
Copics:
Hat, R27, R29, R37,R39 Boots: Y13, Y15, Y18, BV29 Pants & Water: B000, B24, B93, Jacket E15, E18, E53, Y15, Y18, Shadow: N1

Product:


Monday, April 1, 2019

All You Need

Welcome to April 2019!

I'm starting off the month with Whimsy Stamps' digital image,
'Best of Friends Girl' by designer Crissy Armstrong.

I'll be completely honest with you - after selecting it from our Design Team line up of April images, I really had second thoughts! The Whimsy DT has so many talented true artist of which I am not.  I am a card maker, not an artist.  But I tackled it willing to give it my best shot and she turned out pretty good. 


I printed the digital image on Neenah 110# card stock and used Copic markers for my coloring.*  The edge is chalked with an old Creative Memories Red Barn chalking ink and then the image is matted using Tattered Lace Lacey Pearl Square Dies.  The rope pieces are die cut from Elizabeth Craft 1125 Rope Dies

I modified the sentiment to capture what I felt when I look at this little girl gazing down and holding onto her horse.  She looks somewhat sad or full of thoughts or decisions.  The bond that our pets bring to our lives can not be compared to anything else.  Each person reading this understands that point in their own daily life when they just wanted to be alone to think and only their pet could be there for them.  That is what I think when I look at this stamp - and at the card I've created.  A perfect card of encouragement or one for just letting a friend know you are there - when they are ready to open up to you.

Thank you for stopping by today - I hope you enjoyed my project card and the reason behind why I selected this image.  Your comments are always welcomed.
Serving a Risen Savior,
Pam 

This posting will also appear on the following sites:  
Copics: 
Shirt & flower: BG72, BG18, BG11, BG78, Hair: Y11, Y21, E31, Horse, E15, E25, E33, E34, E37, E51, fill with E53 & E23 mostly.  Mane: cover with E000&E40 first, then E41, E21, E13, E43, YR00, YR20, E59.  

Products:


Sunday, March 31, 2019

A Very Special Delivery

It was so exciting to participate in the Growing in Unity 2019 back in January ~ and now today,  the first quarter gals are featured for their UNITY BLOG HOP! 

Let me show you what I've put together for you today featuring Lisa Glanz 'Special Delivery Mouse' and 'Oh Splendid Day'.


The video distorts the card slightly, as it is actually a 6" square card. 


I used several different dies to make this card along with the two Unity stamps (shown at the bottom of the blog).  The hardest part in making a good slider card is just finding the right image that is turned sideways.  These  adorable little fellows are just perfect running down the Whimsy Curved Hill Kinetic die.  I used the new No See Kinetic Basic Die set for the slider so there isn't any slider line showing in the card front.  The background clouds and sunburst are both Gina Marie Design dies.  

And the little finishing touch today - if you live anywhere near South Carolina you certainly understand the need for the tissue in hand!  It's POLLEN season here,  we are a state covered in yellow! 

Thank you again Unity for my opportunity to participate in today's GIU blog hop.  Please leave a comment below to be entered to win the Unity prize pack and continue on the hop!


If you are just joining the Unity Hop, here is the complete order. Otherwise, you should go next to Cara~

 Kim Marie Monson Leach www.frogoffaith.blogspot.com
Rachel Duong https://findingpeacestamper.home.blog/...
Heidi Cope https://heidicopecreations.com/...
Shelly McGovern Schmidt https://shellymc2.blogspot.com/...
Sue Wisniewski https://stampingsueinconnecticut.blogspot.com/...

Pamela J. Duncan https://pamspearls4u.blogspot.com/...
Now on to Cara
Cara Malmrose https://creativechaosbycara.blogspot.com/...
Ashley Johnson https://marklandandmain.blogspot.com/...


Serving a Risen Savior,
Pam

This posting will appear on the following sites:
Unity {Show&Tell}, Addicted to Card Making 2.0, Christian Card Maker, Stamp Junkies, Stampers Shop Shop, Whimsy Stamps & Inspiration, Scrapbook Outlet, Passionate Paper Creations, Karle's Passion, Pinterest, and Not Just Scraps.
Copics:
Mice: E35, E33, E21, E57;  Container E95, E97, YR22, Flowers, $81, R83, R85, BV02, B343, Y18, Y15, E71, G43
Products:


Thursday, March 28, 2019

Sign Us Up for SPRING!

I enjoyed doing Whimsy's Stamp's digital image 'Think Spring' so much back in February, I decided to add it to the cards I'm preparing for a vendor craft sell this weekend.  This time I toned it down a bit to soft yellow, green and tans.


I just love the way designer Crissy Armstrong drew the sweetest face on the one bunny who is turned around, almost like he knows he is about to be in trouble.

  
After coloring with Copic markers I used a dark green mat that would just show on the top and bottom.  I cut a Tan patterned fish tail piece and a light green large pointed doily to mount.  As I began to lay this one out, I realized the dark green was also needed behind the yellow background piece before adding to the card base.  

Do You Do This? ~ Do you build your card on the card base or away and then add to the card base?

I usually have mine pretty much to the completion point before adding to the card base.  It just seems to work better for me and prevent trashing a lot of work.  I'd love to hear the steps of your work flow. 

I did wait till everything was mounted on the card before I added the organza ribbon and then  the 'final touch' on these cute bunny butts!  One mini clear flat-back on each derriere.  

Thanks for hopping over to see today's card.  Please make note~~ THIS Sunday, March 31st,  I'll be in the Unity GIU 1st Quarter Blog Hop.  Be sure to stop in and comment for a chance to win!

Serving a Risen Savior,
Pam

This posting will also appear on the following sites:


Wednesday, March 27, 2019

You Warm My Heart!

Spring is here and today's card is featuring Whimsy Stamps'  "Bunny" digital image by CCDesigns.


I printed this digital image on 110# Neenah card stock and then used Copic markers for coloring.  I added the cloud background using a handmade cloud stencil and Stampin Up Pacific Point ink.  

Next I die cut the image with one of the  Pink & Main Rounded Stitched Square Nesting dies; then added Cherry Ice Stickles to her hair bow, socks, and the water sprinkles.


Peeping out behind the fluffy clouds I've added a blue die cut of the Large Pierced Flower from Gina Marie Designs along with a strip of spring patterned paper and the banner on the bottom corner ~ You Warm My Heart!  The 3/8" organza ribbon is light and delicate enough to finish off the card just perfectly.

Thank you for stopping by today to see how today's card was made.  I hope that you will visit the Whimsy Stamp online store and click on the Digital products section to find 'Bunny' and other great images to add to your collection.

Serving a Risen Savior, 
Pam

This posting will also appear on the following sites:

Copics:
Skin: E0000,R30/0, YR30, RV0000, E40, Hair, E21, E11, E23, E35, E17, E57, E37,  Shirt: E81, E39, Bow/Hose: R39, R81,  Grass: R46, R42, Flowers: R81, Rabbit, W1

Products:


Tuesday, March 26, 2019

This Little Chickie Said...

Happy Easter!

Today I would like to share Whimsy's "Chickie", one of the CCDesign digital images for March.  


This is just the perfect card for any young girl this Easter!  I picked out the bright pinks and blue Copics  and topped the yellows with clear Wink of Stella.  The fluffy white clouds not only add depth but make the card look like spring is on the way for sure.  The colored image is matted with Gina Marie Designs Loopy Square Nesting die and the top flap is one of the My Favorite Things Stitched Basic Edge Dies.  I really loved the printed egg patterned paper that I found to use for the background. I elected not to put a bow on, it seemed to overpower the image. 

I hope you enjoyed stopping by today. This card and many others are available for sale.

Serving a Risen Savior,
Pam 

This posting will appear on the following sites:
Copics:
Skin: E0000,R30/0,YR30, RV0000,E51,E53, Chick: Y21, Y31, Beek Y17, Cheek: R30, Hair:R81, R83, R85, R85 Easter: Y31 & Yellow glitter . Dress: B04, B05, Ruffle R81, R56, Socks R56, B05, Shoes E25,  Flower R56, Rope Green micro pen
Products: