Friday, February 26, 2021

Polkadoodles Hoppy Easter

 Today I'm here with the Design Team at Polkadoodles Crafting  - Week 9 to share with you an Interactive Easter card.  

I've selected Hoppy Easter (printable download) from the Too Cute Collection.


For my Interactive part, I decided to make a flap using the Bunny, Duck and 'Hoppy' with a hidden message underneath. 


To accomplish this I cut the image and printed it on two separate 5 1/2" pieces of cardstock.  After Copic coloring I glued this piece to a piece of light blue paper so the back of the top piece would be covered when raised. Then I carefully cut out the top 'flap' close to the letters and images, leaving a long tab at the top for connecting later and laid it aside while I prepared the base.  

The digital paper from Winnie Sunshine Delights gave me several choices for this card - strips were used for the grass and the scallops for the double row of clouds.  I also printed the secret hidden sentiment from the Winnie Celebrations 3 Sentiment and die cut it for placement when I had the flap in place.

I laid out the bottom row of clouds then worked with the flap and top row of clouds until everything lined up with getting the words back into the right place.  Next I secured the flap to the bottom row and added the top row of clouds, checking as I went to be sure nothing shifted.  Once secured, I added the 'Love You' message and the organza ribbon on the left.  After knotting the ribbon, I added an additional chick to the ribbon for balance, then secured the entire piece to the purple card base.  Inside the card base I added a white liner for additional writing space. 

Thank you for stopping by today.  I enjoy sharing my work with you and invite you to “Follow” my blog and to visit my site ~ “Not Just Scraps” on Facebook ~ where you can purchase my cards.  Plus don't forget to add your cards to this weeks blog challenge HERE.


I’ll be entering this card in the following challenges:

  QKR Stampede ~ Challenge #414  

Path of Positivity ~ Challenge #88 

World Wide Open Design Team Challenge ~ February 

Sparkles Forum Challenge #137 ~ On the Farm 


Pam's Pearls


Copics Used:

Bunny: E30, E21, E33, Scarf: B21, Flower: BV01, BV000, R85, Duck: Y15, Y19, Y11, YR24, YR27, Butterfly: BV000, BV01, B21, Y19, Y15, G21, G24, YG63, Words: R85, R83, Flower Pot: YR23, YR27, YG63, G24, Flowers, BV000, BV01, R85, BV02


Products Used:


Be Your Own Kind Of Beautiful

Today I'm joining my ladies on the Design Team for Colour Crazy Challenge Blog as we kick off Week 8 with a new First Time sponsor for this week ~ Angie Blom Digital Designs. 


I have selected her design, ‘Own Kind of Beautiful Bird’ and have colored her with my Copic markers. 

 I’ve used the  Beaded Chain Knot die by Tattered Lace for the edging and a hand dyed crinkle ribbon from Polka Dot Orchard to accent this lovely bird.  I used an A2 sized Kraft card base and covered with a background mat in a chevron pattern.  After adding the completed bird image and the ribbon bow to the card base, I added the printed sentiment  and anchored it with a yellow paper flowered button.

I hope you will visit our sponsors website (click HERE) to see more of her wonderful images and also enter your cards for this  Colour Crazy Challenge Blog HERE

Thank you for stopping by today.  I enjoy sharing my work with you and invite you to “Follow” my blog and to visit my site ~ “Not Just Scraps” on Facebook ~ where you can purchase my cards.


I’ll be entering this card in the following challenges: 

Scribbles Designs ~ Challenge #97 Heartfelt 

Girlz Creative Crafts ~ Challenge #10 ~ Use an Animal 

Crafty Friends ~ Challenge 149 ~ February 

2 Sisters on the Blog ~ Challenge #47


 Pam's Pearls


Copics Used:  Bird: E93, E95, E97, E07, E08, E09, E01, Beak: YR23, YR27,  Leaves: YG93, YG95, Flowers: Y13, Y18, YR14, YR15, Background: G20

Products Used:


Thursday, February 25, 2021

Heating Up the Kitchen

This past weekend I made this card to meet TWO challenges.  One was Christmas with Bling and the other was code word HEAT.  Hmm.... that took a little thought to mix the two together but here's what I came up with... 

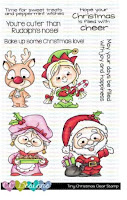
I went to my Christmas stamps by C. C. Designs  ~ to a new stamp package I'd just received called Tiny Christmas where I knew there was a sweet little Mrs. Claus.


She is tiny - only about 2 1/4" x 1 1/2" but as cute as she can be... especially with her HOT dish of Christmas love!  She has a bit of shiny berries on her hat along with her glossy bell earrings and  glossy pearl bracelet. She's sure to catch Santa's attention! 

I'm thrilled that so many challenges include Christmas throughout the year to help build our stash! Hope you are working on yours!

Thank you for stopping by today.  I enjoy sharing my work with you and invite you to “Follow” my blog and to visit my site ~ “Not Just Scraps” on Facebook ~ where you can purchase my cards.


I’ll be entering this card in the following challenges:

 ABC Christmas Challenge ~ C/D (cookies/dessert) 

Fab N Funky ~ #512 Christmas

 Christmas All Year Round ~ C/D February (cookies/dessert) 

Crafty Hazelnuts Patterned Paper ~ February 

The Holly and the Ivy ~ Challenge #88 

Christmas with the Cuties ~ Challenge #46 

Merry Little Christmas Challenge ~ #31 ~ February 


 Pam's Pearls

Copics Used:

Hat & Dress: R24, R29, G17, G07, R20, Apron: G17, G00, Hair: N3, N5, Earrings, N3, B63, Dish, B63, E23, Shoes, N3, N5, Shadow, W3


Products Used:


Wednesday, February 24, 2021

Have an Udderly Fantastic Birthday!

 When you 'love cows' you really LOVE COWS!  One of my sweet girlfriends happens to be one of those people who has a special passion for these spotted creatures, so of course one had to make an appearance on her birthday card!

I selected Art Impressions Utterly Fantastic stamp set to use in designing her special birthday card.  


I started by stamping the graceful cow on Neenah 110# card stock and stamping the sentiment just to the right of her.  I used Memento ink for the cow, to allow for Copic coloring and Versafine ink for the sentiment so that it would be a crisp image. 

After coloring the cow, I added the light green area at the bottom for grass and hand drew the colored flowers.  I used a cloud stencil along with Pink, yellow gold, and blue Distressed Oxide inks to make the cloud background area.

The colored image, the black liner mat, and the pink polka dot mat were die cut using the Whimsy Stamps Notched Square Die.  I secured all three layers onto a green 6" top fold card base.  After checking to be sure everything was secure, I added the additional yellow spider web bow at the top to complete the card.

Thank you for stopping by today.  I enjoy sharing my work with you and invite you to “Follow” my blog and to visit my site ~ “Not Just Scraps” on Facebook ~ where you can purchase my cards.


I’ll be entering this card in the following challenges: 

Art Impressions ~ Best of 2020 

Bastel-Traum ~ Challenge #98 Birthday 

Everybody Art Challenge #485 ~ Birthday 

Try it on Tuesday ~ Oh So Cute! 


 Pam's Pearls


Copics Used:  Cow: E40, E30, R30, R12, N6, Y19, Y15, Apron: Y15, Y19, Balloons: R29, V15, Hat: B24, Y19, E31

Products Used:


Whimsy Stamps, Notched Squares


Tuesday, February 23, 2021

I Really Didn't Forget

Today I'd like to share another card from a recent weekend challenge of using some of those well hidden Embossing Folders that we all have and forget to use...

For this card I used a generic Woodgrain embossing folder and I'm betting at least half of those that read my blog have one of these very popular folders.  What a great one for all of our bird and wildlife images. 

I've paired it up with one of my friend, Donna Ellis', Great Horned Owl images that I've colored with Copic markers.


After coloring, I fussy cut him out and stamped the sentiment with brown VersaFine ink.  I used the Memory Box Matinee Rectangle die to get the stitched edge.  

I mounted the brown embossed woodgrain on a black A2 sized card base, then added the sentiment and then the owl.  Further embellishments, twine, ribbon or other masculine objects could be added depending on who you were making the card for.  However to me, I wanted the owl to be the focal point, thus I left it just as shown.

Thank you for stopping by today.  I enjoy sharing my work with you and invite you to “Follow” my blog and to visit my site ~ “Not Just Scraps” on Facebook ~ where you can purchase my cards.


I’ll be entering this card in the following challenges:

AAA Birthday ~ Game 22 ~ Large Sentiment 

Dream Valley ~ Challenge 242 ~ Hand Colored Image 

Crafty Catz Weekly Challenge #539 ~ ATG 

Your Next Stamp ~ Challenge 158  

Seize the Birthday ~ Challenge #208


 Pam's Pearls


Monday, February 22, 2021

To My Classic Guy

 To say February has been a busy month of celebration here is an understatement!  First my birthday, then the announcement of joining the Polkadoodles Design Team, followed by my marriage on Valentine's Day (wasn't that a shocker!) and now the celebration of my hubby's birthday this past weekend!  It's all been wonderful and exciting! 

Today I would like to share the card I made for his special day.  One of his 'life's treasures' is his 1955 Ford F100 pickup truck that he got for his high school graduation.  Although it has many fond memories, it rests now behind his house and makes a wonderful photo prop!  What better image to use for his birthday card as we celebrate his first birthday together as a couple!

I did use a 'Google' image for this card to try to find as close to the original truck as I could.  Here is the completed card then a few details on how I made it.


After sizing to about 4" x 3" and adding the sentiment, I printed the image on Neenah 110# card stock and colored with my Copic markers.  I used the Gina Marie Designs Labels 1 die for the edge.  I cut a double mat of the green plaid and green solid, then cut a white card stock card base that was 5 1/2" x 6".  I secured the two background mats together then added the colored image on top.  Next I added the brown twine, wrapped around these three layers and tied a knot at the point where they met, and added a brass key charm.  Then I secured the three layers to the card base to complete the card. 


Thank you for stopping by today.  I enjoy sharing my work with you and invite you to “Follow” my blog and to visit my site ~ “Not Just Scraps” on Facebook ~ where you can purchase my cards.


I’ll be entering this card in the following challenges: 

Addicted to Stamps ~ #399 Any Occasion

Fab N Funky ~ Challenge #511 ~ Birthday 

Watercooler Wednesday ~ WWC309 ~ Masculine 

Seize the Birthday #208 


Pam's Pearls 


Copics Used: RV69, R39, YR18, YR20, YR30 Y08, B52, BG72, C0, C5, W3


Friday, February 19, 2021

Birthday Bear Wishes

Today I'm posting for Jan's Digi Stamp Shop along with the rest of her Design Team as we bring you her mid-month posting filled with more of her cute digital images ~ both new and all time favorites!  

For my project today, I've selected Jan's Birthday Bear set.  Here's my completed card and then the details of how I created it. 


I played around with the image a little bit before landing on the design for this card.  I ended up flipping the bear from facing to the left to facing right and layered him in front of the cake.  After adding the sentiment, I printed him on Neenah 110# cardstock and used Copic markers for coloring.  

I selected a 5 1/2" card base and covered it first with a multi candle cardstock paper, then a raised dotted swiss purple square.  I die cut the colored image with Craft Essentials Scalloped Square dies and then secured it to the purple mat.  Lastly I added the lavender organza bow around the top flap of the card.  

Thank you for stopping by today.  I enjoy sharing my work with you and invite you to “Follow” my blog and to visit my site ~ “Not Just Scraps” on Facebook ~ where you can purchase my cards.


Be sure to check out all the Design Team cards for today's posting too on Jan's Mid-month Inspiration posting. 


I’ll be entering this card in the following challenges:

Seize the Birthday ~ Challenge 208 

Fab N Funky ~Challenge 511 Birthday 

Bastel-Traum ~ Birthday 

Crafty Animals ~ Challenge #47


Pam's Pearls


Copics Used:

Balloons: R46, B05 BV02, Cake: BV02, BV13, With B05 & R46 dots, Y21 & Y31 Cake, YG07 & YG17 Bow, B02 & B05 Plate, Candle: B05 R46, R31, Bear: E13, E15, E17, E30, R20, Bow,  YG07, YG17, Feet & Nose: E31 & E34


Products Used:


Thursday, February 18, 2021

Always Add the Ice Cream

I'd love to take a poll of how many crafters have a stash of more than 12 embossing folders and how many use them now.  They certainly were the rave and although still are popular, I'd be willing to bet you are like me - a drawer full that fit into one of three categories:  I rarely use, I forget to use, or I'm really not even sure why I bought them to use, i.e. 'what was I thinking?'.

Several weekends ago, my card swap group's weekend challenge was add all or part of an embossing folder to your card.  Amazingly, we had the highest participation of cards entered that weekend than we have had in over two years!  The response was overwhelming and very creative. 

Today I'd like to share one of my cards from that challenge, Happy Birthday using La La Land's  Heart Glasses Marci and a strip of ice cream cones and popsicle sticks from an embossing folder!


I stamped Marci on Neenah 110 # card stock, colored her with my Copic markers and then fussy cut her out.  I cut the strip of embossing folder about 1 1/3" wide x 5 3/8" and I cut the patterned paper to fit the remainder of the front of the A2 card base.  I added the Marci image over the patterned paper then tucked the Happy Birthday sentiment under the edge of her dress and shoe to complete the card. 

Although we forget about these folders, I found it was a great add on and made up several patterned pieces for my 'left over' box to use on future designs.  I hope you'll take this tip and try out some of those folders in your stash too!

Thank you for stopping by today.  I enjoy sharing my work with you and invite you to “Follow” my blog and to visit my site ~ “Not Just Scraps” on Facebook ~ where you can purchase my cards.


I’ll be entering this card in the following challenges:  

Addicted to Stamps ~ Challenge 399 ~ Any Occasion 

Crafty Gals Corner ~ Challenge 216 ~ Add a Heart

Fab N Funky ~ Challenge 511 ~ Birthday  

Bastel Traum ~ Birthday  

Path of Positivity ~ Challenge 88 ~ Celebrate Those You Love


Pam's Pearls


Products Used: 


Wednesday, February 17, 2021

Feeling a Little Closed In?

For today's card I would like to share with you a card I made for a swap challenge. The challenge was to make a card with a DUCK on it.  I selected one of the  cute images drawn by Artist Dustin Pike for Whimsy Stamps in the set You Crack Me Up.  


 After stamping the image on Neenah 110# cardstock, I used my Copic markers for coloring.  I used the Spellbinder Fancy Postage Edge die for the punched border.    With the confined feelings of quarantine so common these days, I wanted to add my own sentiment to the card, so I generated the 'Quarantine is for the ducks!' sentiment on my computer and used a small die cut for the fancy edging.   

For the card base I used a standard A2 sized white card base, and covered it with a green matting cut 1/8" smaller than the base.   I also cut an additional strip about 1 1/4" wide and the length about 4", and added this strip to the  right of the colored image. I used two strips of mini multi-stripe washi tape 'tacked' across this strip to make it look like they are holding the vertical strip on.  Lastly I added this piece to the card base to complete the card design.

Thank you for stopping by today.  I enjoy sharing my work with you and invite you to “Follow” my blog and to visit my site ~ “Not Just Scraps” on Facebook ~ where you can purchase my cards.


I’ll be entering this card in the following challenges:  

Try it on Tuesday ~ Oh  So Cute  

Crafty Friends Challenge #149 ~ February 

Creative Crafting Uncles ~ Wildlife 

Lil Patch of Crafty Friends ~ Challenge 151   

Dream Valley ~ Challenge #241 Add Some Green  

Always Fun Challenge #201


Pam's Pearls


Copics Used:  Egg: BG49, BG09, BG57, BG53, BG72, Grass: YG00, YG01, YG13, Eyes: C1, Duck: Y15, Y19, Bill: YR27, YR23, YR68


Products Used:


Tuesday, February 16, 2021

A Warm Hug and a Good Book

As I write today's blog, we are completing day six of nothing but RAIN, rain, and more rain.  

The design of Angie Blom'sA Warm Hug Girl brings us a comforting happiness of being snuggled under a warm blanket, with a warm cup of coffee or tea and a great book.

Today I'd like to share the card I made for "An Open Book" challenge using her image ~ A Warm Hug Girl.


 After sizing the image to about 3 1/2" square and placing the sentiment at her shoulder, I printed it on Neenah 110# cardstock.   I used Copic markers for coloring and then the Gina Marie Designs Drop Pendant die for the edge.  I cut a second die, going up two sizes, out of navy cardstock, and then cut it in half vertically.  I glued the colored image on top of the navy mat, lining the top edge and leaving about 1/2" border down the left side.  Next I tied the brown twine around these two pieces and knotted at the point where they joined.  

I used a standard A2 sized card base and secured a light pink patterned paper to the base, then added the die cut pieces.  Once secured, I completed the card by adding the wooden love heart at the knot on the twine.

Thank you for stopping by today.  I enjoy sharing my work with you and invite you to “Follow” my blog and to visit my site ~ “Not Just Scraps” on Facebook ~ where you can purchase my cards.


I’ll be entering this card in the following challenges: 

Get Creative Challenge ~ #98 Use Red or Pink 

Papercraft ~ Challenge #67 ~ For A Loved One  

QKR Stampede ~ Challenge #414   

Scribbles Designs  ~ Challenge #97 ~ Heartfelt  

Creations in Pink ~ Challenge 31  

Digi Doodle Studio ~ Challenge 35 ~ Include a Sentiment 

Angie Blom's February Love Challenge


Pam's Pearls 


 Copics Used:

 Hair: E21, E23, E25, E27, Shirt: RV34, Jeans: B97, B95, Cup: B93, B97, Blanket: RV91, RV93, RV95,  Shoes: E17, Book: G17, RV91, Shadow: W3


Products Used:


Monday, February 15, 2021

We Were Mermaid to be Friends

With all of our cold and wet winter weather right now, I decided on a summer mermaid stamp for today's card.  I made this card over the weekend for a challenge to 'Add a drawing or doodling to your image'.  There were a lot of moans when that challenge was posted  - we love to stamp and color but admittedly so, not many of us are artist that can draw a straight line, a circle or certainly anything more complicated.  

I selected C. C. Designs, Merkini stamp set which has two girls, one on the beach and one mermaid and four sentiments.  Here's my completed card, then how I made it and what I added to meet the challenge.


After stamping her on Neenah 110# cardstock I used my Copic markers for coloring.  I drew in the seaweed and rocks on the left side of her - which is easy to spot since my lines are thicker.  I used a Copic Multi-liner .5 mm but know now to find something smaller next time.  It was perfect though for use with the Copic markers.  I also added more of the bubbles on the right side and then filled all of them with "Sea Glass" Stickles.  I added a touch of Stickles on her necklace and earring also.  I die cut several layers of 'water' using Impressions Obsession Die 101-D and secured those across the bottom prior to die cutting the edges.  For the border edges, I used Gina Marie Designs, Labels 3 for the image and the Sea Green solid cardstock background.  I secured both layers to the standard A2 card base to complete the card. 

Thank you for stopping by today.  I enjoy sharing my work with you and invite you to “Follow” my blog and to visit my site ~ “Not Just Scraps” on Facebook ~ where you can purchase my cards.


I’ll be entering this card in the following challenges: 

Creative Fingers ~ Challenge 201 

Your Next Stamp ~ Challenge 157 

The Paper Shelter ~  Challenge 456 

Crafty Creations ~ Challenge 418 


 Pam's Pearls

Copic: Hair: YR21, YR24, YR27, E39, Body: B60, B63, B66, R81, R83, R85, BG11, BG72, BG75, Stone: W3, W5, Seaweed, BG11, BG72, Shadow: C3

Products:


Sunday, February 14, 2021

Happy Valentine's Day

Known to be the BIGGEST Card buying holiday next to Christmas ~ Happy Valentine's Day!  

One of the cutest stamps I own, Whipper Snapper's Fred & Ginger with an added Stamping Up Conversation Heart for the sentiment.


I've colored this image with Copic markers and I used the Penny Black Elegant Stitching die for the beautiful edge.  

I hope your Prince Charming remembered you today and showered you with love and kisses!

 Thank you for stopping by today.  I enjoy sharing my work with you and invite you to “Follow” my blog and to visit my site ~ “Not Just Scraps” on Facebook ~ where you can purchase my cards.


I’ll be entering this card in the following challenges: 

Cute Card Thursday ~ Challenge #673 

Stinkin Inkers ~ Hugs & Kisses 

Shopping Our Stash ~ #438 Love is in the Air 

Crafty Animals ~ Challenge #47 


Pam's Pearls


Copics Used:  Him: Y19, Y15, YG00, YG01, YG03, YG17, Her: RV17, RV19, V05, Flowers: RV17, RV05, YG17, YG01


Products Used: