Monday, March 25, 2019

If You're Feeling Blue~

Today's card posting and blog are not the normal for me, and will not be the normal for many of the Whimsy Design Team members.  Our cards aren't 'cute' or 'adorable' and they aren't for sale.

Today Whimsy Stamps is releasing Crissy Armstrong's latest image of her penguin, Penguin Ray, in honor of her brother who is fighting cancer.  In addition to our cards being for him, Whimsy will be donating 100% of the sales of this image to the Make A Wish Foundation in Canada.

For my project card, I decided to use Hanna Cheatem's quote and color the penguin really BRIGHT!


The digital image is printed on Neenah 110# card stock and I used Copic markers for coloring.  My card base is 6" square and the DS aqua paper is cut corner to corner and one reversed.  I used the Inkadinkado sentiment by Hanna Cheetem, as my inspiration for the card and laid my elements out basically like a postal envelope.  The Postage Stamp die by WYSE was used for both pieces and then matted with a deep red before adding to the card base.  Then I added a piece of gauze and a crayon box charm for the finishing touch.

Thank you for visiting today.  I would encourage you to take a moment to remember those who are fighting this terrible disease today.


Serving a Risen Savior,
Pam

This posting will appear on the following sites:
Whimsy Stamps & Inspiration, Addicted to Card Making 2.0, Christian Card Makers, Karle's Passion, Stamp JunkiesStampers Shop Swap, Passionate Paper Creations, Pinterest, and Not Just Scraps.
Copics:
Reds: R08, R14, R27, R29, R37, R39, Blues: B000, B00, B01, B02, Beak & Feet: Y15, Y17, Y19, Bag: FYG2, Skull: YG06, Pole N1, Wheels, N4 with glaze, Shadow, N0


Friday, March 22, 2019

Dream Big

Today's project card is featuring Unity Stamps Casey, by artist Tracey Malnofski and Joslyn Nielson.  Although it was released in 2015, it's the first time I've used it and I have to say, I think I will be using it again!  This is one cute little fashion statement for sure with her frilly little dress and ruffles flowing out under her dress.  


I colored this little cutie with my Copic markers and although
my photo doesn't pick it up, there is Wink of Stella on her shoes and her pearl necklace.  I used the Gina Marie Designs Frilly Lace Nested Rectangle die set for both the white and the green frames, and a miscellaneous circle tag die for the sentiment.  

Thanks for stopping by today ~ Your comments are always welcome. 

Serving a Risen Savior,
Pam


This posting will appear on the following sites:

Copics:
Hair: E21, E31, E33, E35, E37, Dress: R81, R83, R85, R89, Ruffle: R89, Pull w/ R81, Shoes: R89, Bows: YG01 & E41, Floor E31.  Clear Wink of Stella for pearls and over shoes

Products:

Wednesday, March 20, 2019

Our Love Can Weather Any Storm

When I saw yesterday that Pink and Main were celebrating their 5th birthday, it brought a big smile and a fond memory of several visits to their booth at the Duluth, GA Scrapbook Expo.  More recently my friend and I visited them at the Stamp Tour in Columbia, SC.  

Since I just happen to have used one of their cute stamps for a recent 'Umbrella' swap, I decided it would be the perfect card for today's blog posting.  


Rain Frogs is one of my go to images for get well cards, cards of encouragement and also works well with several humorous birthday sentiments that I have on hand.  For this one,  I used part of the Gina Marie Designs Stitched Cloud Border Dies and a paper stencil made with the same die to make the puffy clouds.  

While I do enjoy the Pink & Main stamps, one of my addition addictions to their supplies is the larger dies.  Being on the Whimsy Design team, I was thrilled to find that they carry the 5" square dies and other larger shapes.  Thank you Pink & Main!

I hope you will check out the celebration over on their site this week.  We all need to party and support our fellow crafting sites. 

Serving a Risen Savior,
Pam 

This posting will appear on the following sites:

Copics:
Umbrella: Reds, R27, R35, R39, Orange, YR14, YR16, YR19,  Green YG06, YG07,  Blue B04, B06,  Purple, BV02, BV13,  Handle E71 E74,  Jacket Y06, Y15, E15,  Frog, YG61, G24, YG01, G94, Water Various blues
Products:


Bonnie Brings You Easter Greetings

Today I'd like to share with you, Whimsy Stamps's digital image of
 'Bonnie', by designer Sylvia Zet.  She is all dressed up in the cutest big hat and would make the perfect Easter card for any young girl... all the way up to your special sweetheart. 


With this,  and all digital images, storage issues go away.  I sized her to be about 3 1/2" square (without the banner) knowing I wanted to use a 6" square card base.  I used Copic Markers for all the coloring and added Diamond Stickles after die cutting.  The center is a 4" circle to fit inside the Whimsy Loopy circle die which was a retreat gift.  I used the Curved Hill Die from the Kinetic Die set for the hill.  When assembling, I tucked part of the Loopy circle die behind the hill and also added the Happy Easter banner on the top.  She's all ready to go to her new home!

Thanks for stopping by today - Please come again.
Serving a Risen Savior,
Pam 

This posting will appear on the following sites:

Copics: Banner, G20, G21,  Leaves & Grass G20, G21, G24, G28,   Basket, E70, E71, E74,   Nose, N4, N9,   Face:  E0000, Cheeks R30/0, YR30, RV000, E40,   Hat E91, E93, E95,   Flowers E91, E93, E95, R85, RV11


Thursday, March 14, 2019

Forever and Ever and Ever

How long is Forever and Ever and Ever?

We never know how long we will have our special girlfriends in our lives.  If we are  "Lucky" or "Blessed" we  will have them a really long time.  Likewise when we are 'over-blessed' we have MORE than one Best Girl Friend.  

On our card site Addicted to Card Making 2.0 - the Journey Forward, we continue to honor our girlfriend in heaven, Jennifer.  This month our challenge is to make a card for our girlfriend(s).  There are many of us that would love to send her a card, she is still in our thoughts so very often.  As Debra and I continue to run her site in phase 2 ~ we have to laugh sometimes, wondering if Jenn is snickering in heaven, saying, "See, I told you!" 

My card today is for my 'longest' best girlfriend, Cindy.  We have been friends for 57 years!  That is a really long time!  While I'm one LUCKY girl we are both blessed with our friendship.


You can find the digital image of Blossom in the Whimsy Digital product section.  Blossom was Copic colored, then die cut with Sizzix Stacked Archway.  The outside die is the Tattered Lace Pearl Squares die.

Thank you for stopping by - be sure to take time to tell your best friend(s) how much they mean to you... and do it often. 

Serving a Risen Savior,
Pam

This posting will appear on the following sites:

Saturday, March 9, 2019

You Are My Good Luck Charm

While we may not be Irish, most of us enjoy a little 'wearing of the green' on Saint Patrick's Day, March 17th.  In honoring that day, today's card features Whimsy StampsLittle Leprechaun  by designer Crissy Armstrong.  For my card, I used the digital version of the the image which allows me to change the size or flip the image to fit my card better. You can purchase this digital image at the Whimsy Online store by clicking HERE or on the image name above. 


This is one of those cards that started out in one direction and ended up in a totally different one.  I picked this image specifically to make the 'pot of gold' an open pot and make a shaker full of shamrocks.  But after coloring, I decided to leave it just like it is.

The image is Copic colored which are referenced below.  I used the My Favorite Things Large Stitched Rounded Rectangle die for the image piece and added the colorful puffed hearts at the end.  The orange variegated string and circle die with the sentiment and shamrock button were added before gluing the background piece to the card base.  Once everything was assembled, I added diamond Stickles to the trail of the dragonfly, gold glitter Stickles to the shoe buckles and hat buckle, gold solid Stickles to the jacket buttons,  and Wink of Stella -clear to the wings of the dragonfly. 

Be sure to check the Whimsy Facebook page on March 17th ~ and look for a new surprise! May your St. Patrick's Day be filled with Good Luck too!

Serving a Risen Savior,
Pam

This posting will appear on the following sites:

Copics Used:
Hat: YG06,YG07, YG09, Hair E11, E17, E08, E19, Skin, E0000, R30/0, YR30, RV0000, E50, Jacket YG09, G14, G06
Pants, YG17, G24, YG67, Buttons & Buckles Y28, Shoes: N0, N1, N3, N4, & Blk Pen; Hat Ban N3 & N4,   Clover in the 
Hat ~ Stem G24, Clover YG67 &  green pen, Coins Y26, Y28, YR14  Pot, E97, E99, YR27, Socks Y28, YR14

Products Used:

Wednesday, March 6, 2019

Happy Birthday to the "Lawn Ranger!"

In some of my previous blogs I've talked about how some of the female images resemble our girlfriends, which makes it a lot of fun to create cards for them specifically using the matching images.  Likewise I think Art Impression (AI) does a fantastic job imitating the male gender and their the hobbies or habits of their daily lives.

Monday (March 4th) my Dad celebrated his 83rd birthday; and for that occasion I selected AI's  The Lawn Ranger rubber stamp.  Wanting the card to be exceptional for my special guy, I also chose the Whimsy Kinetic dies to make the card a No See Slider.

Here's my finished card, then the step by step details to make this project card.


 The AI Lawn Ranger imaged was stamped on Neenah 110# card stock and Copic colored *(referenced below), then hand cut out.  I determined I was going to use a 6" white card base, so the blue sky piece is cut 5 3/4" square.  Both green pieces are die cut with the Whimsy Kinetic Curved Hill die across the 5 3/4" width.  One is 3" from the tallest point to the bottom and the other is  2" from the tallest point to the bottom.  I also cut the curved fence out of brown card stock and glued it to the back of the larger piece of green.  That piece (the larger) is then glued to the blue sky piece, aligning at the bottom of the 5 3/4" square.  Determine where you want your tractor to ride. I used the middle size of the three arch thin cutting strips in the Curved Basic die set.  Die cut the BACK piece (sky with the grass attached).  The arch will look like an upside down smile.  Using the cut out small circles and two small foam dots, attach one circle on each side of the slider hole, with the foam in the center of this hole.  Then die cut two (or three) of the longest straight die- No See Basic Set, (in this card using green)  for the pull tab.  Glue these together so green is showing on both sides.  Glue this to the back of the card - to the circle on the slider. Once dried, pull the tab to be sure it will slide easily with nothing in it's way.  Watch the path of the pull tab so you see how high or low it goes... pulling it straight.  Now put foam tape around the slider keeping that path open, but close enough to keep the slider going straight.  Then add more foam tape around the edge and supporting areas to make your card strong.  Keep the back of the foam tape ON at this point.  Flip over and first take the small piece that will connect the image to the slider, it has score lines on it.  I also cut two of these and glued together, keeping the green side outward.  Now lay the front piece on the card in the position it would go - take the mower and work it with the pull tab to imagine if they were connected, if the path will work.  This is the point where you can adjust the front grass piece.  It might need to go up or down on the card to put the mower in the right place.  On my card I had to trim 1/2" off the bottom of the front to push the mower up on the card more.  Once you're happy with it, then you add the foam tape on the back of the first piece, making sure you aren't putting any in the path of the slider movement.  You still have the connecting piece sticking straight up on the back piece.  You can carefully fold at the score lines an attach with glue to the wide area of the image.  Aim for the center or a balanced part of the image.  Then remove the back of the foam tape and align from the bottom of the card.  Each time pull the slider to be sure you have everything aligned.  If it pushes in too far, it's okay to put an extra piece of foam tape as a 'stop' before putting together, to keep the tab end out enough to grasp it.   Jennifer Dove has a great YouTube video on using the Kinetic dies if watching is easier for you than following step by step directions. When you get it all together it is so cool! And the more you use the Whimsy dies, the more comfortable you will be with them.

Thanks for stopping by - your comments are always welcome!

Serving a Risen Savior
Pam


This posting will appear on the following sites:


Copics Used:
Hat & Shorts: R24, R37, R39,  Seat & Tire Centers Y15 & Y 19,  Mowe G07 & YG09,  Grill, Deck & Steering Whell, N3, N4, N5. Shirt & Socks shadows W1, N1,  Shoes & Shades, E35 & E55,  Sking R30/0, E000,, YR30, RV000, E40, E50, E51, E41, Outline in BG10. 

Products Used:


Monday, March 4, 2019

Wishing You Sunshine On A Cloudy Day

It seems we are all ready to join hands and sing,
"Rain, Rain, Go Away!"
and take the flu, and heal all those who have had surgery!

Today's featured card using one of Crissy Armstrong's older Whimsy stamps, Everything's Just Ducky, is one that is sure to bring a warm smile to anyone who receives it. 


The rubber image was stamped on Neenah 110# card stock and Copic colored *(referenced below), then die cut with a Pink & Main Stitched Rounded Rectangle die.  The patterned paper was also die cut with a Pink & Main die, but it was the Stitched Rounded Square die.  I used an embossed bright orange paper & the Pink & Main Large Scalloped Square die for the bottom matting and a 6" white card base.  I wrapped the Aqua organza ribbon around the orange mat first, leaving the ends long enough to tie the tag once I had glued the rest of the pieces down.  I added the patterned and the colored imaged, aligning to the right edge.  Then I threaded the ribbon through the pre-stamped tag and finished the card with the organza bow.

Thanks for stopping by today - I always welcome your comments. This and many other cards are available for purchase.

Serving a Risen Savior, 
Pam

This will also be posted on the following sites:

Copics Used:
Umbrella Y19, Y17, Y38, YR09, Handle B16,  Duck: Y08, Y13, Y15, Y18, Y19,  Beak: Y17   Boots: B06, B16, blend with FBG2,  Puddle: BG11, FBG2, B14,  outline with B16,  Bow: B14, B16

Products Used:

Sunday, March 3, 2019

Whimsy's Easter Bunny

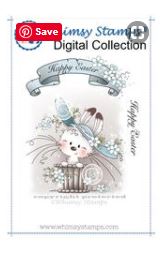
I think Whimsy Stamps has a huge selection of Bunny Stamps both by Crissy Armstrong and by Sylvia Zet.  This Easter Bunny stamp is one of my favorites and has been in my collection for some time. For the month of March, it is now being released in the digital format also.  You can click here to visit the Whimsy online store and add Easter Bunny - Digital Stamp to your shopping cart.

Here's the card I made using the Easter Bunny Digital Image and a few details of my project for you to be able to make your own.


The white card base is 5 1/2" square, with the solid green mat measuring 5 1/4" square.  The galaxy paper is 5" using the Tattered Lace, Lacy Days Square die cut.  I added a 1" strip of matching yellow next.  The image is printed on Neenah 110# card stock and I used Copic markers for coloring. *(referenced below) I used the 4 1/2" die in the same set, to cut the image, but re-cut the vertical edge at ~3 1/2".  After the die cutting, then I added the small pearls to the flower centers on the egg, and the raised Happy Easter oval  on the bottom left.   I added an aqua organza soft bow for the finishing touch.

Maybe you'd like to receive one of these sweet Easter bunny cards during the upcoming season or make one for someone special.  I'd love to see your creation - be sure to post it on Whimsy's Stamps and Inspiration page on Facebook and tag me.  

Thanks for stopping by today - I always welcome your comments.

Serving a Risen Savior, 
Pam 

This posting will appear on the following sites:
Whimsy Stamps &Inspiration, Christian Card Maker, Karle's Passion, Stamp Junkies, StampersShop Swap, Passionate Paper Creations, Pinterest and Not Just Scraps.

Copics:
Egg: BV000, BV23, BV25, BV11,   Chick:  Y21, Y23, Y31, Y32, YR31,   Ribbon:  BG72, GB57,  BG75,   Stool:  C1, N3, N4, N5, N6,  Bunny, W00, W1, W2, W3,    W8 nose/feet pads.  R01 feet bottoms


Friday, March 1, 2019

You Are My Rainbow

It's New Release Day at Whimsy Stamps and today I'm featuring the digital image of Crissy Armstrong's Noah's Ark.  This image is also available in Rubber Cling.

Here's my project card and then a few details in case you'd like to make one also. 


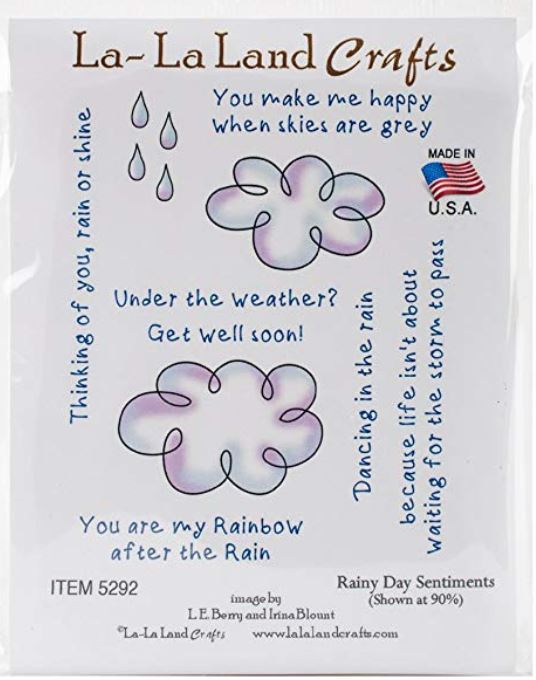
This image is printed on Neenah 110# card stock and Copic colored*.   The image piece is 5 1/4" square with a 1/8" black shadow mat, then an aqua wave patterned mat... all glued and mounted on a 6" white card base.  The bottom piece of the ark (tan lighter piece) is paper pieced using the March digital woodgrain paper, Wood Planks #6.  I did slightly lighten the wood papers knowing I needed the contrast since I wanted to have the darker monkey's for this project.  I pulled the sentiment from Rainy Day Sentiments by La-La Land. 

Hope you enjoy this fun card today.  It and many others are for sale or ordering if not readily available.  Your comments are always welcome.

Serving a Risen Savior, 
Pam

This posting will appear on the following sites:
WhimsyStamps & Inspiration, La-La Land CraftsChristian Card Maker, Karle's Passion, Stamp Junkies, Stampers Shop Swap, Passionate Paper Creations, Pinterest and Not Just Scraps.

Products used:
Copics: Monkey: N1, N3, N5, N7, N9, face E93 on edge & pull in,  Umbrella: E93 with E19 dots
Roof E37, Top of boat, E33, E35, E37 and E57   Elephants: BV20, BV21, BV24, B63, Ears V000
Left Giraffe E21, Right Giraffe E30 & E53,  Spots on both E19