Friday, January 31, 2020

You Make My Tail Wag

Today's stamp was gifted to me by a dear friend who is forever finding duplicate stamps in her collection.  I'm very fortunate to be the receiver of some really nice stamps!  When I received the sheet of puppy dogs from Fiskar stamps, I seriously tossed it to the side thinking, one - I don't do dogs and two - that dog looks hard.  

Last week a friend was flipping through my stamps searching for something for her teenage son. Wouldn't you know when she came across this same Fiskar stamp set it would be the one she would pick.

"Make him a Chocolate Lab" she says, like I can calmly punch a button or flip a page. Ha! Ha!   I'm sweating bullets!  


But the magic of Copic markers, pulling shades and letting the lights fall where they can... I think the little fellow turned out okay.   I used the sentiment "You Make My Tail Wag" which was part of the Fiskar package and then used the Gina Marie Designs Nested Label 2  to cut the colored image.  I applied a background piece of Valentine patterned paper to the A2 size card base then added the colored die cut piece.  I finished the card off by adding a bit of red ribbon and an open paw charm.

I'll be entering this card in the following challenges:
Cute Card Thursday-Challenge 619 Valentines
DL Art Thankful Thursday Valentines Challenge 252
Mod Squad-Inky Stamper - Get Your Animal Stamps Ready

 Thanks for stopping by to see what I've been working on.

Serving a Risen Savior, 
Pam

Products Used:


Thursday, January 30, 2020

Love You Pig Time!

Who says Valentines have to be Pink or Red?  

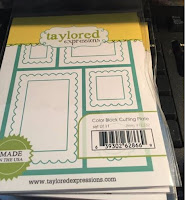
Today's card is a window card using the Taylored Expressions Color Block Square Cutting Plate die and the Mama Elephant's Hogs and Kisses stamp set.


To me, when I make one of these type cards, I remind myself to BE FLEXIBLE.  You have to allow the images and the spaces to flow and sometimes that takes several tries to get it to work out right.  

I started by laying the outside metal die frame on a piece of card stock that was about the size of the card base and then laying the little pig images in the window holes along with the sentiments.  I kept moving them around until I felt like the direction of each piece was 'correct'.  In this case, the bottom 'piggy' that is laying down, crossed over two blocks ~ so I carefully removed the dividing bar making those two smaller boxes into one longer rectangular box.  

Next, I took the selected stamps and stamped them on Neenah 110# card stock using Memento black ink and using Versa fine ink for each sentiment.  I used Copic markers for coloring (E93 & E95 for the pigs, R37 for the hearts and bow, and B07 for the headband).

I made the card base out of the Royal blue card stock that I had cut the window die from and also die cut a small scalloped edged heart for the remaining window.  I die cut the patterned heart paper using the Tattered Lace Beaded Chain Nesting Rectangle die.  Once I had everything glued into place, I added a double bow and ribbon made with yellow organza.  This did end up being an 'odd size' card base, about a 5" x 6" card. I easily made a matching envelope using the Stamping Up Envelope maker. 

I'll be entering this card in the following challenges:
Crafty Sentiments: Use Hearts
Do-Al (l) Kreatives: 3 of a kind
2 Sisters on the blog #35 On the Farm

Thank you for stopping to see what's on my desk today.

Serving a Risen Savior, 
Pam
Products Used:


Wednesday, January 29, 2020

Thoughts A-Flutter

Anyone who knows me in the least, knows how much I love hummingbirds!  From the logo on my photography work since the early 1990's, through the scrapbooking store years  in 2004 to 2015 and continuing through all my personal blogging and other card making and crafting, you will find a hummingbird floating around at some point.  

So finding this Stampendous, Lavender Birdfeeder stamp with the cute House Mouse addition was a must have for me! 


I stamped the image on Neenah 110# card stock and began coloring with my Copic markers.  This image colors up quickly as it appears to have a lot of detail, but it's a lot of the same colors.  I've been wanting to try the 'pink cloud' technique that my friend Faye Winn-Jones has been using recently.  Once I completed the coloring, I used my personal die cut stencil and Spun Sugar Oxide ink to carefully add the clouds around the image.  After giving that a few extra minutes to dry, I used the Gina Marie Frilly Lace Nested Rectangle Die to cut the colored image.  I knew I needed a 5 1/2 card base, so I selected an olive green background to match the greens in the hummingbirds. I trimmed it to just slightly smaller than 5 1/2" square and slipped it in the Misti stamping platform.  I used Versa Fine black ink and the 'just because' sentiment from the Altenew Stamp set, Fancy Greetings.


I'll be entering this card in the following challenges:

Thanks for stopping by today to see what I've been working on.

Serving a Risen Savior, 
Pam
Copics Used:
Feeder: R14, R29, R39, R27, E95, Feeder Flowers: Y15, Water: BG000, Chain: W5, Lavender Flowers:  BV01, BV02, BV13, Stems:YG63, Birds: YG18, YG01, YG11, N5, N1,N0, Mouse: E21, E23, Feet: YR27

Products Used:


Tuesday, January 28, 2020

Happy is the Heart That Holds a Friend

Today's card was really fun to make! It's using the new Whimsy Slimline Window Die, which makes a legal envelope size card.  I also used one of the Whimsy stamps ~ Baby Animals (discontinued) set on this card and made it into a shaker.


I stamped the panda and the bunny on Neenah 110# card stock and used Copic markers for coloring.  I fussy cut them out and set them aside.  I measured a legal envelope then folded a piece of card stock 1/2" smaller to make my card base.  I covered the front with the aqua polka dot paper, then die cut the matching aqua solid paper using the slimline window die.  I used the solid window cut out piece in the center to stamp the sentiment, and put it to the side also.   Next I took 6 pieces of white card stock (or large index cards) and die cut them using the slimline window die. I carefully stacked and glued them together onto the card.  I glued the stamped sentiment down in the center of the stack of die cuts.  I added the tiny multi colored confetti to the top right square and the open red hearts to the bottom left rectangle.  Next I added a piece of acetate that I'd cut the same size as the outside of the window die, gluing it to the top of the white card stock stack.  Once it was secure, I glued the aqua die cut frame on the top, then added the panda, the Best Wishes die cut and the bunny in their spots. 

I'll be entering this card in the following challenges:

Thanks for stopping by to see what I've been working on. 

Serving a Risen Savior, 
Pam
Products used:


Monday, January 27, 2020

Heart Strings of Love

It seems we just said Happy New Year, and now it's already time to buy your special someone a sweet valentine card.  You know it is truly an extra large holiday of card purchases, so I hope you will order a special card from a card maker this year.

My card to share with you today is from Art Impressions, Valentine Bears set.  I've made three cards from this set, so you will be seeing this cute little bear again soon.


For this design, I stamped the bear with the heart string, and the Happy Valentine's Day sentiment. I used Copic markers for coloring and the Gina Marie Studded Square die for the image.  I used Whimsy Stamps Peek-a-Boo Window 4 Die with an embossed Valentine paper for the background.  I took several small flower centers and glued them to the back of the circle cut outs to give an additional sparkle to the card. I added a different Valentine patterned paper to the A2 card base, then the Window die, then the colored image and the sentiment.  For the final touch, I took one of the punched out circles and used it as if it was holding the sentiment down, and added a small pink pearl.

This card will be entered into the following challenges:

Thanks for stopping by today. Be sure to stop back every day to see what's on my desk. 

Serving a Risen Savior, 
Pam

Copics Used:

Products Used:


Thursday, January 23, 2020

New Monarch Butterfly Design

Today I wanted to show you a new digital release from Createful Heart Digi & Design.  This card is created using Monarch Butterfly and is available at the Marketplace Zibbet Store.


To make this card I started by printing the image on Neenah 110# card stock on a 8 x 6 paper.   I then colored each section with Copic markers.  For the flower I used R81, R83, R85, yellow . For the leaves I used YG61, YG63, YG67, For the butterfly I used Y08, Y15, Y17, Y18,  Y18, Y24, Y23.  

Next I die cut the image with my Penny Black Elegant Stitching die.  For the green mat, I used Whimsy Stamps, Notched Square Die.  I used a 6" light green card base and mounted the die cut pieces on, then added the three orange jewel studs and the white double bow at the top. 

I decided to make this a Sympathy card thinking that even though this card would be send and received at a sad time, I will write about how important we are to our Lord.  He will never leave us, and will always be with us. 

I will entering this card in the following challenges:
Through the Craft Room Door ~Tuesday 21
Creative Crafters ~ #24

Thank you for stopping by today.

Serving a Risen Savior, 
Pam 
Products Used:


Wednesday, January 22, 2020

By God's Grace Alone

When the stamp for today's card came in, I was amazed at the size of it.  It is huge and the image is beautiful!  It is a clear stamp by Picket Fence Studio, and is named Lily Bouquet (F108).

Here's the card I made using the stamp. 


I used a 6 x 6 piece of Neenah 110# card stock and my Misti to position and stamp the image with Momento Archival ink. Then I stamped the sentiment near the flowers using Versafine ink.

  I used Copic markers (referenced below) to color the flowers and leaves.  When completed,  I used the  Whimsy Stamps, Notched Square dies to cut the finished image.  I mounted the green background paper on a 6" card base, then added the image and three enameled dots.  Inside the card I used the stamp from the set, 'This too shall pass'.

Thank you for stopping by today. 

Serving a Risen Savior,
Pam
 Copics Used:
Y13, Y15, Y17, Y18, Y38, YG61, YG63, YG67

Product Used:


Tuesday, January 21, 2020

Give Every Day

Today's card was made for Unity Stamps January New Beginnings Challenge.  I purchased their stamp, Your Future Needs You by designer Angie Blom because of her beautiful braided hair.   Here is my completed card entry. 


To make this card, I stamped the image on Neenah 110# card stock and colored her with Copic markers.  I fussy cut her out and put her to the side while I made the double shaker card.  

I took a 10 x 10 piece of watercolor paper and used my Oxide Ink to make a sunrise top (using Worn Lipstick, Spiced Marmalade, Fossilized Amber on the top 3/4), and to make the water for the bottom  (using Cracked Pistachio, Peacock Feathers on the bottom 1/4).  I used the 'wave' from the stamp set and stamped it continuously across the blue/green part of the oxide paper.  I used the Pink and Main, Sunny Cover Die and cut one in the oxide paper and then cut 6 more out of white to make a stacked window double shaker card. 

To assemble, I started by gluing the background oxide piece to the card base,  then added the six white die cut pieces next, carefully gluing and stacking each one. I carefully added the sequins at the top and bottom in each little section before adding the sheet of acetate.  The top layer that completes the stack is the oxide layer that was die cut away.  

Next I carefully glued the girl over the frame of the sunrise die and then I added the sentiment tag with the small organza ribbon.  

I will be adding this card in the Unity Stamp January New Beginning Challenge and also the following challenge: 

Thank you for stopping by today and I appreciate your comments too. 

Serving a Risen Savior, 
Pam

Copics Used:
Hair: E21, E23, E25, Dress: BG07, BG45, BG0`, Skin: G0000, YR0000, RV000

Products Used:


Monday, January 20, 2020

Do You Love Me?

Happy Monday to you from Myrtle Beach, SC this morning! 
I'm away from home this week, enjoying crafting and card making time with several girlfriends.

Today's card is made with Whimsy Stamps, Aimee & Valentino by CC Designs.  I think this is one of their most versatile kids stamps that could be used for many different occasions.   


To make this card I stamped the image on Neenah 110# card stock and used Copic Markers for coloring.  I used the Gina Marie Design Venetian Label Die to cut the image and the aqua mat behind the image.  I used a retro Valentine background paper and a 4 x 5.5" card base.  I stamped the word Love and used the smallest die from the Venetian Label set then glued it to the top of the card.  To complete the card I added the red twine with a single bow and heart charm.  

I used this card for a swap challenge (Valentine Card) for Addicted to Card Making and will also be entering it into the Send a Smile to a Kid Challenge -Valentine or Love Card.

Thank you for stopping by today. 

Serving a risen Savior, 
Pam

Products used:


Gina Marie Designs, Venetian Label Die

Friday, January 17, 2020

The Best Sister in the World


Each time I get a request to make a custom designed card, I get excited about the possibilities.   It is wonderful to ask a few questions about who the card is going to and then to create a surprise handmade designer card.  Today's card was a special order for a friend's sister's birthday.  What made it extra special was they were traveling north to see her and were going to hand deliver the birthday card.  

When I asked her to tell me about her sister, the warmest smile came across her face as she said, 'Well she always has on overalls and she works outside a lot'.  I sent her several images of girls in overalls but Whimsy Stamp, Maybelle With Chores, by Elisabeth Bell was her first choice.  I elected to make a scenic card by adding a second Whimsy stamp, the trees and house in the background. 
                                                      
Here's the finished card and then a few details about the project and the special delivery.


To make the card with two stamps required a masking technique.  I stamped Maybelle on a scrap of paper, cut her out and carefully taped her where I planned to put her on the card front.  Then  I stamped the trees and house image.    Next I removed the paper 'mask', aligned the girl stamp back in the same position and stamped her where the mask had been. This gives her the effect of standing closer and in front of the trees.

The images are colored with Copic markers and I used a Pink & Main's Rounded Stitched Rectangle die for the image and a Tattered Lace Beaded Chain Nested Rectangle Die for the denim mat.   I wanted the Happy Birthday to be die cut out of the same denim paper but ran into a problem.  I didn't have enough paper!  No worries.... I'm sure you can guess what I did, right? 


Ssshhh! Don't tell!  It's okay.... 

I used a red card base to mount all the pieces and a gray organza ribbon with a pretty double bow to finish off the card. I also added a matted die cut liner inside.

My friend was very pleased with the card and promised me she would take a photo when she gave the card to her sister.


I asked her what her sister said ~ she replied ... 'It's Me!', and that's the best compliment she could ever give me! 

Thanks for stopping by today.  I hope you will remember your friends and family with special cards.  They will remember that you took the extra time and effort.

Serving a Risen Savior,
Pam
Copics Used:
Overalls: B41, B45, B37, Apron: R27, R39, Hair: N0-N5, Shirt:C0, Basket: E97, E11, E95, E41, E41, Apples: R16, G06, YG63, Bowl: E87, E93, Tree Trunk: E, 17, E18, E37, E57, Leaves:YG63, YG93, YG95, YG97, YG99, G94, Y19, R29, R46, YR15, YR26, YR05, Flowers: YR16 Y73, Shadows:W3

Products:


Pink & Main Rounded Stitched Rectangle


Thursday, January 16, 2020

Candlelight Wishes

I'm sure I'm not alone ~ please tell me I'm not?  

I see a card in the Facebook news feed and really, really like it.  Without thinking twice, I message the card maker to find out where she got the image from.  A quick response and I'm clicking right behind that.... to a new site full of stamps or digital images!  Within minutes, a click here or there and BAM! My cart is 'hard to push' because of so many wonderful images!  I want to color them all!!!

Today's card is the result of one of the adventures described above.  My friend Judy posted a super cute card - and before I could blink good, I'm on the Etsy site for Lily of the Valley Digital images! Funny how more than one always 'jumps' in the cart!

This sweet image is called Christmas Candle.  Even though she is carrying a candle that has Holly, I don't think this image should be restricted to just Christmas.  


I made my card a card of encouragement or get well by adding a small "Hugs and Prayers" sentiment.  I've also referenced the Copic markers that I used below along with the link to the die from Gina Marie Designs.  

I will be entering this card in the following challenges also:

I appreciate you stopping by today and hope you'll be back soon.  

Serving a Risen Savior,
Pam 
Copic Used:
 Hair: E21 E23, E25, Skin: E000, YR20, RV0000, R30, E51, Candle/Holly: Y30, R27, YR23, R37, R56, YG61, YG63, YG67, Shoes: E23, E25, Scarf, R37, R57, N0, Coat: V91, RV93, V95, Ground: BG0000, B0000

Products Used:


Wednesday, January 15, 2020

In Her Own Wings

Here it is, the 15th of January already!  Time for another image from Createful Heart Digis & Designs.

This month I selected the 'Cardinal' image to share with you from the Createful Heart Zibbet store.


To make this card, I printed the image on Neenah 110# card stock, and used Copic markers for coloring (referenced below). The sentiment is from Unity Stamp Co, and is stamped using VersaFine ink. I used a simple stitched rectangle die for the image, the sentiment and the green mat behind the sentiment.  I covered the A2 card base with a red plaid paper, then added the image and sentiments.  For the final touch, I added a piece of black yarn and a small brown snowflake tab.

I encourage you to visit the Zibbet Store for Createful Heart's Designs and especially to enter your cards for the next month in her blog challenge.  Remember you do have to 'follow' the blog to be eligible to win.

Createful Heart Design store click here.
Blog Challenge click here.

Thanks for stopping by today to see what I've been working on. 
I'll also be entering this card in the following challenges:


Serving a Risen Savior, 
Pam 

Copics Used:
 Tree: E70, E74, W1-W4, Green branches: G20, G21, G24, Holly Leaves: YG95, YG97, Snow: BG0000, Beak and Feet: YR04, YR27, Face N1, G85,  Berries: R17, R46, Cardinal: R17, R27, R29, R31, R39 & R46

Products Used:


Tuesday, January 14, 2020

Dreams Take Us Forward

When I read the new Art Impression Hugs & Kisses Blog Challenge, I knew exactly which stamp I wanted to use ~ Love Birds!

I've used this image several times for anniversary cards, valentine cards, and other special events.  It's perfect with many different sentiments. 


For this card, after stamping on Neenah 110# cardstock  and coloring with Copic markers, I carefully cut away the area from the top of the park bench, around the image, to the other side of the park bench. 

I cut a circle out of a scrap of this multi tear dropped paper and tucked it under the colored image, then glued it lightly to the image.   The sentiment (from Unity Stamp Co.) is stamped on a white card stock and added to the teal mat on the A2 card base.  Then I added the image with the rain 'circle'.  

What a sweet sentiment Unity came up with ~ 

Memories take us back.... what would we be without our memories?

Dreams take us forward.... how wonderful it is that we can dream of wonderful things to come.

I'll be entering this card in the following challenges:

Thanks so much for stopping by today.

Serving a Risen Savior,
Pam

Copics Used:
Her~ Hair: N0, N3, N5, Coat V91, V93, V95, Vine Multiliner.   Him ~ Skin: E51, Pants: W3, Shoes, E23, E25, Coat BG90, BG93, Hat : BG93, BG96.  Bench E08, E09, E19, Shadow W3, Umbrella BG11, BG23, BG34

Products Used:


Monday, January 13, 2020

Celebrating You!

Today's Birthday card was made for one of my long time girlfriends.  We've shared so many road trips over the years to shop for bargains.  We seem to always end up in an 'adventure' every time we hit the road!  Here's to MANY more sweet friend!


For her card, I selected Stamping Bella's Ava Loves to Celebrate and stamped her on Neehan 110# card stock.  I used my Copic Markers for coloring and the Gina Marie Nesting Labels #2 dies for the image, mat and sentiment.  The card base was a 5 1/2" square covered with a mauve 5 1/4" mat.  I added a deep salmon knotted organza ribbon after adhering all the other elements.   I also added a blank die cut square inside for the message. 

I'll be entering this card in the following challenges:


Thank you for stopping and for following by blog daily. 

Serving a Risen Savior, 
Pam 


Products Used:


Sunday, January 12, 2020

Unexpected Miracles

Good Morning!  I ordered this new Unity stamp on the spur of the moment, not even sure I really liked it.  It caught my eye and hopped in the cart but I had my doubts about it to be honest.  So when I inked it up yesterday, it about took my breath, seriously.  It really speaks to me about change, grace, and miracles. I found myself with four sentiments in hand; having a tough time deciding on which one to add!  I hope you like today's card as much as I do.

This is Unity Stamps' Life Should Be, by designer Angie Blom.


To make today's card, I stamped the image on Neehan 110# card stock and colored it with Copic Markers.  I taped it down with washi tape and then added Oxide inks for the background.  I used, Fossilized Amber, Worn Lipstick and Orange Marmalade. 

Next I wanted to add a Bokeh technique to the background.  I used a standard stencil that had several different size circles, a piece of foam, and Moonlight White pigment Ink by Brilliance. (Note: Any white ink would work for this technique.)  I randomly added the white dots around the background, overlapping some and allowing some to go partially off the edge. You do need to set this aside for a few minutes to dry or heat it with your embossing gun to dry it.

 Then I die cut this piece using one of the Gina Marie Designs Nesting Label #2 dies. I used a side fold A2 white card base and covered it with an orange shimmer mat, slightly smaller.  To finish the card I added a white double organza bow. 

I'll be entering this card in the following challenges:

Thank you for stopping by today too! 
Blessings for your Sunday my sweet friend, 

Serving a Risen Savior, 
Pam 

Copics Used:  RV02, Y13, Y15, Y18, Y19, Y378, E25

Product Used: