Wednesday, November 11, 2020

You Can't Pour From an Empty Cup

Coffee Loving Cardmakers Fall / Winter Blog hop is well underway (and I'm behind!).  Today I'd like to share my first card entry for this hop.  

I've combined images from two packages from Polka Dot Orchard.  The girl holding the coffee mug is from Note to Self and the reminder of the card design is from Make Time for Yourself.  Both of these were drawn by artist Jeanie Hays.


To make this card, I placed the swing into my digital card front template and then brought in the blanket layer.  Next I added the pillow layer for sizing, but then moved it out of the card front area to print separately.  Then I brought in the girl image.  (Note: She is sitting in a bean bag chair, so I reduced the opacity to about 60% to allow me to see the size I needed to make her.)  Once I had the size needed, I moved that layer over to the side also, and brought the opacity back up to 100%.  I also pulled the sentiment in for sizing on the card front - then moved it to the side for printing.  If you aren't use to doing digital layers, this is probably a bit confusing.  Basically the card front has the swing and blanket.  Off to the side I have the girl, pillow and sentiment.  

Next I printed both on Neenah 110# card stock and colored each element with my Copic markers.  I die cut the sentiment and fussy cut the pillow and the girl (away from the bean bag).
I also die cut an additional patterned shape one die size larger to go behind the sentiment and a stitched square to use behind the card front.  

I selected a 6" square moss green card base and mounted the layers - then added the enamel dots and the spider web topper.  I also added a white die cut square inside for writing.

Thank you for stopping by today.  I enjoy sharing my work with you and invite you to “Follow” my blog and to visit my site ~ “Not Just Scraps” on Facebook ~ where you can purchase my cards.


Don't forget about the big birthday celebration right now! You can save 37% on this digi and many others including stencils! Visit Polka Dot Orchard!


I’ll be entering this card in the following challenges:

 Coffee Loving Cardmakers ~ Fall/Winter 2020 Blog Hop 

Make Mine Monday ~ #135 Elegant Fall/Autumn 

Simon Says ~ Monday Challenge 

Classic Design Challenge ~ 11 - November 

Crafty Hazelnut - Patterned Paper #11 November 

Sparkles ~ #133 Hello Autumn 

CD Sunday Challenge #48 


Serving a Risen Savior,

Pam

 Products Used:
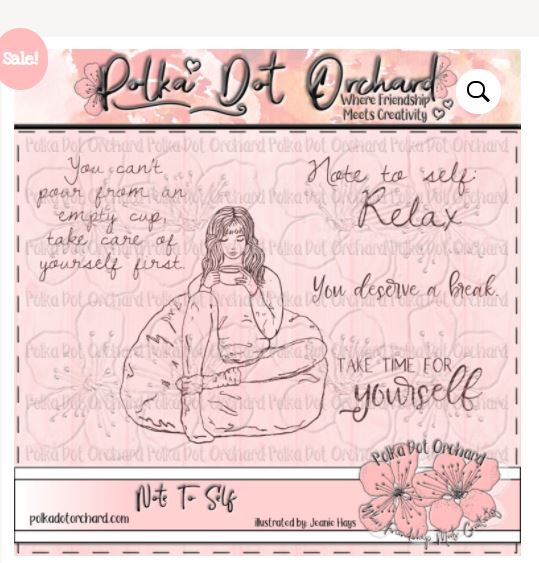
 Polka Dot OrchardMake Time for Yourself   


Tuesday, November 10, 2020

Swim In Your Own Direction

 Many of my online friends joined me in wishing my son a Happy Birthday last week.  Today's card is the one I made for him this weekend to hand deliver. 

This image is by Stamping Bella and is named Oddball Fish Set.


I wanted to have one of the fish swimming the opposite way - and in his favorite 'Clemson' colors.  I stamped the three fish on Neenah 110# card stock and used my Copic markers for coloring.  I fussy cut each of them out afterwards along with the sea weed from the Stamping Bella Tiny Towne Mermaid set.

I selected a blue card base to resemble the water and added a piece of plastic netting (yes, off of a ham!)  I attached the netting with a couple of mini Glue Dots and placed the fish over the glue dots and also on a foam dot to raise them above the netting.  I die cute the stamped sentiments with a Maya Road Arrow die and trimmed the second sentiment down the middle of the arrow.  Lastly, I secured several glass mini domes around each fish to look like air bubbles.

Thank you for stopping by today.  I enjoy sharing my work with you and invite you to “Follow” my blog and to visit my site ~ “Not Just Scraps” on Facebook ~ where you can purchase my cards.


I’ll be entering this card in the following challenges: 

A Perfect Time to Craft ~ #11 November  

Bastel-Traum ~ #94 Background (#btchallenge94) 

Cards Galore ~ November 

Crafty Animals ~ Challenge #44 

Creatalicious Challenge ~#198 Anything Goes w/Humour 

Love to Craft ~ Challenge #52 

Mix It Up ~ Challenge 43 ~ Make Your Background 

Scribbles Designs ~#93 Feature a Creature 

Avenue 613 - Cute Critters 


Serving a Risen Savior,

Pam


Copics Used:

Purple fish:  BV13, BV04, BV02, BV00, Orange fish: YR18, YR16, Y19, Y18, Y17, Y15,  Red/Blue fish: R37, B66, B63, BV000


Products Used:


Stamping Bella Oddball Fish Set


https://stampingbella.com/shop/index.php?route=product/product&product_id=1755

Monday, November 9, 2020

Hey There

 Sometimes sending the simplest greetings may not feel like you've done enough, written enough, made your card fancy enough.  But in reality, when the person receives that unexpected card, sees that you took the time to make it yourself, their heart is going to be filled with gratitude. 

You are going to make a difference!

Today's card is one of the 'simplest' cards and greetings. This is Unity Stamp Company's Gingko Greetings paired with the 'Hey there' sentiment. 


No fancy bows, no bling, no interaction - just 'Hey there'.

Today as we move forward towards the busiest time of the year, take a few minutes to send out those simple cards. Seek out the places like nursing homes where no one ever comes to visit, hospitals where patients can't have visitors, and of course our military personnel.  You are going to make a difference! 

Thank you for stopping by today.  I enjoy sharing my work with you and invite you to “Follow” my blog and to visit my site ~ “Not Just Scraps” on Facebook ~ where you can purchase my cards.


I’ll be entering this card in the following challenges:

A Gem of a Challenge ~ Week #23 

Patties Creations ~ Challenge #176 

Cute Card Thursday ~ Challenge #659 

Simon Says Wednesday Challenge ~ Thinking of You

 Unity {Show & Tell}


Serving a Risen Savior,

Pam

 Products Used


Friday, November 6, 2020

Fall, Family & Friends

 Today I'd like to share with you a sentiment based card from Polka Dot Orchard.  This one was designed by artist Lea Keisling and is named Thank God for Fall.


This package contains this beautiful 'subway art' styled prayer giving thanks to God for several of our fall season blessings along with two styles of leaves. 

For my card today I elected to focus on the sentiment and sprinkle several of the leaves down each side.  After printing to about 2 1/2" x 4", I colored the leaves with my Copic markers.  I selected three solid mats and a Kraft card base, then used a standard X-stitched nesting die to build the layers.  

After cutting and securing to the card base, I added a thin tan twine wrap and bow. I also added an extra white die cut mat inside for writing to complete the card.

Thank you for stopping by today.  I enjoy sharing my work with you and invite you to “Follow” my blog and to visit my site ~ “Not Just Scraps” on Facebook ~ where you can purchase my cards.


I’ll be entering this card in the following challenges: 

Crafty Creations ~ November #415 Anything Goes 

Mod Squad Challenge ~ So Grateful 

The Card Concept ~ #143 Give Thanks 

Paper Funday  ~ #23 November ~ Anything Goes 

Always Fun Challenge ~ #187 Kraft 

Path of Positivity ~ #85 Gratitude 

Sparkles Forum ~ Challenge #83 Hello Autumn


Serving a Risen Savior,

Pam

Products Used:


Thursday, November 5, 2020

Sending Prayers

Today I'd like to share a recent card I made using the Penny Black, 'Unfolding' stamp along with Honey Bee's 'Prayers' Die Set.  

Here's the finished card, then a few details about how I put it together.


  The name of the Penny Black stamp 'Unfolding' is a bit deceiving - until you realize they are talking about the stages of the beautiful flower depicted in the stamped image.  It's truly an amazing stamp!  I stamped it on Neenah 110# card stock and colored it using my Copic markers in several of the 'R' series shades with the YG series for the leaves and stems.  I used the Tattered Lace Lacy Days Die set for the edges of the completed image and also the solid matting. 

I used the same color solid card stock and die cut the word 'prayers' using the Honey Bees set. This is a wonderful die set because it has the word 'pray', along with 'ing', 'er' 'ed' and 's' allowing the versatility of each combination for your card selection!  I carefully glued the die cut word at an angle across the colored flowers. 

I used a moss green card base and mounted the solid mat first.  Then I tied an organza ribbon around the colored image adding a cross in the knot.   I  secured that piece on top of the solid mat to complete card front.  Lastly I cut a white liner and secured it inside for the writing area.

Thank you for stopping by today.  I enjoy sharing my work with you and invite you to “Follow” my blog and to visit my site ~ “Not Just Scraps” on Facebook ~ where you can purchase my cards.


I’ll be entering this card in the following challenges:

 A Perfect Time to Craft - November 

Crafter's Cafe ~ #254 November Just for Fun 

QKR Stampede ~ #407 

Creative Crafters ~ #33 

Penny Black ~ Saturday Challenge October


Serving a Risen Savior,

Pam

Products Used:

Penny Black, Unfolding


Honey Bee Prayer Die Set


Wednesday, November 4, 2020

Word Art Wednesday ~ November Guest Designer

I am so honored to be the Guest Designer for Word Art Wednesday for the month of November.  I've been a blog follower for many years and glean lots of inspiration from the talents of the ladies who use the scriptures as the basis for the cards they share here.   

This month's sponsor, Emma's Paperie, has 25% off her entire site, so be sure to check that out today.  You'll need to use the code 25Off.

This weeks' selected scripture is Exodus 15:13.


For my project card, I selected Whimsy Stamps, Nativity Critters by Crissy Armstrong. 


I stamped the image on Neenah 110# card stock and colored it using my Copic markers.  I used the Memory Box Matinee Rectangle Layers die for the image, the brown mat, and the printed scripture sentiment. 

I matched the background paper to the color of the donkey and covered a 6" square brown card base.  I added the brown mat with the completed manger image, then secured the scripture to the lower corner.  I finished the card by adding an organza double bow and a blank die cut white mat inside for the writing area. 

Thank you for stopping by today, especially if you are here from Word Art Wednesday!  I enjoy sharing my work with you and invite you to “Follow” my blog and to visit my site ~ “Not Just Scraps” on Facebook ~ where you can purchase my cards.


I’ll be entering this card in the following challenges: 

Digi Doodle Challenge #33  ~ Christmas/Winter 

Merry Little Christmas ~ #28 November 

Papercraft Challenge #33 ~ November 

Scribbles Designs ~ #93 Feature a Creature 

World Wide Open Design Team Challenge #10 October 

Ave 613 Create - November ~ Anything Goes with a Critter


Serving a Risen Savior,

Pam

Products Used:


Tuesday, November 3, 2020

Upscaling Part of My Work Area

 No matter how small or large your crafting area is, given some time and use, it is bound to get messy and unorganized.  Well - maybe not everyone has this issue - but MOST of us do!  

In my home, my craft room is ~10' x 10' so every inch is prime real estate.  The area where my Sizzix machine and my very extensive collection of dies are had become cluttered and unmanageable.  But the worse part was my machine was on a 'rolling microwave table' which was low and caused me to bend my back at an odd angle every time I used my die cutting machine. Something just had to give!

Is there even a Sizzix machine in that photo?

The quest was on for a new table or cabinet that was taller and would give me more storage.  It also had to fit width wise in the space (~25") where the cart would be coming out.  It turned out not to be an easy search - Inventory in our stores isn't in abundance and I really didn't want a new piece either. It took over a month of shopping all the little stores before I finally found a piece that would fit!


Definitely one person's 'trash' as it was missing knobs and had been chewed by someone's pet... it reeked of smoke - which I didn't realize until after I purchased! (oh boy!) They were asking $75, and I asked for a better price due to the damage.  I paid $60. Yes, this was going to be a Project for sure!

Four baths of Vinegar, two of Clorox and several sprinklings of Baking Soda later - I used a dewaxed shellac seal coat by Zinsser on the outside and then began the painting. 


It took three coats of good Valspar top quality paint plus some touch up to cover everything - but what a treasure I now have.  My space is reorganized, my dies have plenty of room and are labeled, filed and easy to access. 


The cost of the project ~ $60 for the cabinet, $14 for the knobs, $9 for the liner material, paint was left over, $3 for new rollers, brushes on hand, cleaning supplies on hand. 
Total ~$86  Well worth the investment. 

Thank you for stopping by today.  I enjoy sharing my work with you and invite you to “Follow” my blog and to visit my site ~ “Not Just Scraps” on Facebook ~ where you can purchase my cards.


Serving a Risen Savior,

Pam


Monday, November 2, 2020

May HIS Light Shine on You

While it's hard to believe that it's November, it's going to be even harder to believe how fast Christmas Day is going to be here. I'm here today with Jan's Digital Stamp Shop with my new project card, a $1 off November coupon for you and a free Christmas Ornaments image from Jan!  

First I'd like to share the card I made using  a small image in Jan's 's Honey and Boo package along with one of her generic sentiments.


I sized the image to fit in the top left corner of the card front and then added the sentiment snuggly under it.  I printed this on Neenah 110 # card stock.  I used my Copic markers for coloring and the Penny Black Elegant Stitching Die for the edges.  I used an A2 sized Kraft card base, covered with a Christmas print as my base, and then the  colored image.   Finally I added the brown twine and the charm to complete the card. 

Jan has TWO specials for November - first there is a TURKEY coupon ~ $1 off your Digi Purchase 


To use this coupon:

* Sales Starts NOW, Ends 12~31~20, Ends 12-31-2020, 

Good for one stamp/purchase per person

*USE Coupon Code: Turkey$1

But wait  ....  There's MORE!!!

Jan is also offering a FREEBIE to all her readers and blog players!

Visit the Shop (Click HERE) and get your FREE Christmas Ornaments Image!


My card using the free image ~ 


Be sure to add your card to Jan's Challenge this month - Here's the link for her Blog Challenge:  HERE  

Thank you for stopping by today.  I enjoy sharing my work with you and invite you to “Follow” my blog and to visit my site ~ “Not Just Scraps” on Facebook ~ where you can purchase my cards.


I’ll be entering this card in the following challenges:

CD Sunday ~ Anything Goes #47 

Crafty Hazelnut ~ #514 Begins with an H (Holly) 

My Time to Craft ~ #444 Clean & Simple 

Creative Sketchy Girls ~ #53 Winter

Word Art Wednesday ~ #462-463


Serving a Risen Savior,

Pam

Products Used:


Sunday, November 1, 2020

Winter Birds Are On the Way


This afternoon I'm back with a second posting, this time with my Design Team ladies from The Corrosive Challenge Blog with a new month (#11) and a new sponsor.  For November our sponsors are: The Art of Ching Chou Kuik and Fred She Said Designs.

For my project card I'm using Fred She Said's image Winter Birds - Blue Tit Digi  

I wanted to make the bird a little differently so I decided to make her dimensional.  Here's my finished card, then several photos and details on how I went through the steps to get to the end result.  


I started by duplicating the single image of the bird (which comes with this set also) at the same time as I duplicated the above image. I used my Copic markers for coloring and duplicated the colors for the second bird.   


Then I carefully fussy cut the second bird out and placed her on wax paper on a small paper plate.  I used a foam disposable brush to apply two thin coats of Mod Podge, allowing about 30 minutes to dry in between coats and over night before the next step.  

Next I took the first colored bird and die cut her in a circle with the Gina Marie Design Pleated Lace Circle Die.  I covered an A2 sized card base vertically with a Christmas flower patterned paper, then added the colored image toward the top center of the card base.  Using my Misti, I stamped 'Merry Christmas' from Gina Marie Designs winter Flourished Stamp Set, die cut the ends, and added across the bottom half of the card base.  

Now to add the 'Mod Podge Bird'.  On the Card Base Bird -  I placed two small foam squares in the center of the bird's body and then carefully put glue on the feet and legs of the bird on the card base.   I carefully placed the Mod Podge Bird's feet onto the branch, then laid her body onto the foam square, making sure she was lined up straight and held her there for a few second to let the glue dry good. 


I added a tiny dot of Diamond Stickles to each of the highlight spots on the holly berries and on the bird's eye.  Then I randomly added the three blue enamel dots and the white organza bow for the finishing touch. 

Thank you for stopping by today.  I enjoy sharing my work with you and invite you to “Follow” my blog and to visit my site ~ “Not Just Scraps” on Facebook ~ where you can purchase my cards.


Serving a Risen Savior,

Pam


Products Used:


Don't Worry ~ You've Got This

Good morning from the Design Team at 2 Crafty Critter Crazies.  We're here today with the new Blogspot Challenge #44 and our sponsor for this month is The Paper Shelter


For my project card, I have selected their image  ~ My Little Dragon.

To make this card, I sized the image to 3" wide by 4" tall knowing I wanted to make a 5 1/2" square card.  I printed her on Neenah 110 # card stock and used my Copic markers for coloring.  I used the Gina Marie Designs Labels 3 Die for the edges of the completed image.  

I die cut the blue/green to lavender 'sky' paper with my Tattered Lace's Nested Beaded Chain Square Die and adhered it to the card base.  Next I secured the colored image to the center of the card followed by the sentiment tags which came from my stash box of extras. 


I added a bit of Silver/Blue Stickles to her sword and helmet.

 Then to finish the card I randomly added the three red enamel dots.

Thank you for stopping by today.  I enjoy sharing my work with you and invite you to “Follow” my blog and to visit my site ~ “Not Just Scraps” on Facebook ~ where you can purchase my cards.


I also invite you to visit the 2 Crafty Critter Crazy Challenge blog to see the other Design Team cards and to enter YOUR Cards too!  


I’ll be entering this card in the following challenges:

AAA Birthday ~ Photo Inspiration Challenge #18 

Scribbles Designs ~ Feature a Creature 

Creative Crafters ~ Challenge #33 Anything Goes


Serving a Risen Savior,

Pam

Products Used: