Friday, June 30, 2023

Hello Lovely Lady!

Welcome to the Classic Design Challenge for July.  Our sponsor for the month is Fred She Said and I have selected their lovely Hibiscus for my inspirational card today.   


I made the single image a large 4" flower, colored with three shades of lavender Copic markers and three shades of green  I added gold metallic gel men in the center for the stamen and then die cut the edge using Tattered Lace Lacy Days Square.  I also used this die for the background  matting. 

For this card I used a 5 1/2" card base and secured the green patterned paper layer.  I rotated the completed hibiscus image to the right, keeping all the corners on the card base and secured it,  Lastly I added the gold 'hello' embellishment sentiment at the bottom center to complete the card. 

Thank you for stopping by today to view my blog. I enjoy sharing my work with you and invite you to 'Follow' my blog and to visit my site - "Not Just Scraps' on Facebook - where you can purchase my cards. 

I will be entering this card in the following challenges:

Try it on Tuesday: Summer Blooms   

Beautiful Blossoms ~ Flowers 

Simon Says ~ Anything Goes #107 

The Crafty Addict ~ Challenge 2


Pam's Pearls


Copics 

V12, V15, V17, YR24, G21,G40, G43, G82, Gold Metallic pen


Products


Thursday, June 22, 2023

Start Each Day

Today's cutie card is showcasing All Dressed Up's new Wellie Boots.  


After sizing her to about 3 1/2" tall and printing her on Neenah 110# cardstock, I colored her using my Copic markers. (quite a few Copic markers...)  I added in the rolling hills and a few extra flowers in her garden and a calming sunset or sunrise.


Next I die cut the completed image using the Gemini ~ Scalloped Edge Squares 2I added the plaid printed mat, a 1/2" green horizontal strip across the center and the vertical sentiment  ~ 

'Start each day with a grateful heart' 

to the card base.  Lastly I added the organza ribbon and the heart charm at the fold to complete the card.

Thank you for stopping by today to view my blog. I enjoy sharing my work with you and invite you to 'Follow' my blog and to visit my site - "Not Just Scraps' on Facebook - where you can purchase my cards.  

Pam's Pearls


Copics  

Hair: E21, E23, E25, Headband, Shirt & Wellie Boots: Y15, Y18, Overalls, B23, B24, B26, B28, Socks: B21, Bird: B01, B02, E93, Shovel: R56, C2, Rolling Hills: G03, G09, YG03, YG09, YG13, YG17, Tree & Bushes: E23, YG17, YG09, YG03, Flowers: YG67, Y15, R35, B23 , Sky: RV10, RV00, Y00, Y02, Y11, BG0000, BG00, BG01 


Products 

All Dressed Up ~ Wellie Boots 


Wednesday, June 21, 2023

Our Dwelling Place

Today I'm returning with the second posting as Guest Designer with this month's Word Art Wednesday Design Team.

Our sponsor for this session is Altenew and our scripture reference is Psalm 90:1.

For my card of inspiration, I've selected Altenew's, 'To the Moon' for the moon and 'All Things Orange' for the range of mountains. 


I started this card with a heavy piece of mixed media card stock.  Starting at the bottom and working up, I used a blending brush and mixed Distressed Oxides: Wild Honey, Mustard Seed, Blueprint Sketch, Shaded Lilac, Dusty Concord, Uncharted Marnier.  I lightly sprayed this layer with my mister and let it dry a few minutes.

Next I stamped the mountain range, using Versa Claire ink.  I used my Misti for stamping this so I could ink and stamp several times, ensuring everything was covered well.  

Separately I stamped the Altenew two part moon stamp, die cut, and mounted with foam squares.  

Then I blended the Black Soot around the edges for contrast and lastly added the tagged scripture to complete the card. 

Thank you for stopping by today to view my blog. I enjoy sharing my work with you and invite you to 'Follow' my blog and to visit my site - "Not Just Scraps' on Facebook - where you can purchase my cards. 

Pam's Pearls


Products  

Oxides:

Wild Honey, Mustard Seed, Blueprint Sketch, Shaded Lilac, Dusty Concord, Uncharted Marnier, Black Suit

Altenew ~ To the Moon


Altenew ~ All Things Orange


Monday, June 19, 2023

Little Rocket Man

Although I'm currently having cervical surgery this morning (Your prayers are appreciated!) it's mid month Inspirational posting for Jan's Digital Stamp Shop and her Challenge Blog.

I've used Jan's 'Rocket Man' for my festive Celebration card. 


I sized the image to about 4" and colored him with Copic markers.   You can see in the closer photo below, I then used gold and silver metallic markers for the stars and sparkle explosions!


After trimming the completed image, I added the gold foil matting and secured both to the navy card base.  The navy ribbon with white stars was the perfect ribbon for the bow at the fold of the card. 

Thank you for stopping by today to view my blog. I enjoy sharing my work with you and invite you to 'Follow' my blog and to visit my site - "Not Just Scraps' on Facebook - where you can purchase my cards. 


Pam's Pearls

Copics:

Hair: B41, N08, N06, BV23, Shorts: B83, B85, B97, Socks: B97, Vest: G09, Shirt, BV20, Shoes: BV20, E33, Rockets: R27, B97, B95, Gold and Silver Gel pens  

Products:


Sunday, June 18, 2023

Father's Day Stampscapes

What an amazing two hour zoom session we had at Copictopia Summer Fun 2023 with Kevin Nakagawa learning a little about Stampsapes.  Our amazing gift was the set #8 and three additional small wooden silhouette stamps. I've used a combination of those to make this card for my son, Kevin for Father's Day today. 


 Watching Kevin and trying to follow along with him was a lot of fun as he explains things well and showed us lots of options for all of the stamps.  He truly opens a new world of ways to use these and many more stamps!

Thank you for stopping by today to view my blog. I enjoy sharing my work with you and invite you to 'Follow' my blog and to visit my site - "Not Just Scraps' on Facebook - where you can purchase my cards. 


Pam's Pearls


Saturday, June 17, 2023

Beep Beep! It's Your Birthday!

Our Design Team challenge this week at Polkadoodles was to make card with a 'thing' - not a person or animal. 

For this I selected two packages - The Red Truck (DLPD9139) and USA 4th July (DLPD8208).


Using Photoshop Elements, I sized the truck to about 3" tall and 4" long.  I layered the flag into the truck bed, layered the star filled heart on the truck door and added the banner across the entire image. These images were precolored.  I also sized the sentiment from the truck package to fit, then moved it away from the design for printing. 

All of the coloring was done with Copic markers, which are referenced at the bottom of my blog.  When completed, then I die cut the image and the red strip using Tattered Lace, Lacy Days Squares.  Both the blue and red matting paper are from Polkadoodles, The Colour of Spring paper pack. 

After cutting a card base (5 1/2" x 6 1/2") I secured the layers as shown, blue, then red strips, then image and finally the matted sentiment. 

Didn't it turn out cute!  Be sure to hop over to the blog to see all the design team creations.  You can add your hand made cards while you're there! We'd love to see them. 

Thank you for stopping by today to view my blog. I enjoy sharing my work with you and invite you to 'Follow' my blog and to visit my site - "Not Just Scraps' on Facebook - where you can purchase my cards.  

Pam's Pearls


Copics 

Truck: B91,B94, B95, B97, C2, C4, Rust: RV69, R39, YR18, Y08, B91, Tires: N5, N8, C4, Shadow, W2


Products 


Polkadoodles USA 4th July 

Tattered Lace, Lacy Days Squares

Thursday, June 15, 2023

On My Farm

After a wonderful weekend retreat and a couple of days with my best friend, I'm popping back in this morning to share with the All Dressed Up Design Team.  

For today's inspirational card, I've combined two super cute images ~   Spring Lamb and On My Farm.


While I enjoy using Photoshop Elements for layering my card images, this one could also be done in Word as these were actually printed separately and cut out.

I started by placing the On My Farm image across the top of my printing area and sizing it to about 4" wide. Next I pulled in Spring Lamb and played with the sizing to fit her close to the tractor ~ then moved her to a separate part of the page and printed both images. 

I colored both images with my Copic markers.  On the farm image I colored farther down past the wavy line adding a second line and a little more green after that.  On the Spring Lamb I continued the fence rail out to the edge of the paper on both sides, then fussy cut at the top line and around her body.  This cut allowed me to place her on the top of the farm image, making them one card.  Once secured together I trimmed the edges and added the image front to the blue 5 x 7 card base to complete the card design.

Thank you for stopping by today to view my blog. I enjoy sharing my work with you and invite you to 'Follow' my blog and to visit my site - "Not Just Scraps' on Facebook - where you can purchase my cards. 


Pam's Pearls


Copics 

Tractor: G07, Y18, N3, N5, Cloud: B41, B60,  Hill: YG61, B63, B67, G20, Pig & Cart: RV00, RV10, BG07, N5, Lamb & Cart: N2, RV000, R35, N5

Second Image: Hair: E21, E23, E25, Shirt: R81,RV11, Overalls: R83, R85, Shoes: B95, B9, Rail: E19, Lamb: RV0000, N0, Chicken R29, E15, E13 


Products 


All Dressed Up, On My Farm  
This image comes with and without the fence & cow


Friday, June 9, 2023

Born to Stand Out

One of my special girlfriends had her birthday earlier this week.  She is another 'Cat Lady' who has more furry babies that I'd know what to do with! 

What better image for her day than Beccy's Place, "The Three Tenors"!


Even the sentiment is perfect for her outgoing personality and multi skilled career.  Debra is also the owner of Scrapsalot, LLC where she has tons of cool things. Be sure to check that out! 

I sized the kitties to just under 4" tall and layered the sentiment in the upper right corner.  After printing on Neenah 110# cardstock, I used my Copic markers for the coloring.  

I selected a deep red with medium sized patterned dots for the background paper.  Using the Penny Black Elegant Stitching die, I added the decorative edge on the image and the background paper.  

The card base is a standard A2 size.  I secured the background paper and then the completed image.  Lastly I added the randomly placed gold bling dots. 

Happy Birthday Debra ~ and many more! 

Thank you for stopping by today to view my blog. I enjoy sharing my work with you and invite you to 'Follow' my blog and to visit my site - "Not Just Scraps' on Facebook - where you can purchase my cards. 

I will be entering this card in the following challenges: 

 Paper Minutes ~ Challenge 798 - Animal Loving 

Cupcake Inspiration ~ Challenge 570 

Crafter's Cafe ~ May Challenge 

Crafty Animals ~ Challenge 73 

Crazy Critters ~ Challenge 75 

Beccy's Place ~ June Challenge

Pam's Pearls


Copics 

Left: N1, N4, RV99, R56, R21, Middle: E31, E33, E34, E35, N1, N4, RV99, R56, R21, Right: E31, E33, E34, E35, RV99, R56, R21, Under: W4

Products 


Wednesday, June 7, 2023

Generations to Come

It's always an honor to be asked to be the featured Guest Designer for any of the teams or on the challenge blogs.  I always enjoy joining the talented ladies on Word Art Wednesday and am thrilled to be here with them today and again on June 21st. 

The scripture for today is Psalm 78:4 and the sponsor is Taylored Expressions

Here's my completed card, then a little bit about it. 


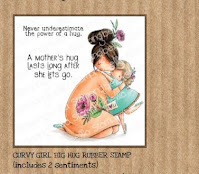
 For the Taylored Expressions product, I've selected their Treetops Background and added Stamping Bella's Big Girl Hugs along with the selected scripture. 

The treetop background is quite large but perfect for many things 'beneath it'.  After stamping I colored the tree, sky and ground using my Copic markers.  

I stamped the Stamping Bella - Big Girl Hugs separately and Copic colored her, then carefully cut her out. I added several foam squares to the back of the Mom's head, upper body and the girl's head, then secured the bottom part of the image. This gives a great 3D effect yet the image is stable. 

After printing the image to fit the desired space, I die cut it also then secured it to the left of the girls.  Lastly I added the yellow organza ribbon bow at the fold to complete the card design.

A special thanks to my friend Becky who gave me the tree stamp at our last crafting retreat.  Told you that you'd see it again. 

Thank you for stopping by today to view my blog. I enjoy sharing my work with you and invite you to 'Follow' my blog and to visit my site - "Not Just Scraps' on Facebook - where you can purchase my cards. 

I will be entering this card in the following challenges: 

Crafting Happiness ~ June ~ Challenge 143  

Path of Positivity ~ Challenge 113 

Stamp + Fun = Creativity ~ Bingo (Christian {scripture} + Light Green {tree} + Stamp {tree and girls} 

World Wide Crafters and Colourist ~ May Challenge 

Creative Crafters ~ Challenge 64 

Four Seasons ~ Summer ~ June Challenge

Stamping Bella Sisterhood (Facebook Challenge)- WINNER - $25 Gift Cert.

Pam's Pearls 

Copics 

Background ~ Treetops: E70, E71, E74, G40, G43, G46, YG61, YG63, YG67, Sky: B0000, B34, B32, B52, B81, Y000, Y00, YR30, YR31, RV34, RV00, RV10, RV000, Grass: G83, G43, G40, G24, G21

Momma ~ Hair: E41, E42, E43, E44, Dress: BG13, BG15, BG32, Shoes: BG45, Girl ~ Hair: E39, YR27, YR24, YR21, Dress: V17, V15, V12, Shoes: V17, Flowers: YG67, YG61, Y13, Y18, Heart: R37, Y000, Under: W2

Products 

Stamping Bella, Curvy Girl Big Hug

Taylored Expressions, Treetops Background

Tuesday, June 6, 2023

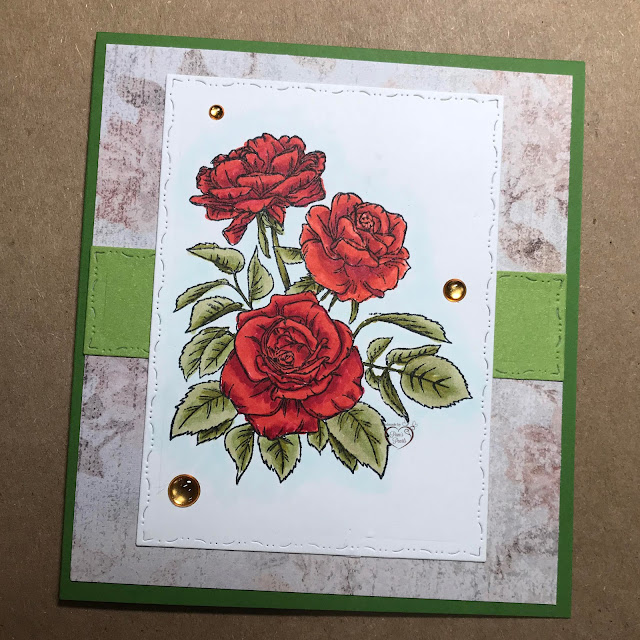
Rose are Red

Today I'm sharing this beautiful Gina K image named Rose Boutique Mini.


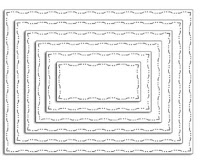
After stamping the image, I used my Copic markers for coloring.  The edges are die cut using Penny Black Elegant Stitching Rectangles

I made the 4 1/2" x 5  1/2" card base by matching the green shades in the leaves.  I secured the patterned paper matting to cover the card front, then added the lighter green horizontal die cut piece.  Next I secured the completed image to the center and finished up with three gold bling dots randomly placed. 

This one was for a customer's order who wanted to add their own sentiment later, thus there isn't a sentiment on this completed card. 

Thank you for stopping by today to view my blog. I enjoy sharing my work with you and invite you to 'Follow' my blog and to visit my site - "Not Just Scraps' on Facebook - where you can purchase my cards. 

I will be entering this card in the following challenges:  

Use Your Stuff ~ Challenge 485 

QKR Stampede ~ Challenge 466   

The Flower Challenge ~ Challenge 81 ~ Favorite Flower  

Triple Challenge ~ June ~ Birds, Butterflies, Blooms 

Pam's Pearls


Copics

Rose Center: R17, R27, R37, Rose Top & Bottom:  R46, R29, R24, R35, Leaves: YG91, YG93, YG95, YG97, Around: B0000 

Products 


Monday, June 5, 2023

Best Mateys!

Happy First Monday of June! 

I'm starting off the week with a great summer time image from Jan's Digital Stamp Shop as we open the June Challenge Blog. 

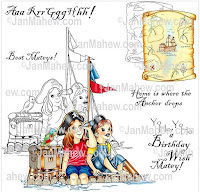
Newly Released, I've used Jan's "Pirate Life" for my inspirational card for today. 


I thought her sentiment 'Best Mateys', would be perfect for two little girls. (Although the one on the right could easily be a little boy!)

I sized the image to just under 5" tall and after printing, colored it with my Copic markers. 

I used Tattered Lace, Hemstitch Squares for the die cut decorative edges.  I found the pink striped paper that I thought would go well with the design, but only had one piece (6" square).  I could have done the clouds a different way but really wanted to stay within that pattern.  So I simply die cut the clouds out of the center of the 6" square and was still able to use the square for the card matting.  I  also used a gold metallic pen to fill the treasure chest. 


The card base was 6 1/2" x 5 1/2".  After securing the mat, I added the completed image in the center and then the pink striped clouds.

Finally I added the pink organza ribbon with an anchor charm for the final touch. 

Thank you for stopping by today to view my blog. I enjoy sharing my work with you and invite you to 'Follow' my blog and to visit my site - "Not Just Scraps' on Facebook - where you can purchase my cards. 

I will be entering this card in the following challenges: 

Love to Craft ~ Challenge 74   

QKR Stampede ~ Challenge 456  

Four Seasons ~ Summer  

Avenue 613 ~ June Challenge  

Crafty Calendar ~ June Challenge  

Creations in Pink ~ Challenge 58

Pam's Pearls


Copics

 Left Girl: Hair: YR23, YR24, E37, Shirt: Y15, Y18, Shorts: G03, G07, Right Girl: Hair: E31, E23, E25, Shirt: G14, Overalls: R83, R85; Hats: R81, R84, BV23, BV25, Logs: E70, E71, E74, Gold: Y26, Y28, Metallic Gel Pen, Chest: YR23, YR24, YR27, E37, Bird: YR27, Y11, YG25, Flag: RV66, RV63, RV55, Flag pole: E34, Water: BG01, BG000, B41

Products 


Saturday, June 3, 2023

BBQ Grilling King!

Today I'm posting with the Design Team from Polkadoodles, UK.  This week's challenge for us was a slimline picnic/BBQ card creation. 

For mine, I selected the BBQ Gnome and created a Happy Birthday slimline card. 


This image can be purchased separately or in a bundle with the extra elements.  I have the bundle and designed the layout on my computer.  I added the picnic table, and banner in the background, then placed the gnome to the right and also added the grilling mittens to the side of the grill.   I printed out a strip 2" wide x 8" long of the grilling paper.  

All of the coloring was done with my copic markers which are listed below for your reference. 

For the base I selected a deep red and cut the base 4" x 7", with a top fold.  I secured the horizontal strip, then added the completed image,  I die cut a simple Happy Birthday out of the solid blue color and added it to the bottom left of the card front.  Lastly I added the yellow/gold twine at the fold.

Thank you for stopping by today to view my blog. I enjoy sharing my work with you and invite you to 'Follow' my blog and to visit my site - "Not Just Scraps' on Facebook - where you can purchase my cards. 

I will be entering this card in the following challenges: 

Crafty Catz ~ Weekly ~ Challenge 640

Double Trouble Dare ~ Challenge 139 

My Time to Craft ~ Challenge 509 ~ Masculine 

Moving Along with the Times ~ Challenge 155 


Pam's Pearls


Copics 

Mittens: B24, B06, C0, Banner: Y28, BG05, B06, R37, Picnic Umbrella: BG49, Y19, R29, BG077, YR16, Wood: E74, Cloth: R29, R24, Under for shadow: W3

Grill: C3, C4, C6, C7, E35, RV42, Tools: N5, YR27

Gnome ~ Hat: C0, Y28, B24, Mustache: N1, N3, N5, Jacket: R11, R37, Pants: B24, Sandals: B97, E74

Products